


Getting Started with VXT Canvas
Use VXT Canvas create a variety of content scenarios.
-
It is best to use VXT Canvas the Google Chrome browser. Some functions may not be available if another browser is used.
-
The appearances of free templates available in VXT Canvas may look differently, depending on the web engine version.
-
On the VXT CMS Home screen, click Content.
-
On the main page of the Content menu, click Create Content. You are redirected to the VXT Canvas menu page.
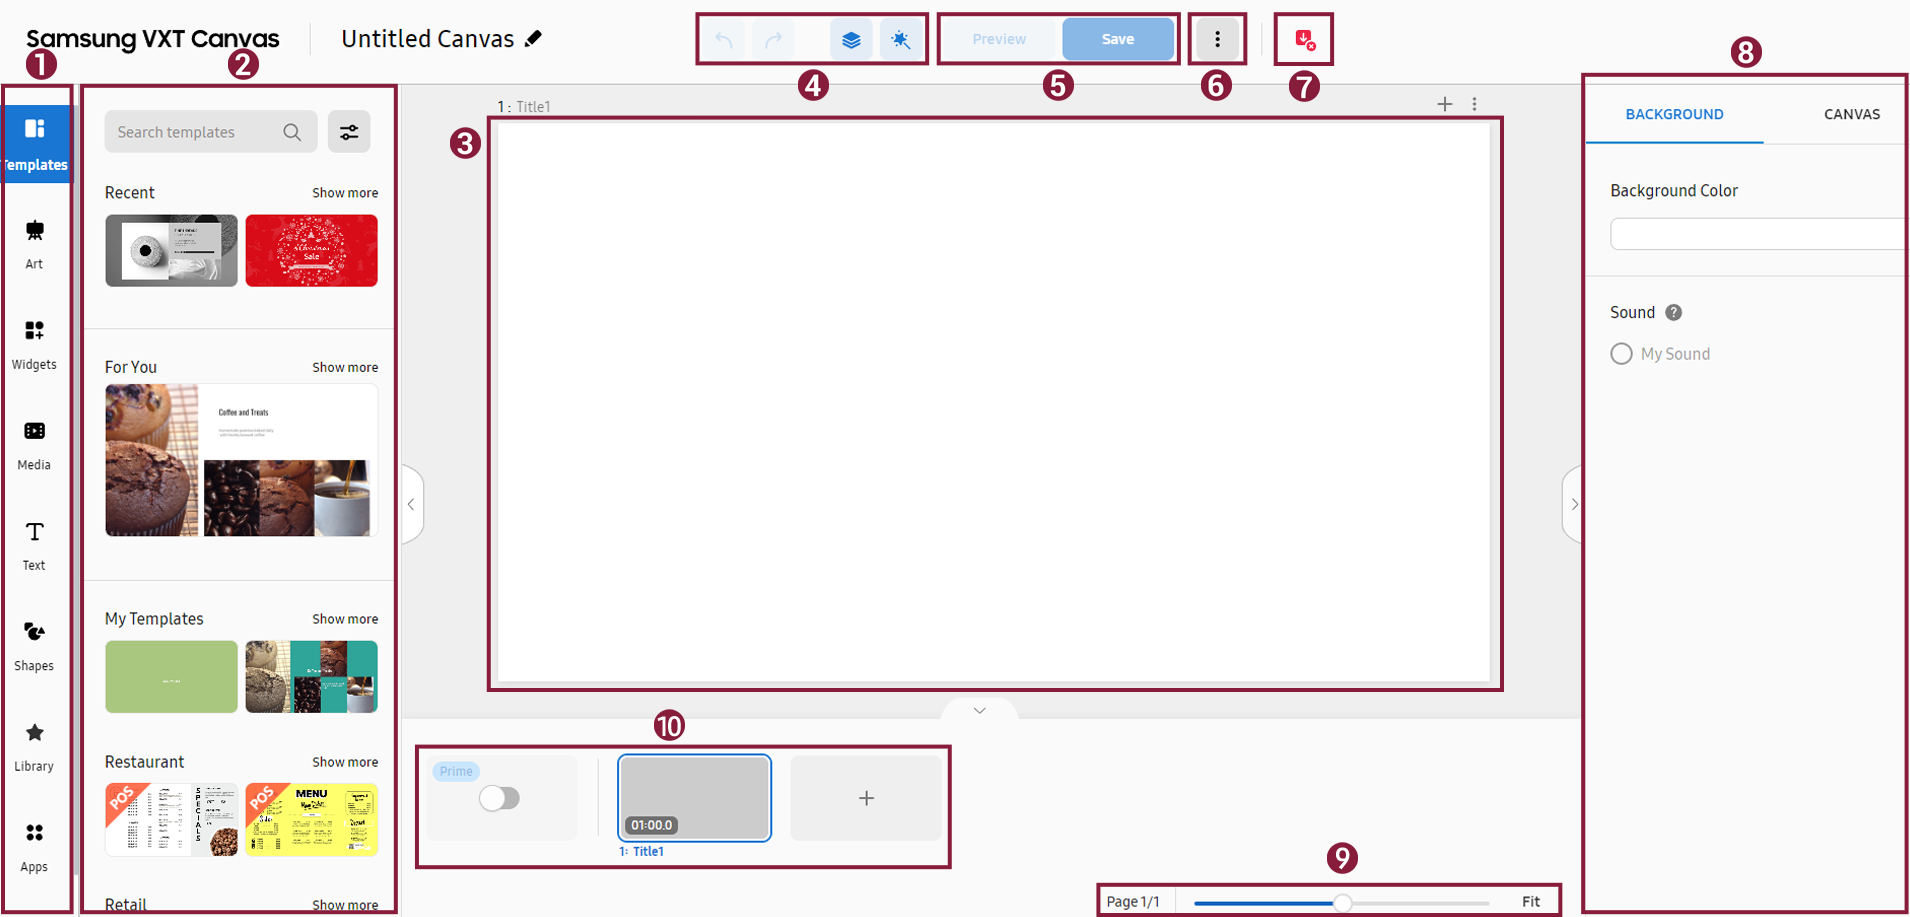
Content Creation Page of VXT Canvas
The content creation page is composed of the following sections.
Create content by adding templates, widgets, or patterns to an empty canvas, and publishing
created content.
 |
|
No |
Item |
Description |
|---|---|---|
 |
Menu panel |
Displays the menu items of various categories offered in VXT Canvas. Users can easily create content using the menu items on this panel. |
 |
Sub-panel |
Displays the sub-menu items of the menu selected on the menu panel. This panel provides specific design items or categories. |
 |
Editor window |
This is the content editor section. You can view content or edit added elements from this section. |
 |
Icons for configuring content settings |
Provides the menu items related to content pages. Undo or redo the last action. Display layers or set playback events. Refer to the following for details: |
 |
Preview and Save buttons |
Preview or save edited content. When saving, if the content was already published, the changes are immediately applied on the screen. |
 |
More button |
Click the
|
 |
Undo button |
Displayed when there are unsaved changes. Clicking this button will revert to the previous state without saving changes. |
 |
Element properties panel |
Elements are the basic components that make up a canvas, which include templates,
geometric shapes, widgets, and any other items you add to decorate a content page. |
 |
Zoom slider |
Zoom in/out of a content view. Use the slide bar to adjust the zoom level. |
 |
Page thumbnail panel |
Manage or edit content pages being created. Refer to the following for details: |
Creating Content from VXT Canvas
-
On the main page of the Content menu, click Create Content to open the VXT Canvas page. An untitled canvas with a white background appears.
To cancel creation of the content item being worked on and create a new content item, click
 (More) > New.
 -
Enter a name for the content.
-
Customize the content by adding various elements, such as templates, art, and widgets, from the menu panel on the left of the editor window.
-
Click Save to save the content. The created content is displayed on the main page of the Content menu.
Showing the Rulers and Grid Lines
Enable the rulers and grid lines to display them in the editor window.
-
On the main page of the Content menu, click Create Content to open the Canvas page. A blank, untitled canvas with a white background is displayed.
-
From the menu items at the top of the page, click
(More) and turn on Ruler or Guides.Rulers are displayed in pixels, and two grid lines are displayed, one along the X-axis and the other along the Y-axis.
Editing an element layer
View and edit the layers for design elements included in content. Rearrange layers by dragging and dropping.
-
While content is displayed, click
 (Layer) from the top menu above the canvas. Layers for content elements are displayed on
the right of the content.
(Layer) from the top menu above the canvas. Layers for content elements are displayed on
the right of the content. -
Hover the mouse cursor over a layer to display the
 (Hide),
  (Move), and
  (Delete) icons. Use these icons to hide or delete the layer.
To rearrange layers, click the
(Move) icon next to the intended layer and then drag and drop to the desired position among
layers.
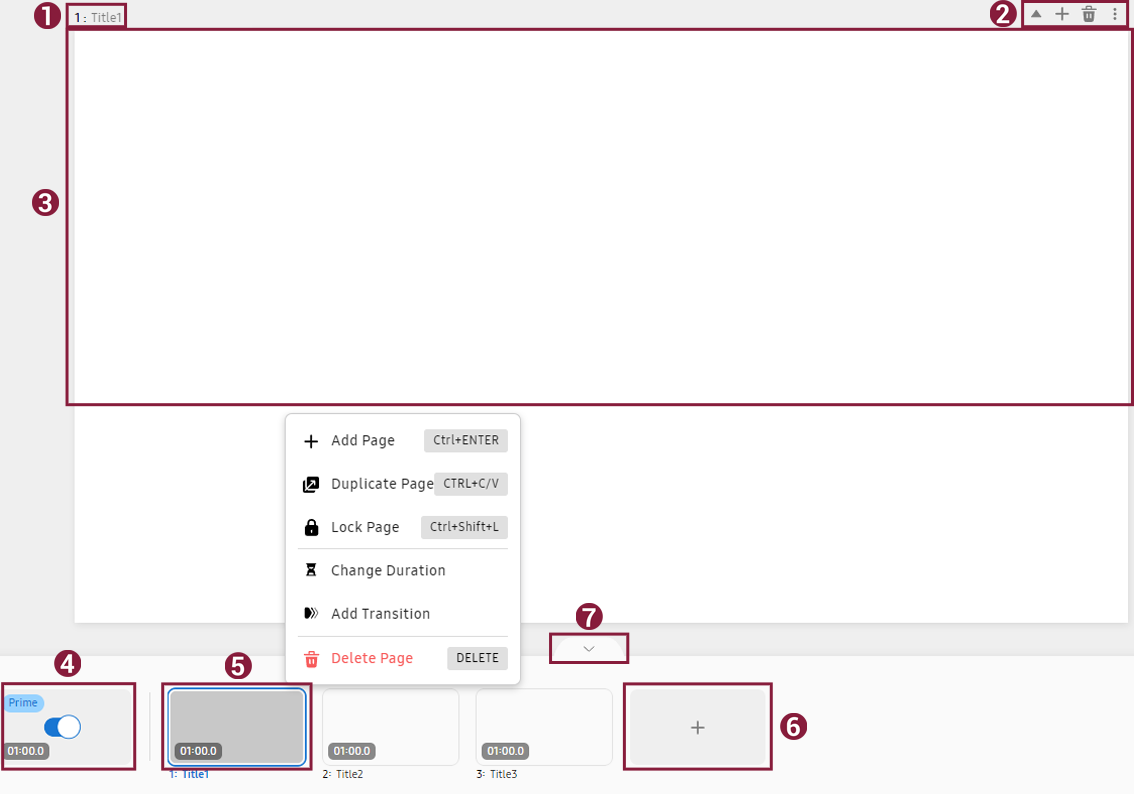
Page area
This section shows the components of the canvas page area. If you click  beneath the page area, a list of thumbnails for the pages currently being created
appear. Use this list to view or edit settings for each page.
beneath the page area, a list of thumbnails for the pages currently being created
appear. Use this list to view or edit settings for each page.
 |
|
No |
Item |
Description |
|---|---|---|
|
|
Page title |
Set or edit the title of a page. Double-click to enter a title. |
|
|
Navigate Between Pages |
|
|
|
Editor window |
This is the content editor section. You can view content or edit added elements from this section. |
|
|
Prime page |
To display logos, watermarks, or other elements uniformly on all pages, you only need to add those elements once to the prime page, then they will automatically be added to all pages. |
|
|
Page thumbnail |
Shows a minimized preview of the page currently being edited. |
|
|
Add New Page |
Click the |
|
|
Page thumbnail handle |
Display or hide a page thumbnail. |


Using Pages
Adding a new page
To add a different page to the current page, click  (Add Page) in the page thumbnail area.
Entering a page name
To edit the name of a page, double-click the title at the top left of the page (area
). Alternatively, click the title in the page thumbnail area (area ) and then set or edit the title.
Displaying identical design elements on all pages
To display texts or graphic elements, such as logo images or watermarks, in the same location on multiple pages, you only need to add them once to the prime page, then they will automatically be added to all pages.
-
In the Prime page thumbnail beneath the canvas, toggle on the
 button. The prime page is activated.
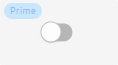
▶

-
Design the page named “Prime Page” by adding graphic, text, and media elements.
-
Click and edit the prime page playback time. The default playback time is 1 minute (60 seconds).
-
From a page thumbnail, click
(Add Page) to add a page. A page containing the default elements set on the prime page is created.
Deleting the prime page
To delete the prime page, turn off the  icon in the Prime page thumbnail. The prime page and all elements set from the prime page will be deleted.
All other pages will display only the elements set individually for them.
icon in the Prime page thumbnail. The prime page and all elements set from the prime page will be deleted.
All other pages will display only the elements set individually for them.
Changing page playback times
Edit the playback time of a page by entering the desired time in the playback time
field  displayed in the page thumbnail. Playback time can be edited in second increments.
-
To continuously play only one page, set the playback time to 0.
-
Playback time can be set to a minimum of 5 seconds and a maximum of 1 hour.
-
For E-Paper, make sure the playback time is at least 5 minutes.
-
Using the Event Manager feature, set it up so that a page switches to another page when an external input occurs, such as a touch event or network connection.
-
For more information about Event Manager, refer to the following:
Duplicating a page
To copy and paste the current page, click  (More) in the page thumbnail and then click Duplicate Page. A duplicate page of the intended page is displayed.
Deleting a page
To delete the current page, click (More) in the page thumbnail and then click Delete Page.
Adjusting a page zoom rate
Increase or decrease the page zoom rate.
This can be done by dragging the zoom slider below the page.
Adding page transition effects
Add transition effects when switching from one page to another, as follows:
-
In a page thumbnail beneath the canvas, click
(More) and then click Add Transition. -
From the list of transition effects displayed on the right, select the effect you want to use when switching between pages. The selected transition effect is displayed on the page.
-
The transition effect icon and transition effect playback time are displayed in the page thumbnail.
-
To adjust the transition effect duration, click the on displayed playback time (
 ) and edit the time.
-