


Managing workspaces
A workspace is the basic unit for managing content and screens in VXT CMS. Administrators can organize content and screens using workspaces to classify and manage resources by project, department, or client. Using VXT Analytics, it is possible to analyze workspace-specific content playback.
Viewing Workspace Information
View information on a workspace, such as the current rate plan, storage space in use, creation details, tag set, and energy usage.
-
The Home screen also provides rate plan and storage space information.
-
On the VXT CMS Home screen, click
 and then select Settings > Workspace.
 -
Click the General tab.
-
Click the Workspace about which you want to view information.
Type
Description
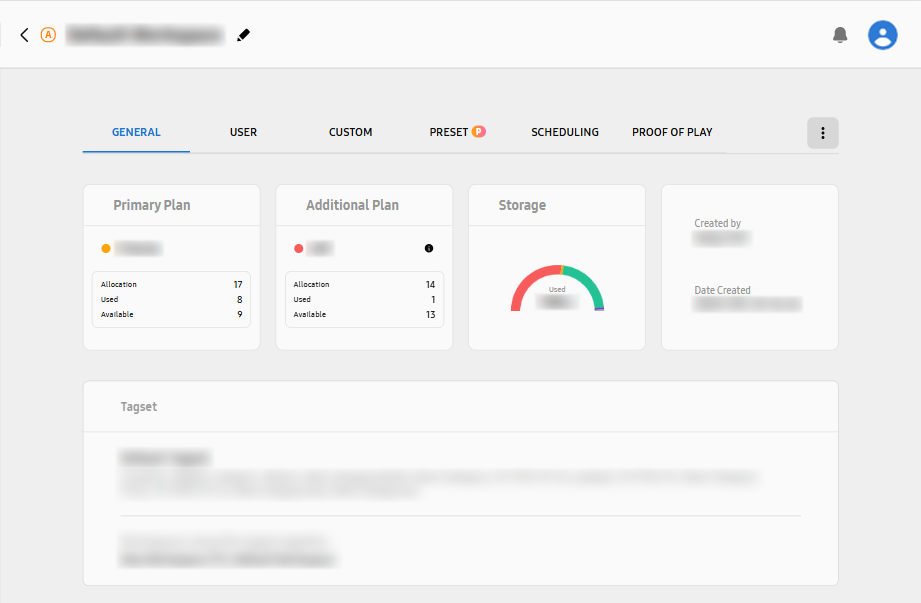
Primary Plan
-
View the type of Primary Plan for the licenses assigned to the workspace, as well as the number of assigned licenses, the number of used licenses, and the number of licenses available for use.
-
If the rate plan has additional licenses available for assignment to the workspace,
 and
and  are displayed on the left and right of the rate plan name. Click on the menu card
to view the rate plan details.
are displayed on the left and right of the rate plan name. Click on the menu card
to view the rate plan details.
-
More information about Primary Plan can be obtained from the Samsung VXT CMS website at https://vxt.samsung.com/pricing).
Additional Plan
-
View the type of Additional Plan for additional services provided to the workspace, as well as the number of assigned licenses, the number of used licenses, and the number of licenses available for use.
-
If the rate plan has additional licenses available for assignment to the workspace,
and are displayed on the left and right of the rate plan name. Click on the menu card
to view the rate plan details.
-
More information about Additional Plan can be obtained from the Samsung VXT CMS website at https://vxt.samsung.com/pricing).
Storage
-
View how much storage space is used in the workspace, shown as a chart with numerical values. Hover the mouse cursor over each color in the chart to see what file type and capacity the color represents.
Created by, Date Created
-
View who created the workspace and when it was created.
Tagset
-
View the name of the tag set used in the workspace, as well as the tags included in the set.
-
Click on the menu card to view details of the tag set.
-
Adding Workspaces
Add a workspace as follows:
-
On the VXT CMS Home screen, click
and then select Settings > Workspace. -
Click New Workspace.
-
At the top left, enter a workspace name in the title field. Adding the workspace is complete.
Configuring Workspace Settings
Efficiently manage workspaces by assigning licenses and managing users.
-
On the VXT CMS Home screen, click
and then select Settings > Workspace. -
On the left side of the screen, click Workspace in the menu tab.
-
Customize and save the rate plan details, playback records, and other settings for individual workspaces.
Assigning a License
A license is the right to use VXT CMS and refers to the number of screens that can be registered to a workspace. Users can add and manage screens within the assigned number of licenses.
-
License assignment is also possible from the Plan menu.
-
On the VXT CMS Home screen, click
and then select Settings > Workspace. -
Click New Workspace. Alternatively, click on the workspace to which you want to assign a license.
-
In the General tab, click Allocate Licenses → from the Primary Plan menu card.
-
Click the rate plan you want to assign to a workspace.
-
Click Add Workspace.
-
In the pop-up window, select the workspace to which you want to assign the rate plan and then click the Add button.
-
From the displayed list of workspaces, enter the number of licenses to be assigned to the intended workspace.
-
The number of licenses assigned to a workspace in the list cannot exceed the total number of licenses permitted for the selected rate plan.
-
-
Click the OK button below the list. License assignment is complete.
Adding users
Manage access privileges by adding users to each workspace and assigning roles to them, to allow only specific users to access the workspace. This restricts unnecessary access, strengthening the security of your system.
-
On the VXT CMS Home screen, click
and then select Settings > Workspace. -
In the User tab, click the Add User button.
-
In the pop-up window, select the user to add and assign a role.
-
Click the Add button. Adding the user is complete.
-
To change the role of a user, change the Role setting for that user from the user list.
-
To delete a user from a workspace, select the checkbox of the intended user on the user list, and then click Remove User.
-
An alternative way to add users or assign roles is to use the User menu. To learn more about user roles, refer to the following:
Checking Energy Usage of Workspaces
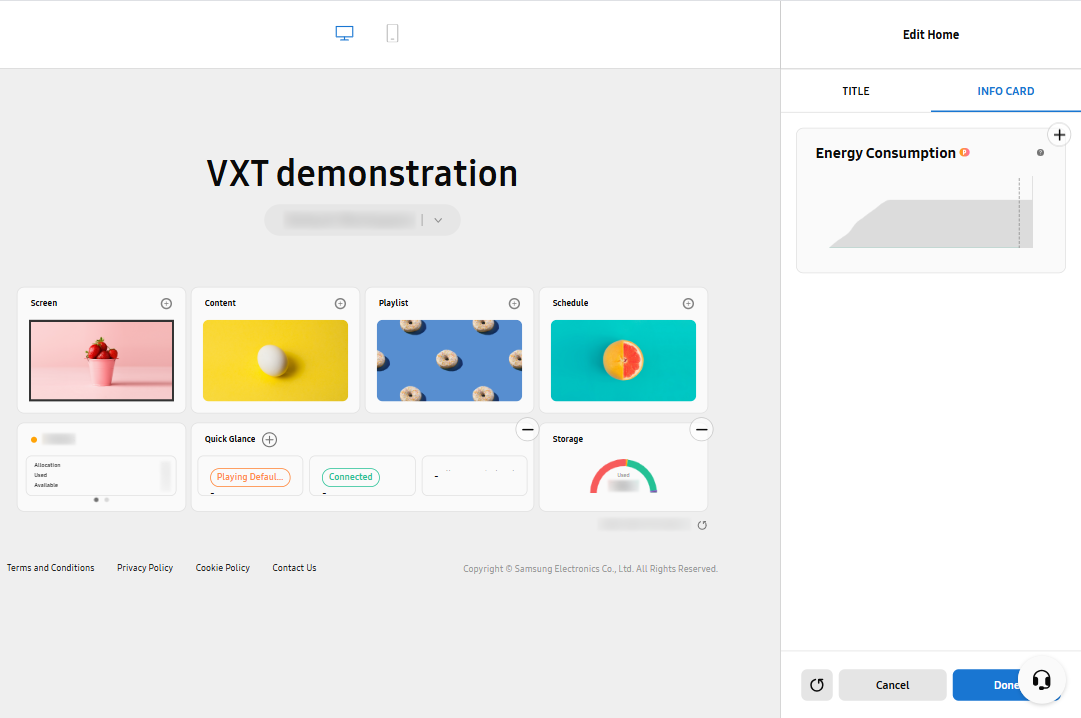
Total energy usage of your workspace can be checked from the Home screen. On the Home screen, view the Energy Consumption menu card.
-
If the Energy Consumption card is not found, on the VXT CMS Home screen, click
, select Settings > Edit Home, and then add the Energy Consumption card from the INFO CARD tab. -
This feature may not be supported, depending on the rate plan in use.
 |
Interaction with Other Workspaces
Set up multiple workspaces within an organization, and interact between workspaces.
Screen
Screens registered in a workspace can be moved to other workspaces. If a screen is moved, its information is reset in the original workspace.
-
It is not possible to share or copy screens.
Content, playlists, schedules, channels
Content, playlists, schedules, or channels stored in a workspace cannot be shared or copied to other workspaces.
-
If shared content is edited, the changes are applied to all of the workspaces to which the content was shared.
-
If copied content is edited, the changes are only applied to the workspace where the content was edited.
Configuring App Splash Settings
App splash refers to the page that displays content continuously while connected screens are turning on or the next content is loading.
-
On the VXT CMS Home screen, click
and then select Settings > Workspace. -
Click the workspace for which you want to set an app splash logo.
-
Click the CUSTOM tab.
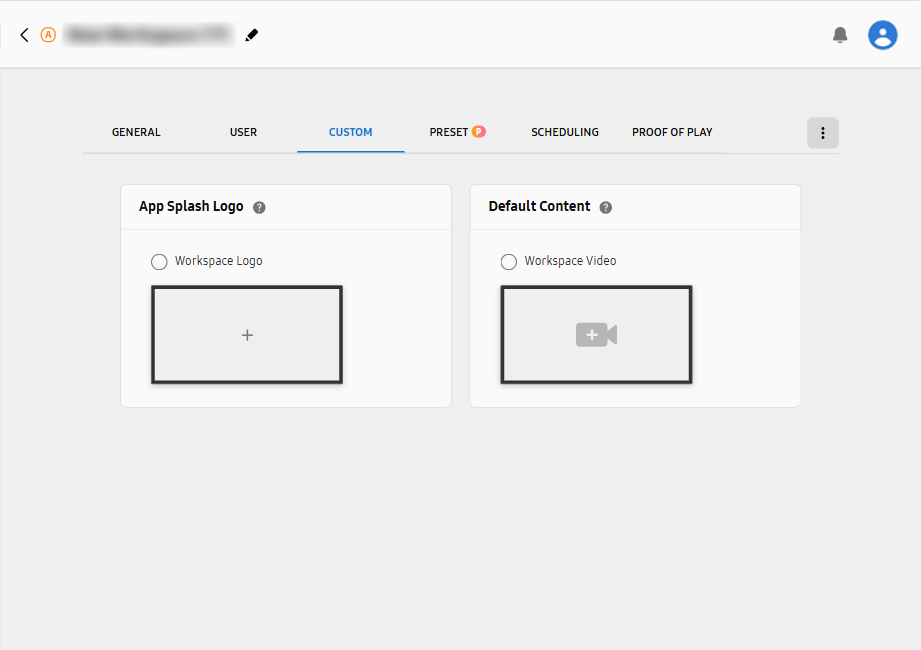
Setting an App Splash Logo
The app splash logo appears when the VXT Player starts. Display a brand logo, welcome message, or brief information using the app splash logo feature.
-
Under App Splash Logo, click the Workspace Logo checkbox or the
 (Select App Splash Logo) box.
 -
In the pop-up window, select the content you want to set as your app splash logo.
-
To display a list of content items that are not selectable for use as an app splash logo, turn off the Hide Inactivated option.
-
-
At the bottom of the pop-up window, click OK to set the selected content as the app splash logo.
-
To change the app splash logo, open the CUSTOM tab, click the current app splash logo, and then select a different app splash logo.
-
To delete an app splash logo, navigate to the CUSTOM tab and click
 (Remove Logo) for the logo to delete.
Setting the Default Content
Default content is the content that plays instead of a blank screen when no content is set.
-
Only video files can be set as default content.
-
Under Default Content, click the Workspace Video checkbox or the
 (Select Default Content) box.
 -
In the pop-up window, select the content item you want to set as default content.
-
To display a list of content items that are not selectable as default content, turn off the Hide Inactivated option.
-
-
At the bottom of the pop-up window, click OK to set the selected content item as the default content.
-
To change the default content, open the CUSTOM tab, click the current default content, and then select a different content item.
-
To delete the default content, open the CUSTOM tab and then click
(Delete) for the default content.
Publishing All Content Items at a Specified Time
Admin-role users in workspaces can set it up so that all content items are published at a specified time every day.
-
On the VXT CMS Home screen, click
and then select Settings > Workspace. -
Click the workspace for which you want to schedule content publishing.
-
Click the SCHEDULING tab.
-
Turn on the activate button from the Scheduled Publishing menu. The Schedule Time item is activated.
-
Set the time you want to publish the content items.
Scheduling a Restart for All Screens
Admin-role users in workspaces can set it up so that all screens restart at a specified time on specific days, every week.
-
On the VXT CMS Home screen, click
and then select Settings > Workspace. -
Click the workspace for which you want to schedule a screen restart.
-
Click the SCHEDULING tab.
-
Turn on Activate from the Weekly Reboot menu. The Schedule Time item is activated.
-
Set the days and time you want to restart the screens.
Viewing Playback Records of Workspaces
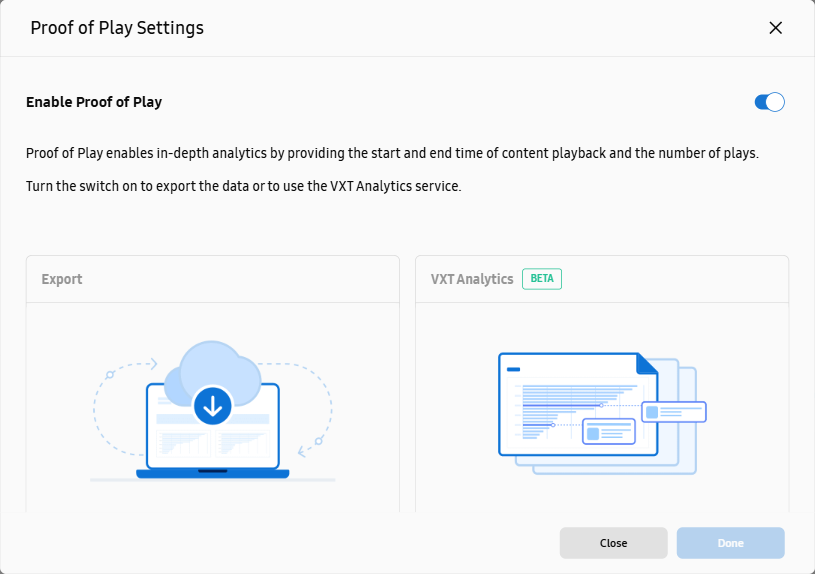
VXT CMS uses the VXT Analytics feature to provide data related to content playback records of workspaces and screens.
Creating a playback record tab
-
On the VXT CMS Home screen, click
and then select Settings > Workspace. -
Hover the mouse cursor over the workspace for which you want to view the playback records. The
 (More) icon appears.
 -
Click
(More) > Proof of Play Settings. -
In the displayed Proof of Play Settings window, turn on the Enable Proof of Play option and then click Done. The Proof of Play tab is added.
Viewing Playback Records of Screens
View the following playback records of screens: what content items were played and for how long they were played on specific screens, as well as information on screens that played content. View the playback records to check which screens played content, what content was played and for how long content played.
-
Extract playback records from a maximum of 500 screens simultaneously, using the Export feature. The start date to view playback records cannot be more than 6 months from the current date, and the period to view records can be set to a maximum of 31 days.
-
On the VXT CMS Home screen, click
and then select Settings > Workspace. -
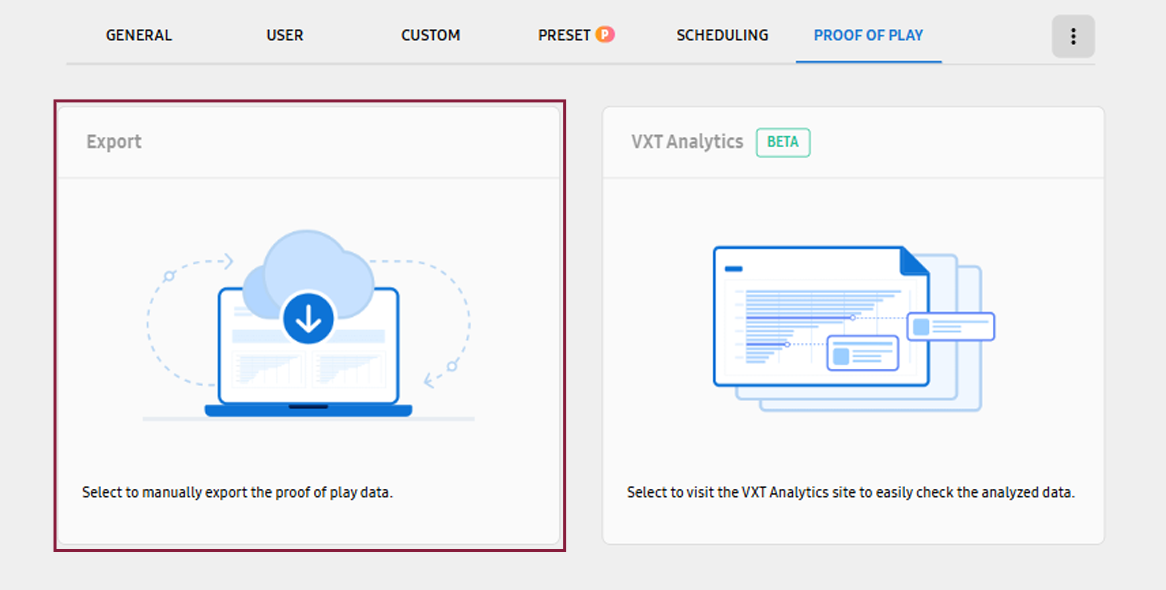
Select the Proof of Play tab.
-
Click on the Export menu card.
-
In the pop-up window, click the New button.
-
Enter a playback record name, click the Select button, and then select the screen you want to view playback records.
-
Specify the intended playback period.
-
Click Export.
Data extraction may take several minutes or tens of minutes. Data extraction continues even if you close the window, and a notification is provided when extraction is complete.
-
When data extraction is complete, hover the mouse cursor over the extracted data records and click
 (Download).
 -
Open and view the downloaded file. Data is provided in an Excel .csv file.
-
In the Export window, the extracted playback record items and details of the records.
-
To re-download previously extracted playback records, click the
(Download) button for the intended playback item. To delete extracted playback records, click
(Delete).
Analyzing Playback Records of Workspaces
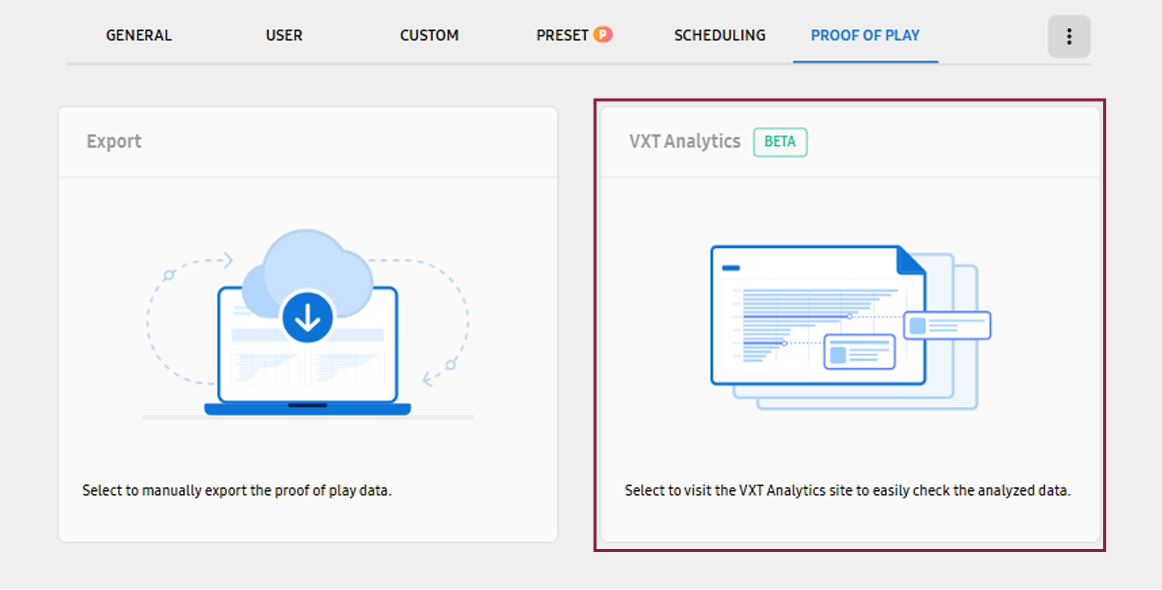
To view the data on workspaces’ screen playback records, analyzed by the VXT CMS,
access the Samsung VXT Analytics site using the VXT Analytics menu.
Click on the VXT Analytics menu card. You are redirected to the Samsung VXT Analytics site where the data was
analyzed.
 |
Viewing the Results of Analysis of Workspaces’ Playback Records
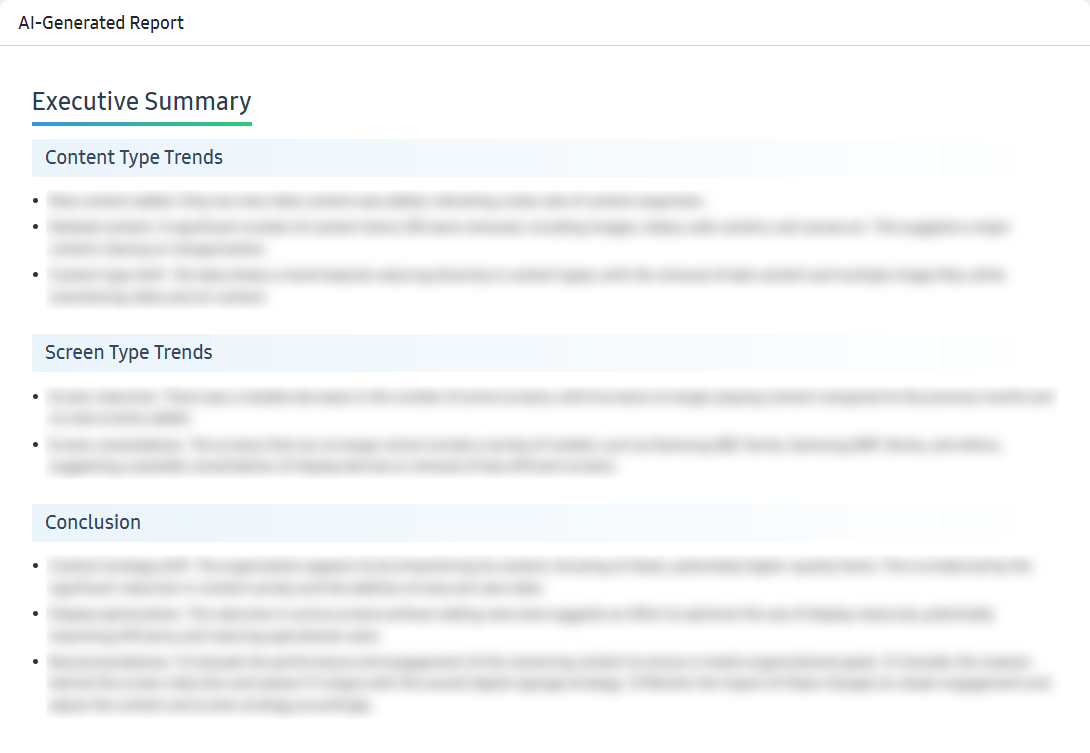
Use the VXT Analytics menu to access the Samsung VXT Analytics site. You can view statistics on content and screen playback in workspaces and view AI reports on a data basis.
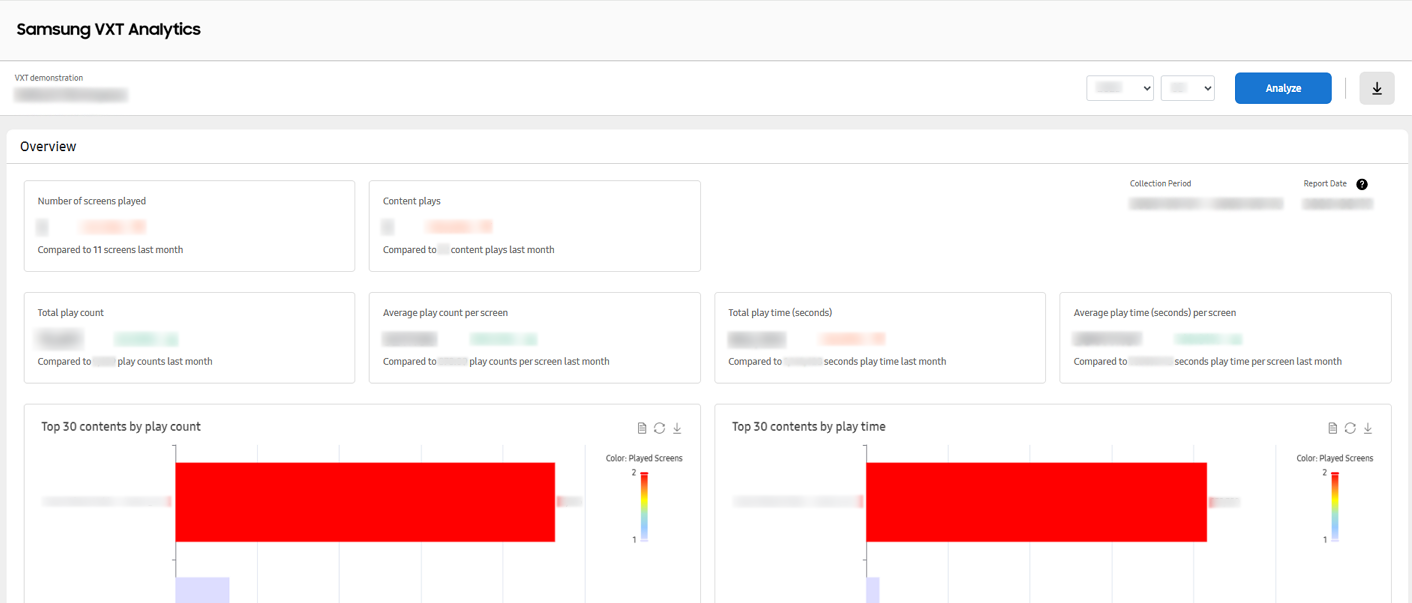 |
Scroll down to view the data statistics and AI-generated reports.
 |
-
Analysis reports are provided on a monthly basis; data from the previous month is provided as an analysis report between the 5th and 10th of each month. To view the analysis results for a different month from the current screen, change the year and month at the top right of the page and click the Analyze button.
-
To save the analysis results as a PDF file, click the
 button at the top right of the page.
Deleting a Workspace
Permanently delete a stored workspace and all resources, including the screen information, content, and data, contained in the workspace.
This will also delete the content shared to other workspaces. You may move screens, content, playlists, and schedules to other workspaces before deleting a workspace.
-
Only Admin-role users can delete the workspaces to which they belong.
-
On the VXT CMS Home screen, click
and then select Settings > Workspace. -
Click the workspace to delete.
-
Click
(More) at the top right of the page. -
Click Delete from the menu list.
-
Read the confirmation message in the pop-up window, and select the I have read and understood. checkbox.
-
In the pop-up window, click Delete to delete the workspace.
 Tips
Tips
-
It is possible to delete multiple workspaces simultaneously from the list page of the Workspace menu. Click the checkboxes of the workspaces you want to delete. The Delete Workspace button appears.