


Using Advertising Content
Manage and publish pre-created advertising content within VXT CMS, just like any other content. Update advertising content in real time by linking it to an ad server.
-
To use advertising content, first you need to register it to an ad server. For inquiries about ad server registration, please refer to the following website:
Adding Advertisement Content
 |
-
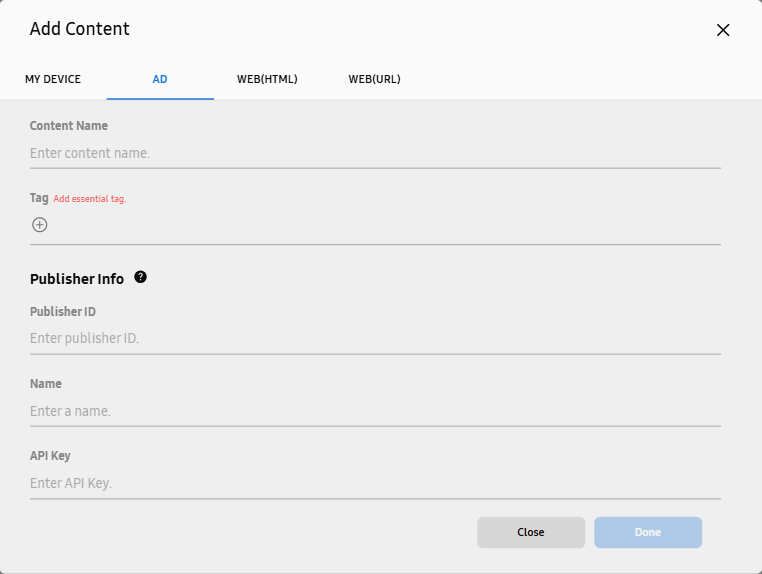
On the VXT CMS Home screen, select Content > Add Content.
-
In the displayed add-content window, select the AD tab.
-
Enter the content name and required tags, fill in the Publisher Info and Ads Info fields, and then click Done.
-
Publisher Info: Enter information about the publisher that posts the ad.
-
Ads Info: Enter information about the advertising.
-
To view Publisher Info and Ads Info, first you need to register an ad server.
-
Setting Default Content for Playback when Advertising Content is Not Received
Set default content for playback when receiving advertising content from the ad server fails.
-
In the displayed add-content window, select the AD tab.
-
At the bottom of the AD tab, click the Default Content item
 and select the content you want to display by default.