Create a schedule to add to devices saved in MagicINFO Server.
Select ![]() (Schedule) on the main menu bar.
(Schedule) on the main menu bar.
Creating MagicINFO schedules
- Click Create Schedule > Content.
Use the Create Schedule window to configure basic schedule settings and click Create.
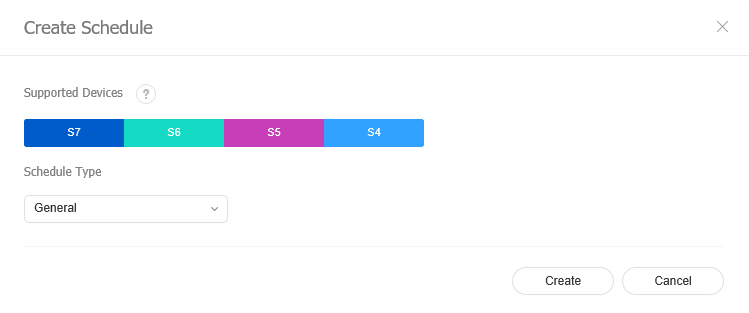
Supported Devices Select a device type to which to distribute the schedule.
Note
- Common schedules are compatible with all device types.
- Higher-performance devices than the selected device are automatically included in the selection. For example, if you select S2 Player, higher versions, such as S3 Player, I Player, are automatically selected.
- Supported Devices only displays device types for the devices that have currently licenses registered on MagicINFO Server.
Schedule Type Select a schedule type. Select General.
Note
The options available under Schedule Type vary depending on the selected device types.
Configure the specific schedule settings.
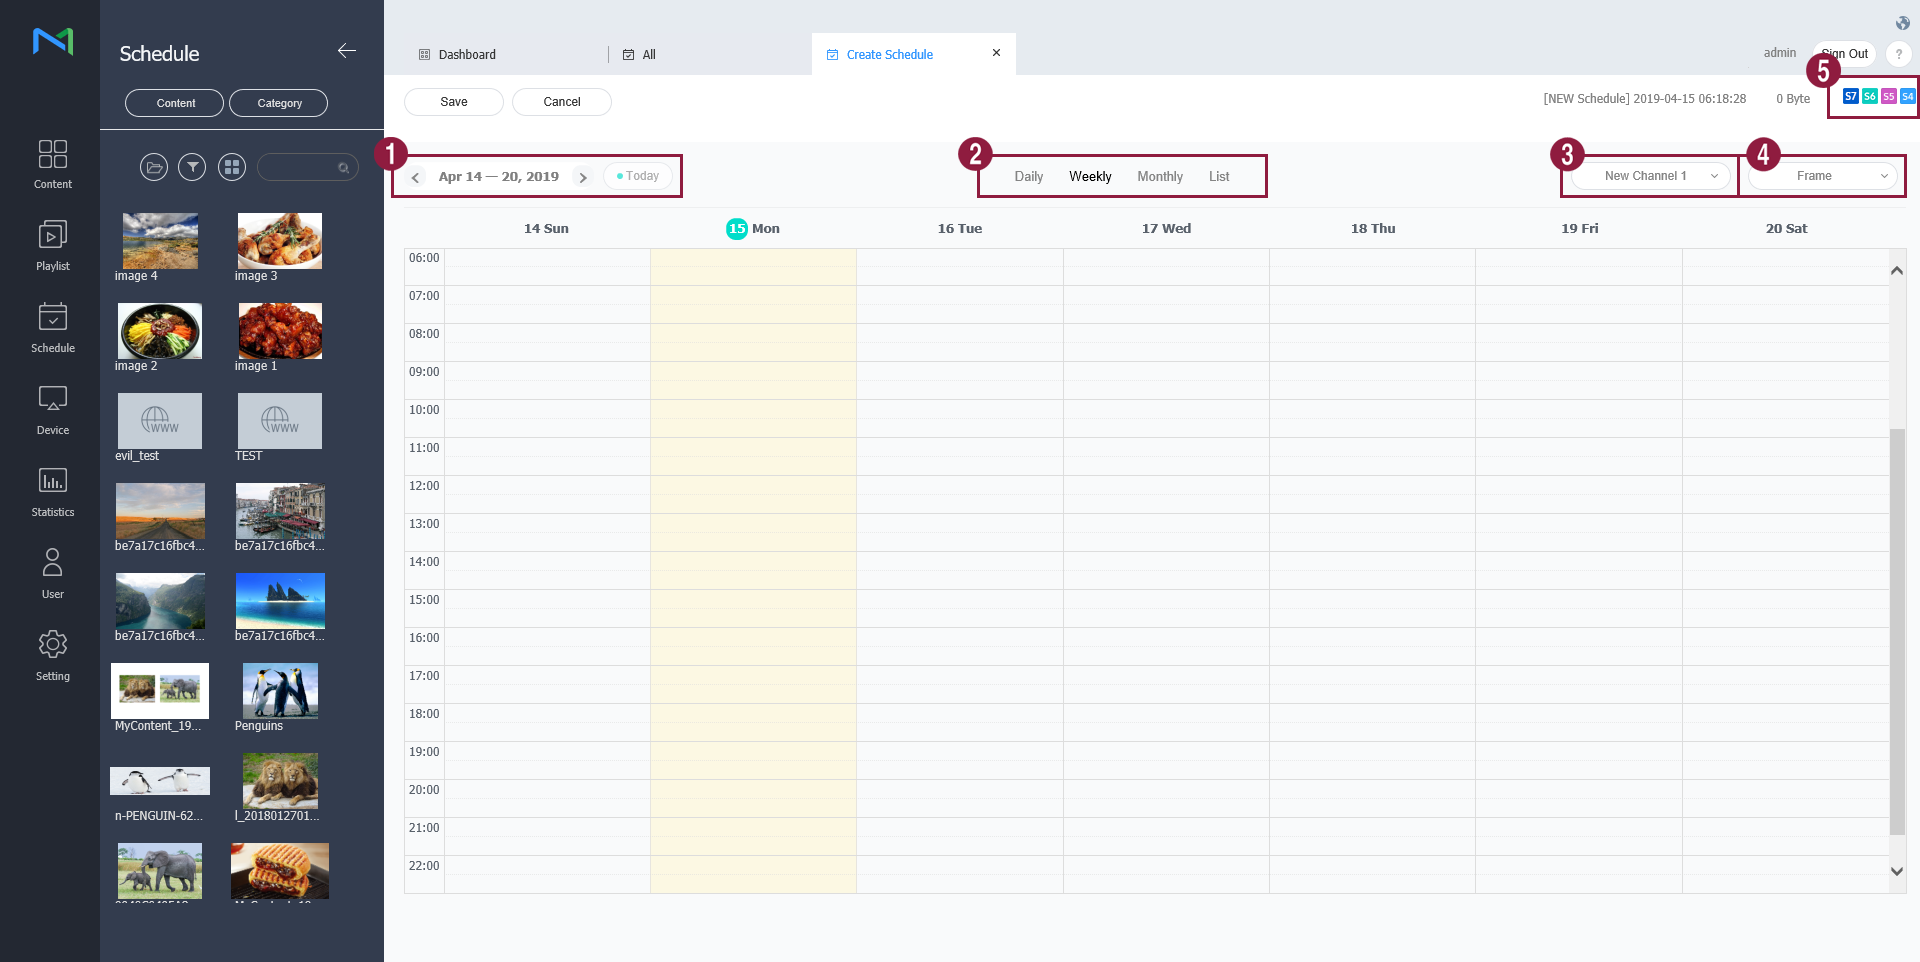
1 Select a date to which to assign the schedule. 2 Specify the time unit of a timetable to assign the schedule to.Timetables can be selected daily, weekly or monthly. - Everday: View a daily timetable.
- Weekly: View a weekly timetable.
- Monthly: View a monthly timetable.
- List: View content playback schedules assigned to a timetable as a list.
3 Select a date to which to assign the schedule.
Set channels. To add or change channels, Click Edit Channel. Use the "change channel" window to select a channel. Alternatively, click Add and set the channel name and number to add a channel.
What is a channel?
A channel is similar to a TV broadcast channel. Add channels when creating a schedule and then distribute the channels to devices. This allows you to play desired content by changing device channels. For details on changing channels, refer to ► Editing device information
4 Select a screen frame for a device to which to distribute the schedule. Play a content file on the device screen split according to the selected frame. To change the frame, click Edit Frame.
5 View device types to which to distribute the schedule. - Add programs to the schedule, using one of the following options:
- Option 1: Click and drag content from the content list to the schedule table. Click the added content.
- Option 2: In the schedule table, click or drag the time slot to which to add the content.
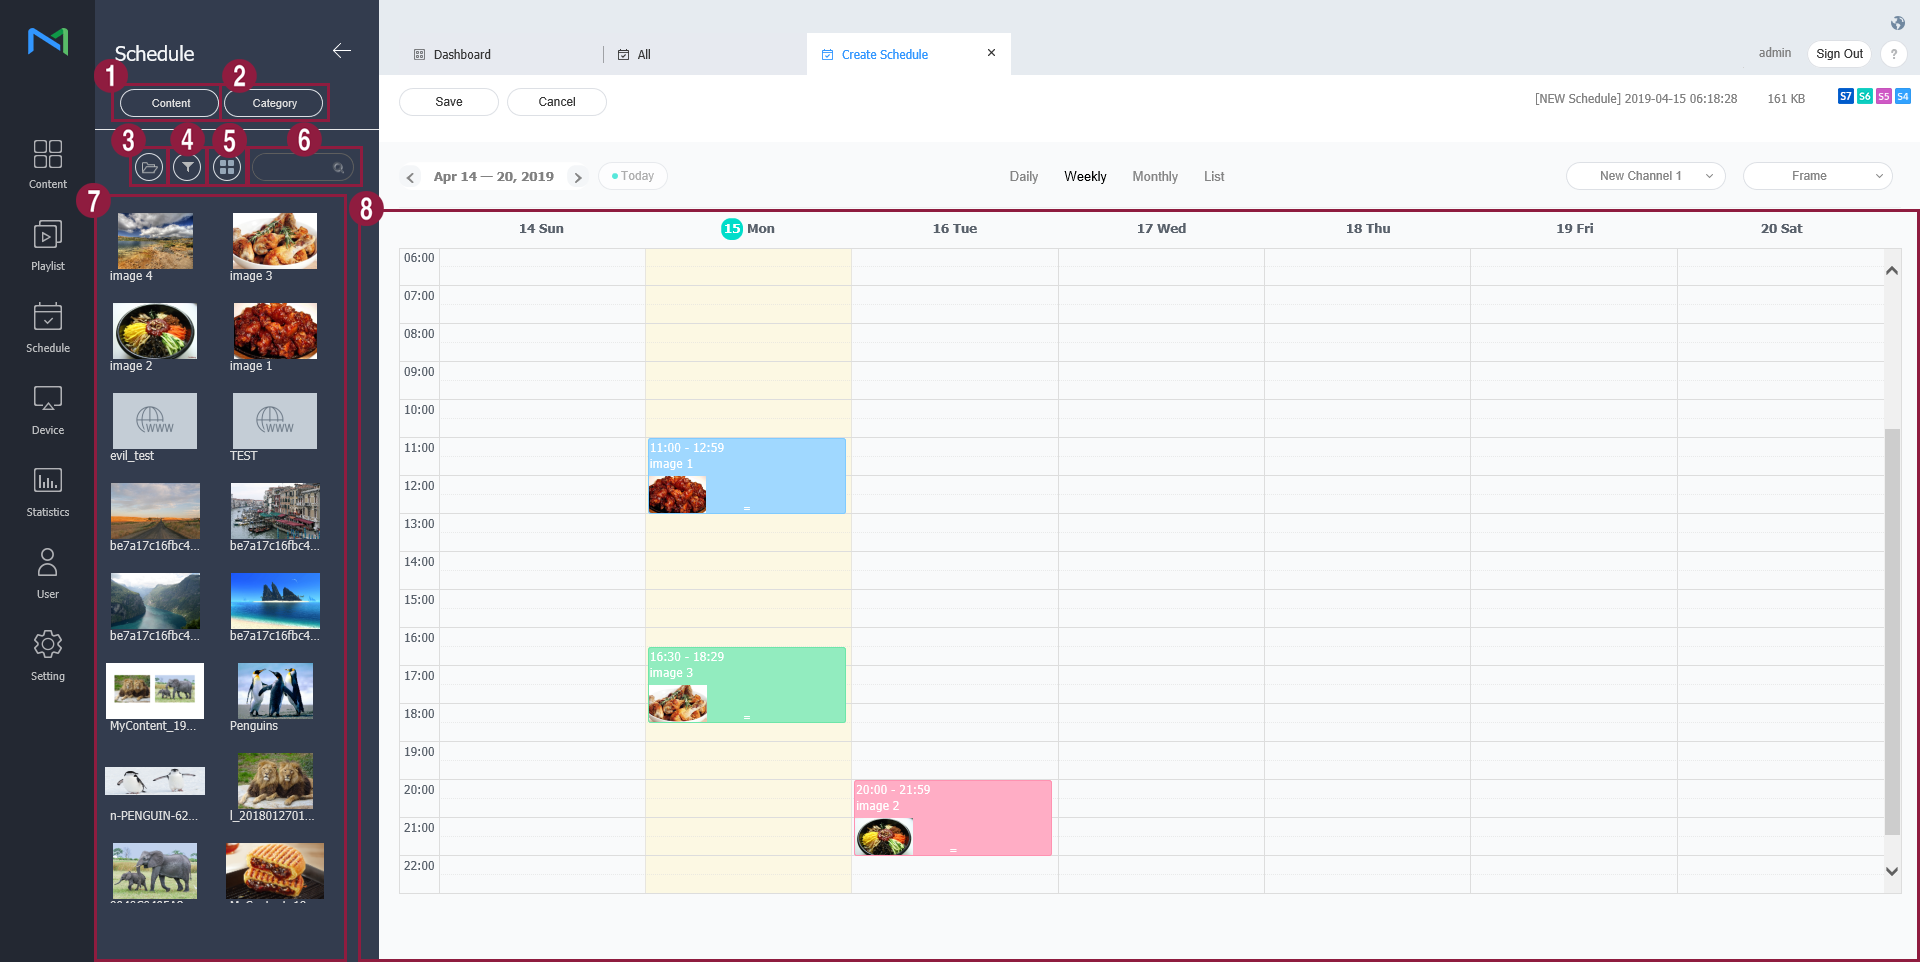
1 View schedules by content, playlist, input source, or category. 2 Select the desired category. Only content items, playlists, or input sources that match the selected category appear on the screen. 3 View content under a specific group. 4 Select the desired file types, user IDs, tags, and file sizes. Only files that match the selected conditions appear on the screen. 5 Sort content files by using thumbnail or list view mode.
6 Search content files or playlists by name.Click on an empty space to search for specific types of content. 7 A list of content items, playlists, input sources, or categories is displayed. 8 This is the schedule table. Drag or click a time slot to assign content dragged from the content list. When the New Schedule window appears, configure program details and click Save.

Content Select or change content, playlists and/or input sources to distribute to devices.
- If you select Lock, content is prevented from being edited by a USB device insertion into the device or other actions.
Playback Date Specify the period to execute a schedule.
- To run a schedule continuously, select the Never expired checkbox.
Repeat - Once: Execute a schedule only once.
- Everday: Repeat a schedule every day.
- Weekly: Repeat a schedule on the specified day(s).
- Monthly: Repeat a schedule on the specified dates of every month.
Playing Time Set the time to play content.
- To play content continuously over a specified period of time, select the 24 hours checkbox.
Note
Schedule is similar in concept to TV listings. You can play selected content for a specified period of time.
- After configuring the required schedule settings, click Save.
When the content distribution settings window appears, input distribution information and click Save & Publish. Click More Options to view additional settings.
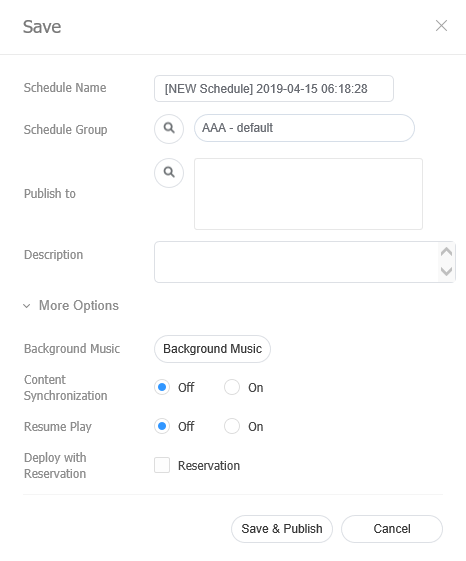
Schedule Name Enter a schedule name. A single schedule name cannot be used more than once. Schedule Group Select a group for the schedule. Publish to Click
 to select a device group to which to distribute the schedule. Devices can be selected by the group. It is not possible to select individual devices.
Description Enter a description of the schedule. Background Music Select a content to use as background music for the content. If the content mapped to the schedule is a video that contains sound, the sound is replaced by the specified background music and only the video is played.
Content Synchronization Enable or disable the mode to sync content files. Content file synchronization is a function that syncs playback times when a content file is played on multiple devices that share the same schedule. This function is only available on devices connected to the same network.
Resume Play Choose whether to use resume play. Deploy with Reservation Select the Reservation checkbox to distribute the schedule at a specific time. All requests for schedule changes are saved up until the specified distribution time. These changes are applied all at once when the schedule is distributed.
Note
- It is possible to distribute videowall schedules to devices that have videowall layouts configured. For details, refer to ► Creating VideoWall schedules
- You can have multiple devices play different content simultaneously. For details, refer to ► Creating synced playback schedules