MagicINFO Server offers an option to map multiple playlists to devices to play each playlist on a specific date or time slot. To use this ad scheduling feature, you will need to create an ad playlist first.
Note
For details on ad scheduling, refer to ► Creating ad schedules
- Click New Playlist.
Configure initial playlist settings and click Create.
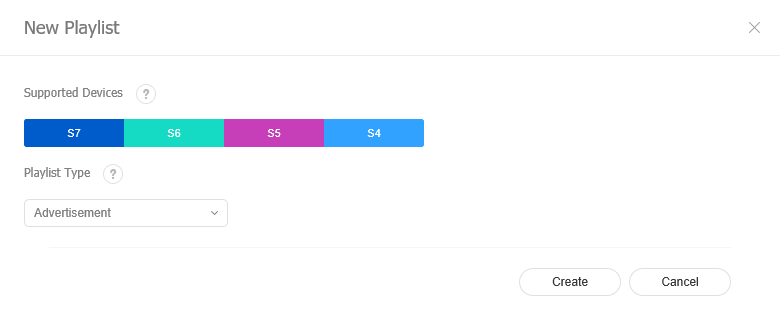
Supported Devices Select a device type that will play the playlist.
Note
- Advertising playlist can be generated when I Player, S5 Player, and S4 Player have been selected.
Higher-performance devices than the selected device are automatically included in the selection. For example, if you select S2 Player, higher versions, such as S3 Player, I Player, are automatically selected.
Supported Devices only displays device types for the devices that have currently licenses registered on MagicINFO Server.
Playlist Type Select a playlist type. Select Advertisement.
Note
Advertising playlist can be generated when I Player, S6 Player, S5 Player, S4 Player have been selected.
Available playlist types may vary, depending on the device type selected in the previous step.
For details on each playlist type, hover the mouse pointer over
 next to Playlist Type.
Configure detailed playlist settings and click Save.
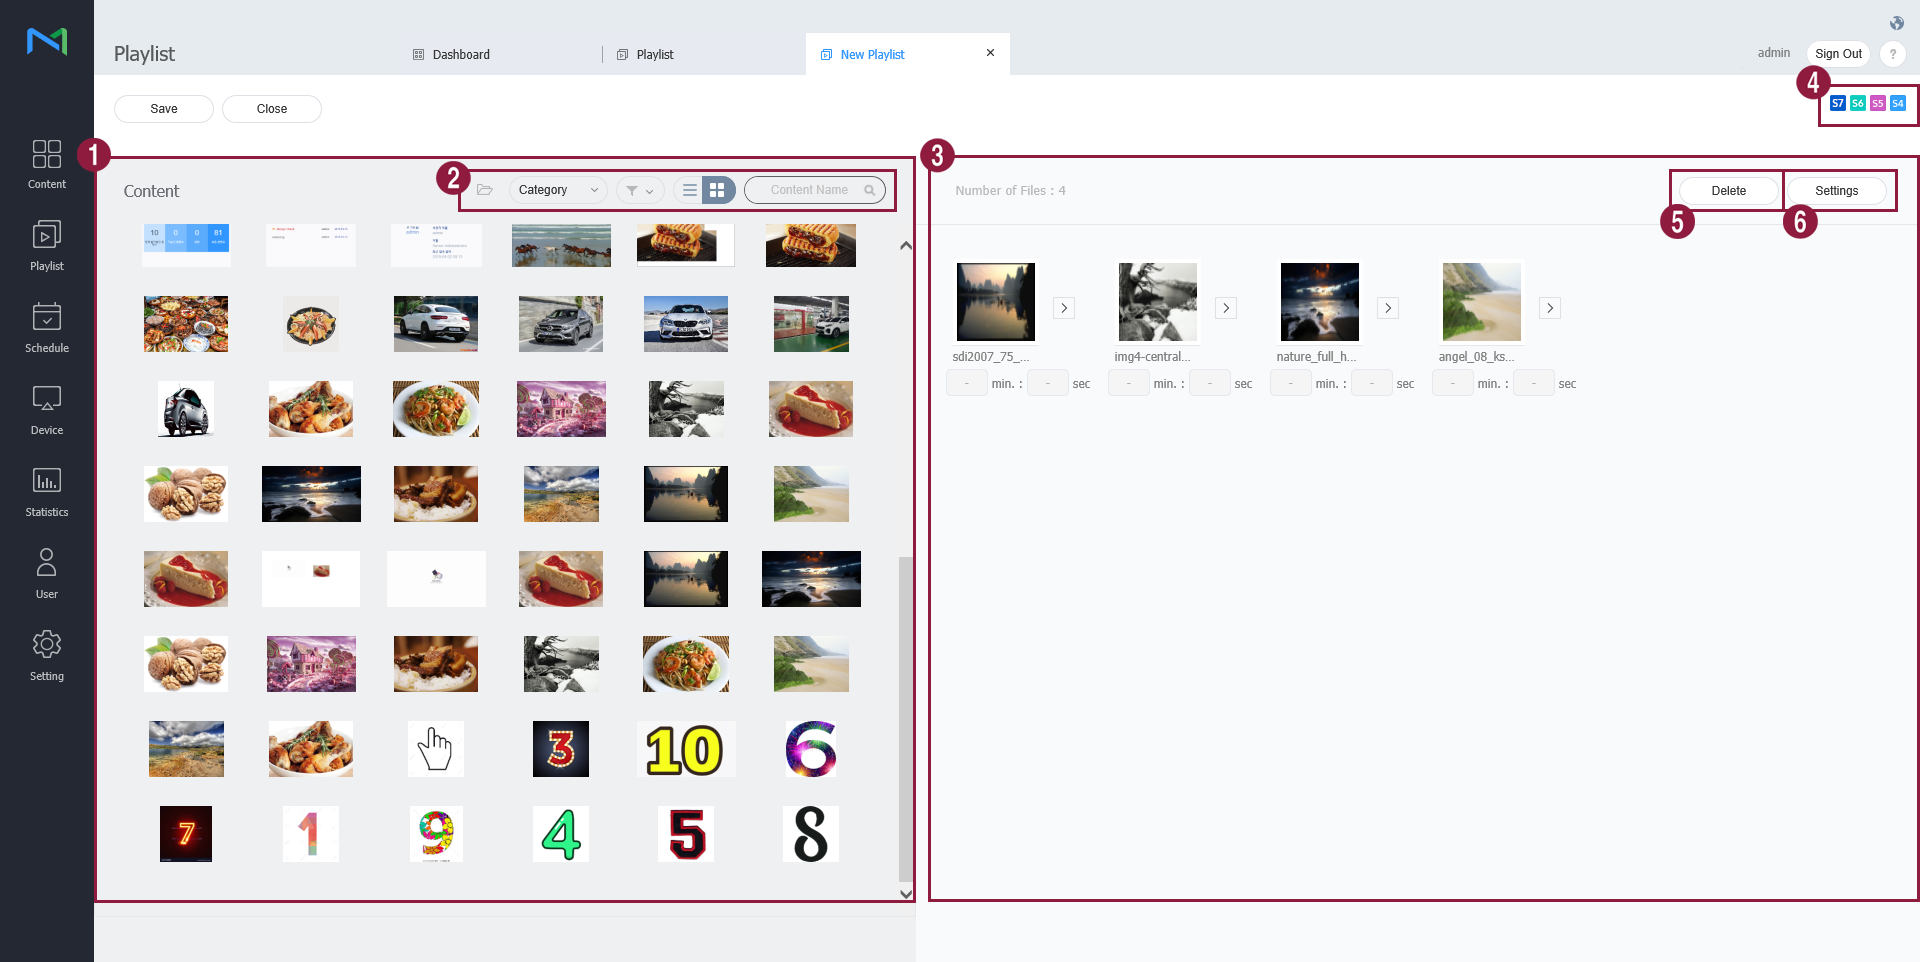
1 Content files are displayed as a list. If you click content, the content is added to the Playlist box.
Note
The same content can be added multiple times.
2 Change the content view mode or search for a content file.
 : View content by the group.
 : Click
  and select the desired categories. Only content items that match the selected categories appear on the screen.
 : Click , and select the desired file types, user IDs, tags, and file sizes. Only files that match the selected conditions appear on the screen.
 : Change the content view mode. Select
  for list view or select
  for thumbnail view.
- Content Name: Search content files by name.
3 View content files included in the playlist. 4 View device types that can play the playlist currently being created. 5 Delete content files from a playlist.Select at least one content file and click this menu.
Note
Alternatively, hover the mouse pointer over a content file in the playlist box to display
 . Click to delete the file.
6 Set playback options for content files included in the playlist. Select at least one content file from the playlist and click this menu.
- Playback Time: Select the Enable checkbox to set the content playback duration. If you do not select the Enable checkbox, the content plays for the slot duration specified when the ad schedule was created.
Play Frequency: Set the frequency of content playback.
Play Independently: To set a specific playback option for content, click Play Independently. Set the content playback date, day and time and turn repeat playback mode on or off.
Note
Alternatively, hover the mouse pointer over a content file in the playlist box to display
 . Click to set the content file playback options.
A slot is a time unit for ad scheduling. Create the desired number of slots and assign a different ad schedule to each slot.
- Content playback time varies, depending on whether repeat playback mode is on or off. For example, if you set the playback period and time to Oct. 1 - 15, 2016 and 09:00 - 15:00, the content plays as follows:
- If repeat playback mode is on, the content plays continuously from 9 am on Oct. 1 through 3 pm on Oct. 15.
- If repeat playback mode is off, the content plays from 9 am through 3 pm daily between Oct. 1 and 15.
Configure playlist settings, such as the playlist name, and click Save. Creating a playlist is complete.
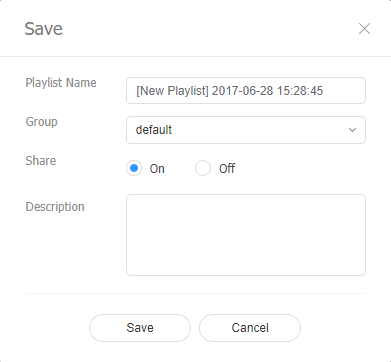
Playlist Name Enter a playlist name. Group Select a group for the playlist. Share Choose whether to share the playlist. Description Enter a description of the playlist.