Versions Compared

Key

  • This line was added.
  • This line was removed.
  • Formatting was changed.

...

Sv translation
languageen

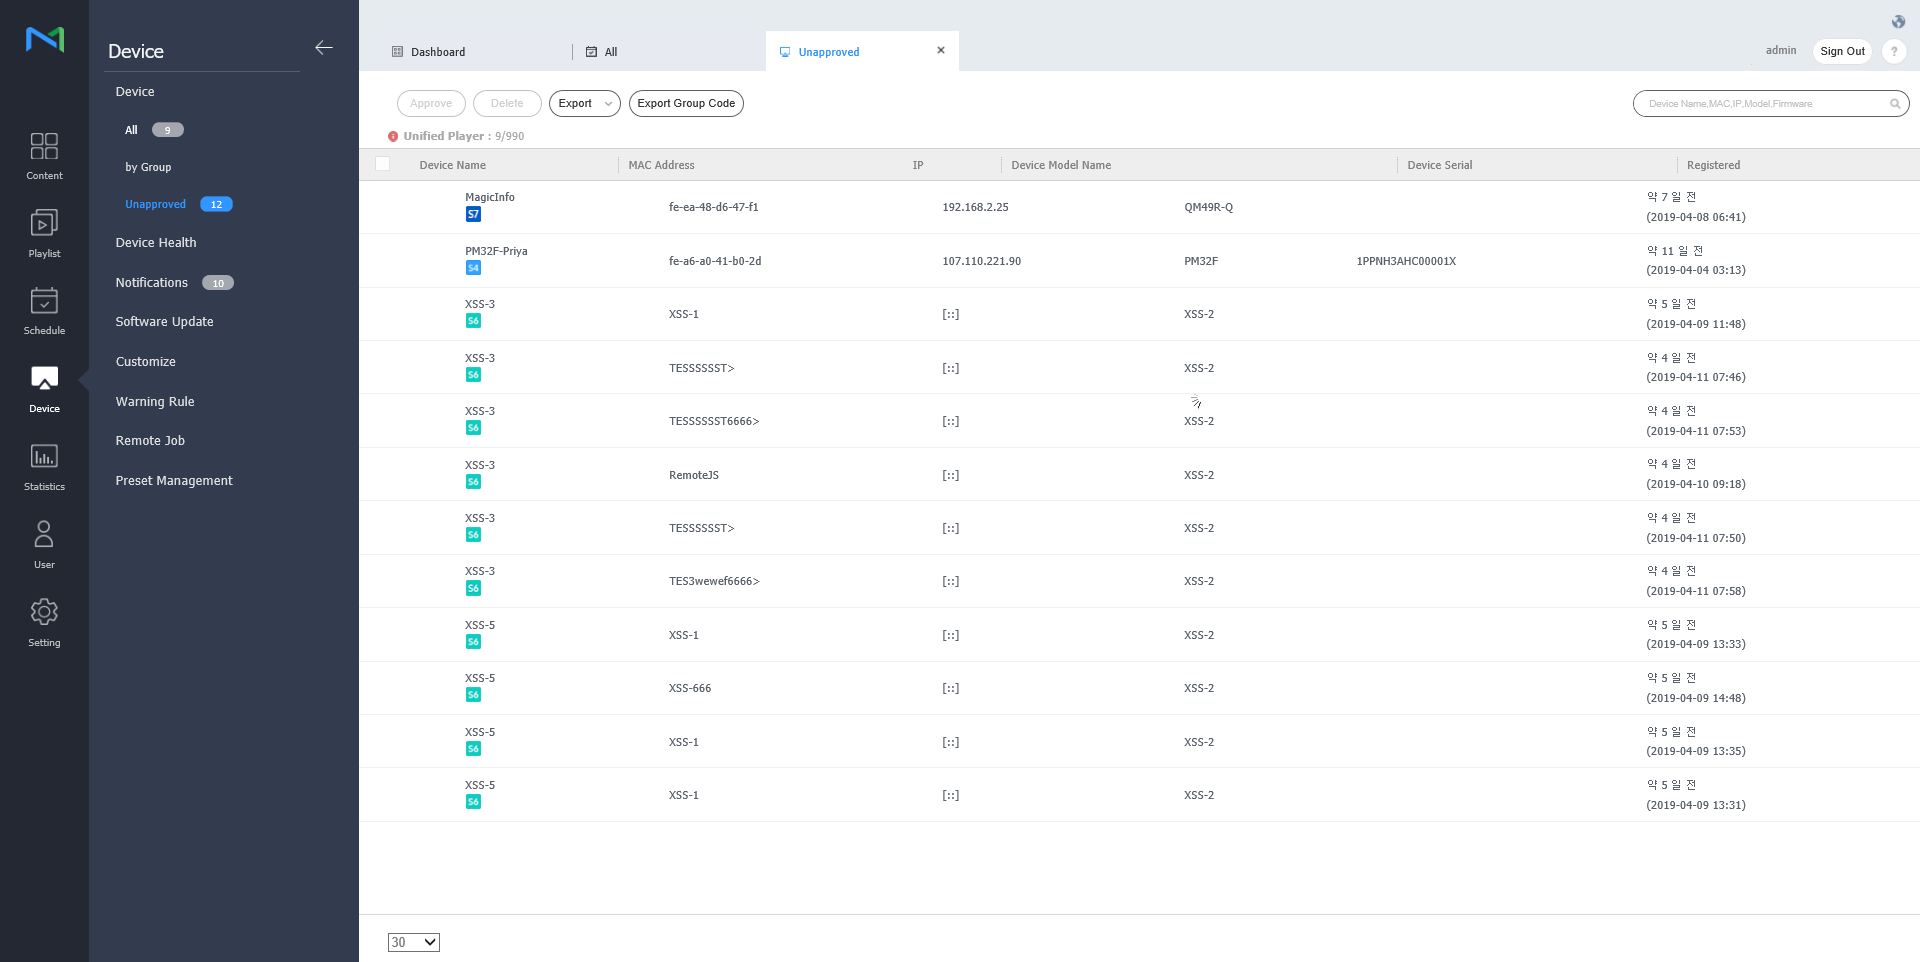
View devices connected to MagicInfo Server, retrieve details for each device, and remotely control devices. Create groups for each organization to manage devices by the group. For each organization, a default group is created by default.

Click Device from the sub-menu items.

  • All: View all devices connected to MagicInfo Server, retrieve details for each device, and remotely control devices.
  • by Group: View devices connected to MagicInfo Server by the group.
  • Unapproved: View and authorize devices that are connected to MagicInfo Server but not authorized.
Info
titleNote
  • If VideoWall devices are connected to MagicInfo Server, click the appropriate menu item view details for each device.
  • With Device Permissions enabled, the device manager can only manage devices authorized by general administrator or organization administrators. For details on device management privilege settings, refer to ► 사용자 정보 관리하기
Stylesheet
classscreen
1
  • Edit: Edit information on the selected device. For details, refer to ► 장치 정보 수정하기
  • Delete: Delete the selected device.
  • Move: Move the selected device. Select a group from the "move group" window.
  • Quick Control: View a list of frequently used remote control functions. For details, refer to ► Quick Control
  • Assign Tag: Assign media or variable tags to devices. For details, refer to ► Assigning tags to devices
  • Export: Export a list of devices as an Excel or PDF file.
2View a description of icons displayed on the device list.
3

Filter the device list to view specific devices only. Select a condition from the filter settings window and click Save.

Info
titleNote

If you select Device Type, only devices that currently have licenses registered to MagicInfo Server appear.

4

Change the view mode for the device list.

  • : Display devices as thumbnail images.
  • : Display device names and information in the device list.
5Configure device polling settings.
6Search devices by using keywords.
7

Select info items to display in thumbnails. This option appears only when the device view mode is set to thumbnail mode.

8Adjust the size of thumbnails. This option appears only when the device view mode is set to thumbnail mode.
9

Display the device list in alphabetical or reverse alphabetical order. This option appears only when the device view mode is set to thumbnail mode.

10

View the list of devices.

  • If thumbnail view mode is in use, click a thumbnail to select a device. To view device details, click a device name.

    Info
    titleNote

    When LED device is connected, click on from thumbnail to manage corresponding LED. For details, refer to ►Manage LED device

  • If list view mode is in use, select a checkbox to select a device. To view device details, click a device name.

Authorizing devices


View and authorize devices that are connected to MagicInfo Server but not authorized.

  1. Click Device > Unapproved. Unapproved devices appear.

    Stylesheet
    classscreen
  2. Select a device and click Approve. A window appears where a device can be authorized.
  3. Specify the name, group, location and expiration date. Click OK. The device has been authorized.

    Stylesheet
    classscreen
Info
titleNote
  • To delete an unauthorized device without authorizing it, select the device and click Delete.
  • To approve multiple devices of the same model simultaneously, select the device checkboxes and click Approve. If you enter representative names of devices, the device names are saved in the "representative name_(sequence number)" format.

Managing device groups


  1. Click by Group.
  2. Manage groups, using one of the following options:
    • Option 1: Select a group and right-click on the mouse.
    • Option 2: Place the mouse cursor on a group name and click .
    Stylesheet
    classscreen
    New Group

    Create a sub-group under the selected group.

    Info
    titleNote

    A root group can be created by adding an organization. For details on adding organizations, refer to ► 소속 관리하기

    Rename

    Rename the selected group.

    Info
    titleNote

    It is not possible to rename a root group.

    Delete

    Delete the selected group.

    Info
    titleNote

    It is not possible to delete a root group.


Info
titleNote
  • To move a group, drag the group from by Group to a desired location. Sub-groups can be moved to root groups. It is not possible to move root groups to sub-groups. When moving a group that contains sub-groups, all the sub-groups will move together maintaining the group hierarchy.
  • The number of users in a group will be displayed next to the group name.

Anchor
managing_led_devices
Manage LED device


You can check for the information of LED device that is connected to MagicInfo Server or manage the cabinet that is connected to LED. 

Click on from device list. A list of cabinet that is connected to LED device is displayed.

Stylesheet
classscreen
1
  • Edit: You can modify the cabinet you have selected. 
  • Scan Cabinet: You can search for the cabinet that is connected to LED device. Set the desired number for each group and click on Scan.

  • Show ID: ID value can be displayed on the cabinet you have selected.

  • Hide ID: ID value can be hidden from the cabinet you have selected.
  • Edit Layout: Configure Cabinet layouts. For details, refer to ► Setting_Cabinet_Layout
  • Warning Rule: Cabinets with predefined errors will be indicated in red color. For details, refer to ► 경고 룰 설정하기
  • Export: Export a list of devices as an Excel or PDF file.
2

Change the view mode for the cabinet list.

  • Image Added: Display canbiets as thumbnail images.
  • Image Added: Display cabinet names and information in the cabinet list.
3You can update the cabinet list.
34A list of cabinet that is connected is displayed.

Modify LED information

  1. Select the cabinet you wish from cabinet list and click on Edit.
  2. View and edit information and click Save.
    To refresh the current device status, click Current Status.

    Stylesheet
    classscreen

    Cabinet Settings

    1. ABL: If the video or image that is being displayed is too bright, it may cause eye strain after long periods of time. In this case, you can set to automatically adjust the brightness. In order to use the function, click ON. In order to deactivate, click OFF.
    2. Gamut: You can change the input source for the cabinet. Select the source you desire from a drop down box.
    3. Backlight: You can adjust the brightness of cabinet at a desired level (0 ~ 10 levels).

    Cabinet Calibration

    You can calibrate the resolution of cabinet that is connected to S-box. In order to use the function, click ON. In order to deactivate, click OFF.

    1. Pixel RGB CC: You can apply pixel RGB CC adjustment value as cabinet resolution.
    2. Module RGB CC: You can apply module RGB CC adjustment value as cabinet resolution.
    3. Edge Correction: You can apply border adjustment value as cabinet resolution.

Search cabinet

You can search for the cabinet that is connected to LED device.

  1. Select the cabinet you wish from the cabinet list and click on Scan Cabinet.
  2. Set the desired number for each group and click on Scan.

    Stylesheet
    classscreen

Anchor
using_quick_control
using_quick_control
Quick Control


Quick Control is the collection of frequently used remote device control functions.

To use Quick Control dashboard, select a device from the list and click Quick Control.

Stylesheet
classscreen
PowerTurn the device on or off.
Panel StatusSwitch the device panel on or off.
Remote Control

Enable the remote access function.

The remote access function is only available in MagicInfo Player I.

RestartRestart the device.
SourceSelect an input source from the dropdown list.
Schedule ChannelChange the device channel.
VolumeAdjust the volume of the device.
MuteMute or unmute the device.
Empty StorageEmpty the storage in a device.

Anchor
setting_tags_on_devices
Assigning tags to devices


Assign a tag to a device. This allows the device to selectively display information that satisfies conditions of the tag assigned to a DLK element or playlist.

  1. Select a device from the device list and click Assign Tag. It is possible to select more than one device.

    Stylesheet
    classscreen
  2. Use the tag settings window to configure tag settings and click Save.

    Stylesheet
    classscreen
    1Tags are displayed as a list.
    1. Select and drag a tag to a device.
    2. To add or delete tags, click Edit.
    2

    View the list of devices.

    1. Add a tag to each device.

    2. To delete a tag, click .

    3
    1. Save: Save tag settings.

    2. Close: Close the tag settings window.


Info
titleNote

To assign a tag to a device, first make sure to add the tag to MagicInfo Server. For details on adding or editing tags, refer to ► 태그 관리하기


...