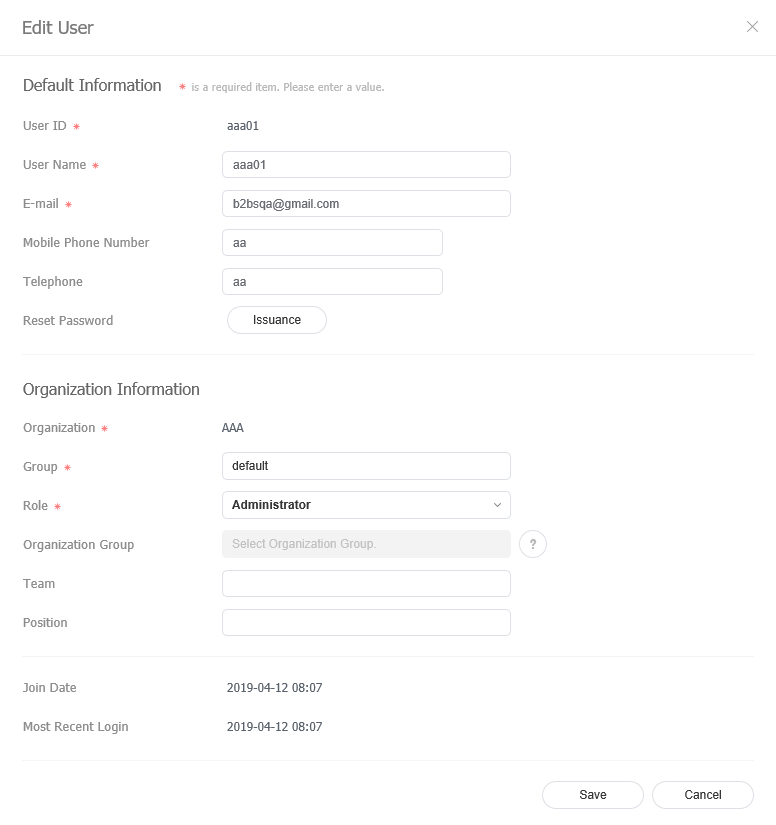
Viewing detailed user information
- In the user list, view user information and click a user ID for which you want to edit information.
View the information. Edit the information as needed and click Save.
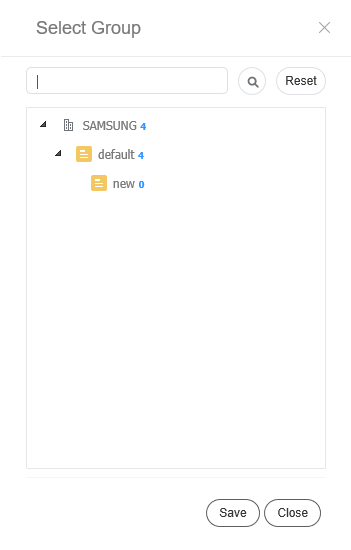
Changing a user group
Change the group of a user from the user list.
Note
Only the general administrator and organization administrators can change user groups.
- In the user list, click a user ID for which you want to change the group.
In the detailed user info window, click Group.
Select the new group name and click Save. The group of the user will be changed.
Note
Enter a group name in the search box to search for a specific group.
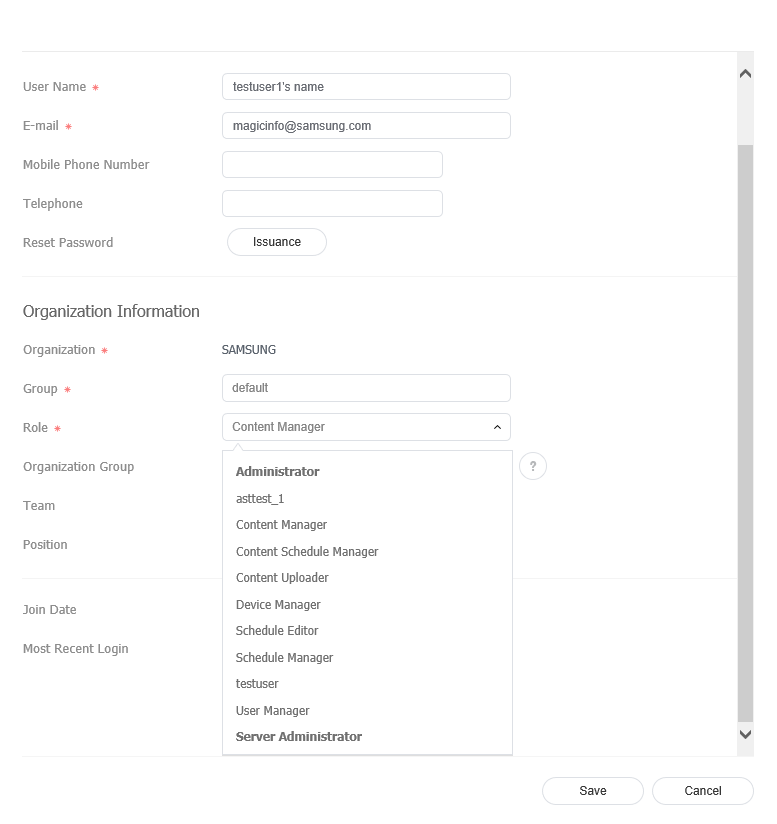
Changing a user role
Change a user role from the user list.
Note
- The general administrator and organization administrator role cannot be modified.
- The general administrator and organization administrators can add and manage roles. For details, refer to ► User role management
- In the user list, click a user ID for which you want to change the role.
Select the Role from the drop-down list and click Save. The role of the user will be changed.
Note
- Administrator: Authorized to manage overall matters of their organization.
- Content Manager: Authorized to access and manage the content-related menu items.
- Content Schedule Manager: Authorized to retrieve and manage content and schedules.
- Content Uploader: Authorized to create content and playlists.
- Device Manager: Authorized to access and manage the device-related menu items.
- Schedule Editor: Authorized to create and edit content schedules and message schedules.
- Schedule Manager: Authorized to access and manage the schedule-related menu items.
- User Manager: Authorized to access and manage the user-related menu items.
Issuing temporary passwords
The administrator can issue a temporary password to a user that has lost their password.
Note
- To use this function, go to Setup > Server management > Server Settings > and select the Enable Alarm Mailing checkbox.
- After obtaining a temporary password, make sure to change the password after login. Otherwise, a warning message that the password should be changed will appear each time you log in.
- In the user list, click a user ID for which you want to issue a temporary password.
In the detailed user info window, click Issuance from Reset Password.
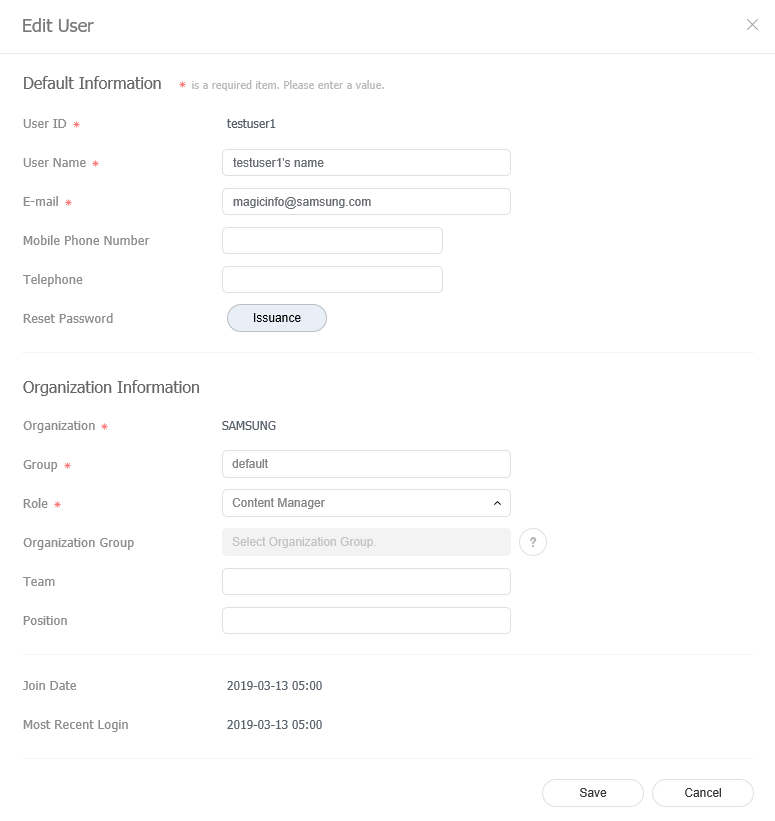
- Click OK in the issue confirmation dialog box.