


Using the Google Drive App
VXT Canvas supports the Google Drive app for business. Link your VXT screen to Google
Drive and display images and videos from your Google Drive as a slideshow on the screen.
Follow the steps below to use the Google Drive app.
-
Samsung VXT CMS only provides pairing with the user's Google account for displaying content on a Signage device, and is not involved in actual data processing.
-
All data is processed according to the terms of use and privacy policy of Google Drive.
-
Samsung is not involved in any Google Drive content and assumes no responsibility for Google Drive content unrelated to Samsung.
Presets (Account Preparation)
To use the Google Drive App, first, you need to create a Google account that can be used as a Google Drive account. If you do not have a Google account, create an account as follows:
-
Go to http://accounts.google.com/signin and click Create account.
-
Enter your name, email or mobile phone number, date of birth, gender, username, and password.
-
Add your phone number and recovery email if needed.
-
Agree to Google's terms of service & privacy policy and click I Agree.
-
To finish creating your account, you need to confirm your email or mobile phone number.
-
After your account is successfully created, you can access Google Drive by going to https://drive.google.com/
-
For more information on signing up for an account, refer to the following webpage:
Sign in to Google Drive (Using the App)
Sign in to your Google Drive account.
Make sure that you have your own Google account.
Signing in to Google Drive
-
In VXT Canvas, click the Apps menu, then search for the Google Drive App and click it.
-
On the app information, click the Install button.
-
After the app is installed, click the Sign In button.
-
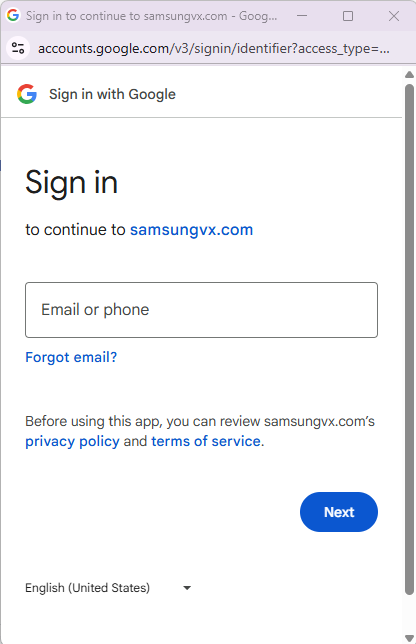
If you have any Google accounts that are already logged in on the browser, select an account displayed under "Choose an account", or select "Use another account" to log in to another account.

-
If there aren't any Google accounts that are already logged in, please input the credentials of your Google account.
-
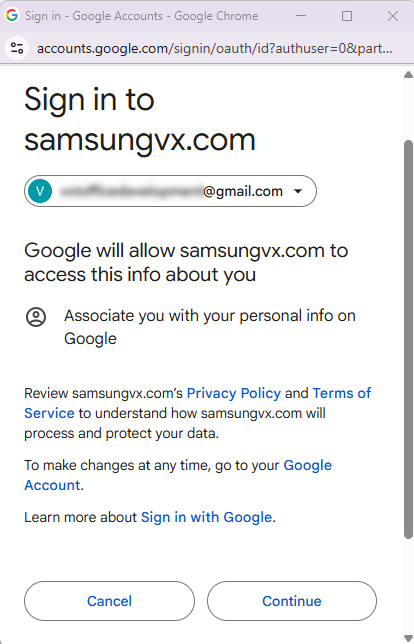
To use the Samsung VXT Canvas app with your logged-in Google account, click the Continue button.
-
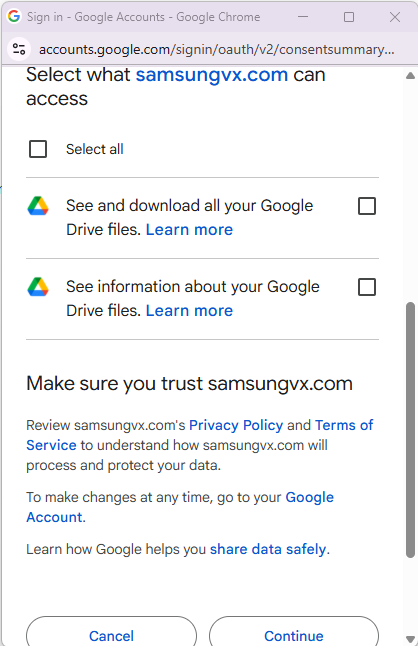
Check all the access granted to the Samsung VXT Canvas App, and click the Continue button.
-
If you disable any of the access, the Google Drive App may not be able to work properly.
-
-
The Samsung VXT Canvas app has been connected to your Google account.
How to Use the Google Drive App
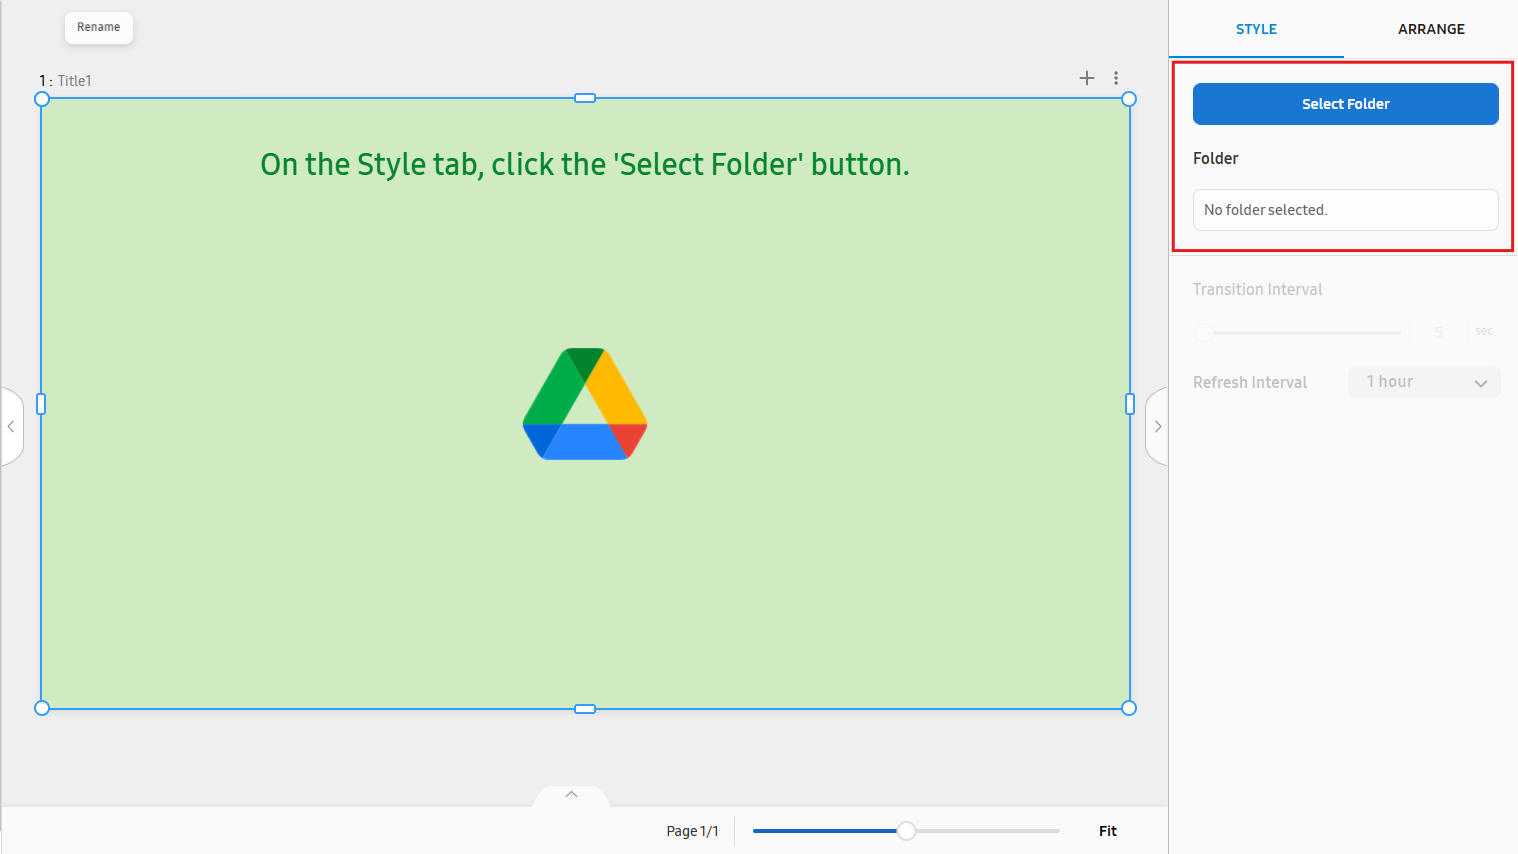
Selecting a Google Drive Folder Containing Media Files
 |
-
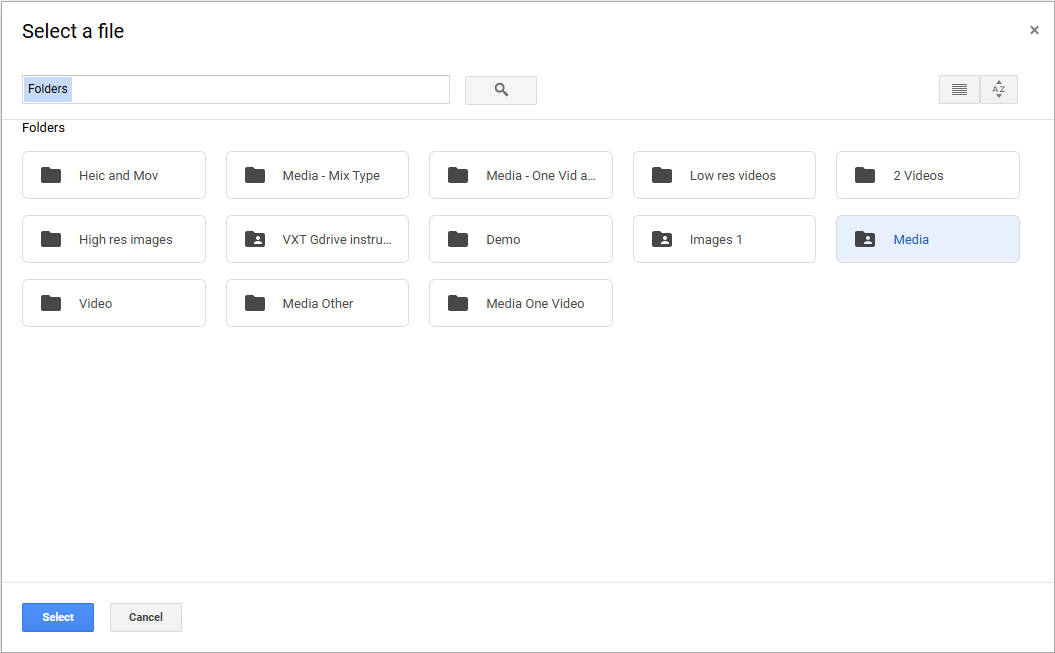
Open the Google Drive UI by clicking the Select Folder button.
-
The Google Drive UI displays the content of the Google Drive associated with the account used for login.
-
Select a folder containing the image and video files to be displayed, and click the Select button.
-
Currently, only one folder type can be selected.
-
Images with HEIC extension (.HEIC/.HEIF) are not supported and won't be displayed in the content.
-
After a folder is selected, all the images and videos inside will be displayed as
a slideshow.
If no valid image or video is contained inside the folder, the content will not display
anything.
Specifying the Content Transition Interval and Refresh Interval
The Transition Interval or Refresh Interval can only be specified after the Google Drive content has been selected and the slideshow is displayed.
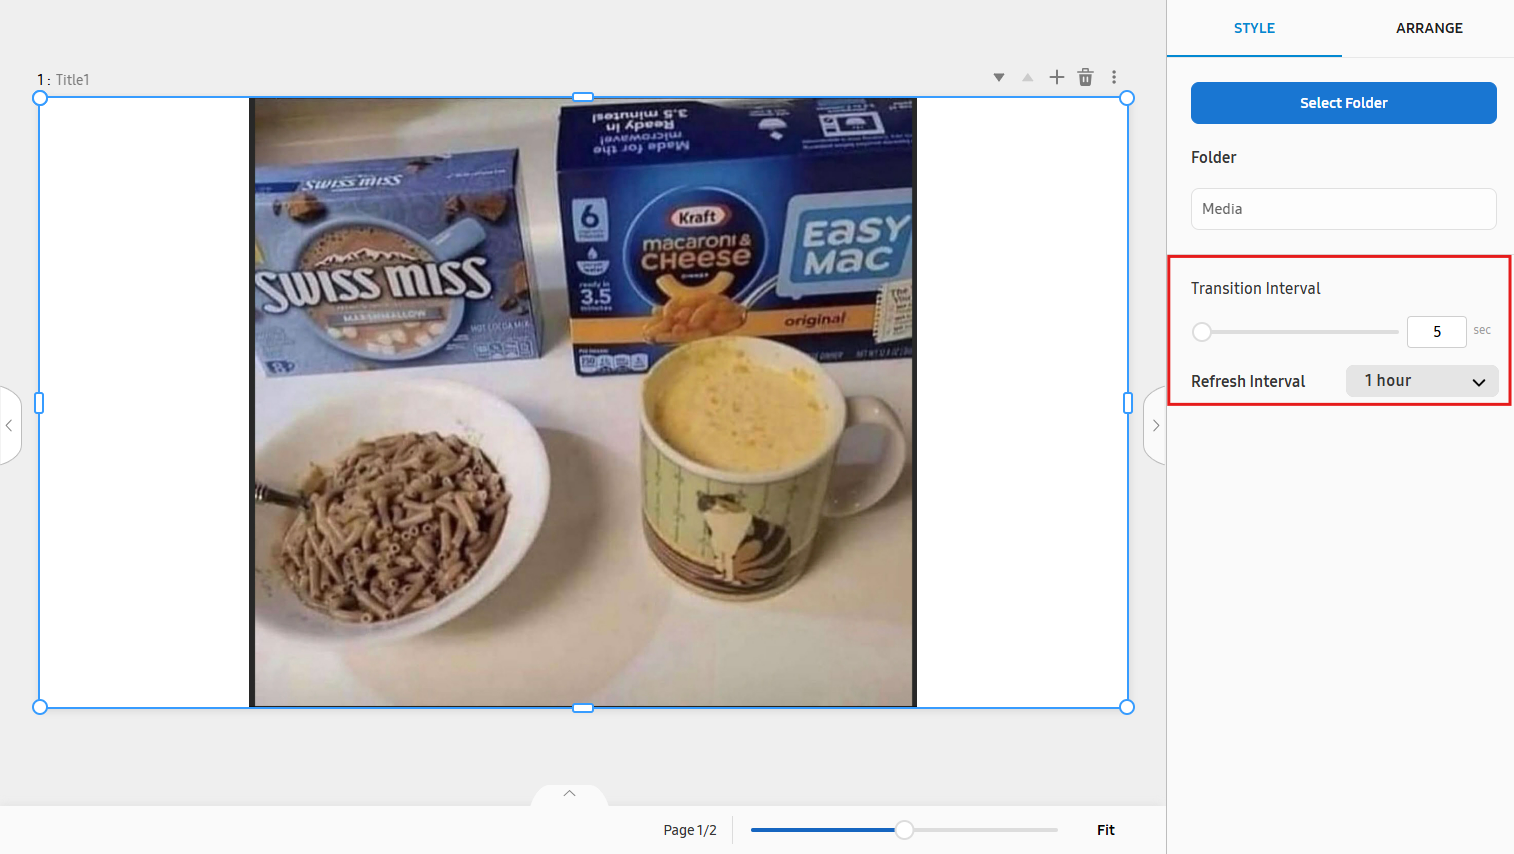 |
Transition Interval
Transition Interval is used to set the duration for which each image or video slide is displayed. (5~10
seconds)
For example, if you set the Transition Interval to 10, each slide is displayed for 10 seconds until it is changed to the next slide.
-
If only one image or video is contained inside the folder, the Transition Interval will not affect the slideshow since the slide displayed will not change.
-
For the video slide, it will only be played for the duration of the Transition Interval and will be changed to the next slide regardless of the actual duration of the video.
-
If the duration of the video is less than the Transition Interval, it will be looped until the slide is changed.
Refresh Interval
Refresh Interval is used to set the duration for the content inside the selected folder to be refreshed.
(15 minutes~24 hours)
For example, if you set the Refresh Interval to 1 hour, the content inside the folder will be checked every hour, and if there
are any changes, the slide content will be updated.
-
If there are no changes to the content inside the folder, the slideshow will continue to be displayed as is.
-
If images or videos are added to or removed from the folder, when the slideshow content is refreshed, the changes will be applied.