

Remotely Controlling a Screen
With the remote screen control feature, users can remotely control screens without having to visit the locations where the screens are installed. Control and troubleshoot connected screens in real time.
-
Available remote control functions may differ, depending on the screen type.
-
This function may not be available, depending on the rate plan in use.
-
Remote screen control is not possible if:
-
The screen is not registered on the remote management server
-
The screen is offline
-
The remote connection is set to off on the screen
-
The type of screen is a virtual screen
-
Getting Started with Remote Screen Monitoring
View the displays of connected screens in real time.
-
Remotely connected screens can be controlled using your mouse and keyboard.
-
When multiple users are remotely connected to the same screen, a list of the currently connected users is shown below the screen display.
-
On the VXT CMS Home screen, click Screens.
-
On the main page of the Screens menu, click on the screen you want to remotely check.
-
Click the Settings tab on the right side of the page.
-
Turn on Remote Configuration under the General item.
-
Hover the mouse cursor over the screen thumbnail to display the Start Remote Control button. Click the Start Remote Control button.
-
A larger view of the remotely connected screen appears.
Checking Remote Management Status in Real Time
Check the exact processing status of the remote management functions set on a connected screen.
-
Click
 (Notification) at the top right of the page.
 -
Select the RM STATE tab.
-
Check the processing status.
-
To download details of the selected notification as an Excel CSV file, click the
 (Export) button. To rerun a management action, click the
  (Refresh) button.
-
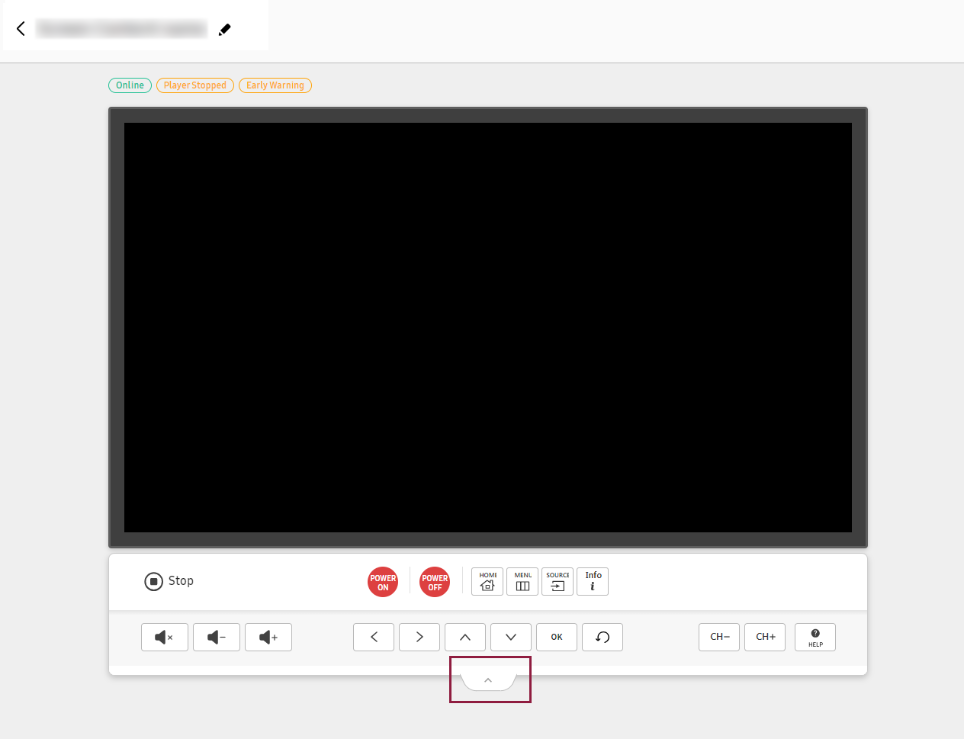
Remote Control Buttons
Start remote screen monitoring mode.
-
Once remote control is connected, remote control buttons appear below the screen view on the VXT CMS screen. Hover the mouse cursor over a remote control button to display the
 icon at the bottom. If you click the icon, additional buttons appear.
 -
If additional buttons for a remote control button are displayed and you click the
icon, the additional buttons disappear.
 |
|
Item |
Description |
|---|---|
|
|
Ends remote control of the current screen. |
|
|
Turns the screen on or off. Press and hold to restart the screen.
|
|
|
Turns on the Windows menus on the screen. |
|
|
Mutes, decreases, or increases the sound volume of the screen. |
|
|
Moves the focus to the left or right on the screen. |
|
|
Moves the focus up or down on the screen up, or changes channels. |
|
|
Selects or runs the focused item on the screen. |
|
|
Returns to the previous menu on the screen. |
|
|
Decreases or increases the channel displayed on the screen. |
|
|
Displays details on how to remotely control a screen using the mouse and keyboard. |


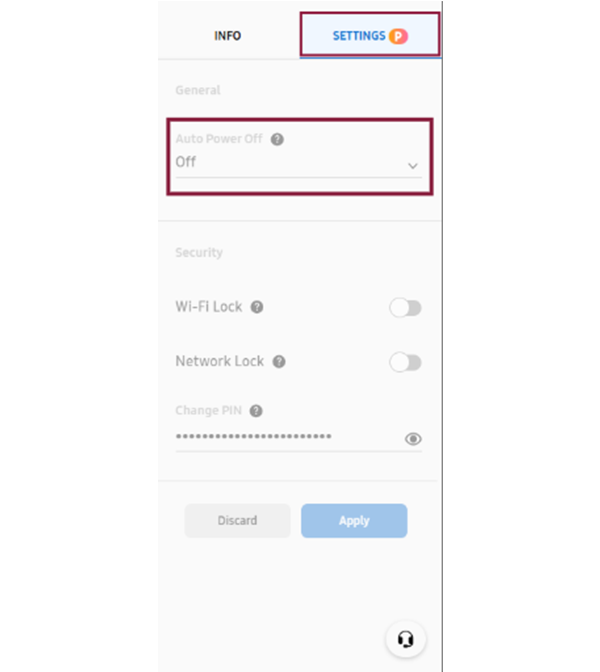
Automatically Turning Off the Screen
Set a timer to automatically turn off the screen when no user interaction is detected.
-
Click the Settings tab on the right of the intended screen.
-
Under the General item, use the Auto Power Off option to set a timer.
-
This cannot be set from Windows Player or Android Player.
-
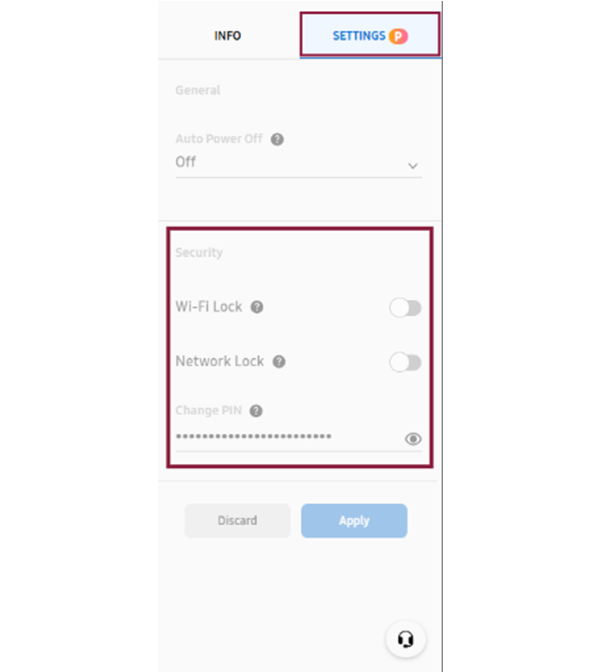
Configuring Screen Security Settings
Strengthen the security of content and screens by configuring security settings using
the Security menu, to prevent unauthorized access or manipulation.
From the Settings tab on the right of the intended screen view, check and configure settings under
Security.
-
Some items may not be available, depending on the screen type.
 |
|
Item |
Description |
|---|---|
|
Bluetooth Lock |
Restricts Bluetooth connections to prevent unauthorized access using Bluetooth. |
|
USB Lock |
Restricts USB connections to prevent external devices from connecting through USB ports. |
|
Wi-Fi Lock |
Restricts Wi-Fi connections to prevent access over wireless networks and strengthen network security. |
|
Network Lock |
Restricts network connections to prevent access over wired networks and strengthen
network security. |
|
Remote Controller Lock |
Prevents control using a physical remote control in locations where actual screens are installed. |
|
Panel Button Lock |
Prevents control using on-screen buttons in locations where actual screens are installed. |
|
Screen Monitoring Lock |
Prevents on-screen displays from being viewed from VXT CMS. This option is only enabled for users with the Owner or Admin role. |
|
Change PIN |
Changes the PIN for screen access. |
Updating the Screen Software
Check for new software updates, and install updates if necessary.
-
It is not possible to install updates from Windows Player or Android Player.
-
Click the Settings tab on the right of the screen view for which to install updates.
-
Under the General item, click the Update button in Software Update.
-
After the process is complete, click the Apply button to apply the changes.
Setting the Screen Wall Playback Method
Screen wall playback method can be set depending on the type of synced playlist and by using the settings menu. Two playback methods are available, as follows:
|
Item |
Single-content playlist |
Multi-content playlist |
|---|---|---|
|
Playback method |
Duplicate playback |
Extended screen playback |
|
Quantity of content |
One |
More than one |
|
Content transmission method |
Content is duplicated to multiple screens |
Content is split into multiple screens |
|
Display method |
The same content is displayed on each of multiple screens |
Any large single content item is displayed across multiple screens |
-
Click the Settings tab on the right of the screen view on which to play content.
-
Under How to Play, select either Expanded or Duplicate for Play by mode below.
Controlling the Screens of a Screen Wall Simultaneously
A screen wall is a large screen made up of multiple screens connected together. In VXT CMS, users can control multiple screens set up as a screen wall simultaneously, using the Multi Control menu.
-
Click the Settings tab on the right of the screen view you want to control.
-
Click the Multi Control button to display the Multi Control window.
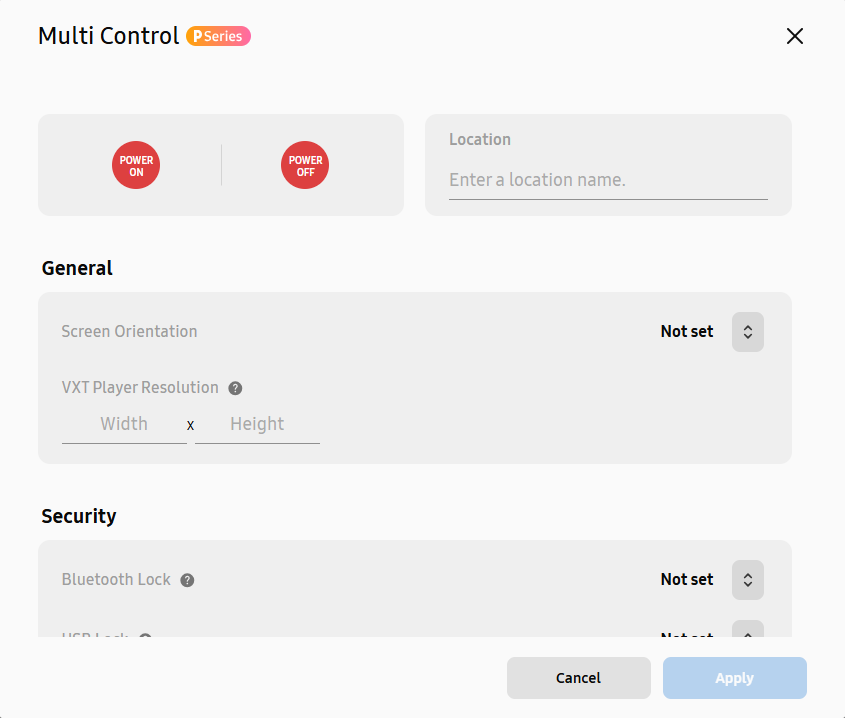
Item
Description
Power control
-
Turn on or off the screens of a screen wall.
-
To restart the screens, press and hold
 (Power On) or
  (Power Off).
Location setting
-
Enter the name of the area where the screens are located. The screen information is updated with the area name added.
Screen orientation setting
-
Set the display orientation for the screens of a screen wall. This optimizes content to fit the orientation of the screens.
-
Under General, set Screen Orientation to Landscape or Portrait. If you do not want to set screen orientation, select Not set.
VXT Player resolution setting
-
VXT Player resolution may differ from the actual display resolution. Improve content display quality by optimizing the resolution.
-
Resolution can be adjusted using the VXT Player Resolution option under the General item. The resolution of the VXT Player must be set lower than the actual screen resolution.
Security settings
-
Strengthen the security of your content and screen walls by configuring security settings, preventing unauthorized access or manipulation.
-
Check the screen wall security setting items under Security and change settings as required. To check the current setting values, hover the mouse cursor over
 next to the intended setting item. Each item can be set to either On or Off. If you do not want to set screen orientation, select Not set.
-
Getting Screen Status Reports
Monitor screen status in real time and be notified immediately when abnormalities are expected or detected.
-
This feature may not be supported, depending on the rate plan in use.
-
Click
(Notification) at the top right of the VXT CMS Home screen. -
Select the Early Warning tab.
-
Select a frequency and items for reports you wish to receive, and select recipients.
-
If users to be set as recipients are not found in the recipient list, click the Add User button at the top right of the list to add users.
-
-
Click Save to save the configured settings.
-
If no report items are selected, report emails will not be sent even if a report frequency is set.
-
Detectable Issues
Issues that can be detected using the Early Warning feature are as follows:
-
Screen disconnection during operating hours
-
Display of content other than VXT Player App
-
Software issues
-
Unstable network connection
-
Screen overheating
-
Malfunction of hardware, such as fans, screens, or panels