Page History
| Sv translation | |||||||||||||||||||||||||||||||||||||||||||||||||||||||||||||||||||||||||||
|---|---|---|---|---|---|---|---|---|---|---|---|---|---|---|---|---|---|---|---|---|---|---|---|---|---|---|---|---|---|---|---|---|---|---|---|---|---|---|---|---|---|---|---|---|---|---|---|---|---|---|---|---|---|---|---|---|---|---|---|---|---|---|---|---|---|---|---|---|---|---|---|---|---|---|---|
| |||||||||||||||||||||||||||||||||||||||||||||||||||||||||||||||||||||||||||
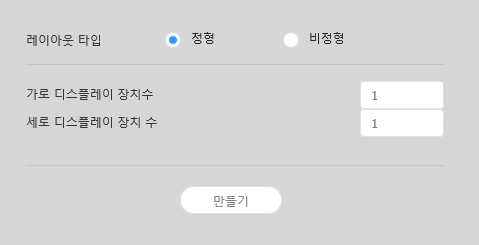
레이아웃 설정하기MagicInfo Server에서 Layout Editor를 실행하면 레이아웃 설정 창이 실행됩니다. 해당 창에서 레이아웃 기본 설정 후 생성을 클릭하세요.
레이아웃 구성하기레이아웃 모드에서 비디오월 레이아웃을 원하는대로 구성할 수 있습니다.
장치 정렬하기
장치 배치하기
섹션 속성 설정하기
장치 속성 설정하기
장치 맵핑하기레이아웃 모드에서 설정이 완료되면 맵핑 모드를 클릭하세요. 맵핑 모드에 진입하면 실제 장치 화면에 ID가 나타납니다. 이 ID를 사용하여 편집 영역의 가상 장치와 실제 장치를 연동할 수 있습니다.
레이아웃 미세 조정하기맵핑 모드에서 설정이 완료되면 미세조정 모드를 클릭하세요. 실제 장치의 위치 설정에 미세한 조정이 필요한 경우 미세조정 모드를 사용하여 간편하게 수정할 수 있습니다.
MagicInfo Server에 배포하기
|


| Sv translation | |||||||||||||||||||||||||||||||||||||||||||||||||||||||||||||||||||||||||||
|---|---|---|---|---|---|---|---|---|---|---|---|---|---|---|---|---|---|---|---|---|---|---|---|---|---|---|---|---|---|---|---|---|---|---|---|---|---|---|---|---|---|---|---|---|---|---|---|---|---|---|---|---|---|---|---|---|---|---|---|---|---|---|---|---|---|---|---|---|---|---|---|---|---|---|---|
| |||||||||||||||||||||||||||||||||||||||||||||||||||||||||||||||||||||||||||
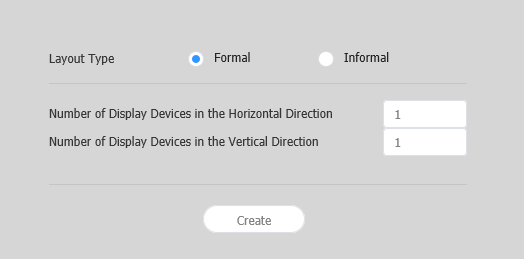
Layout settingsIf you launch Layout Editor from MagicInfo Server, the Layout setting window appears. Configure basic layout settings from the window, and then click Create.
Configuring a layoutConfigure a videowall layout as desired using Layout Mode.
Aligning devices
Arranging devices
Configuring section properties
Configuring device properties
Mapping devicesAfter configuring the required settings in Layout Mode, click Mapping Mode. An ID appears on the actual device screen as soon as Mapping Mode activates. Use the ID to control the virtual device screen in the edit section in conjunction with the actual device.
Finely adjusting layoutsAfter configuring the required settings in Mapping Mode, click Finetuning Mode. To finely adjust location settings for an actual device, use Finetuning Mode to edit the settings.
Deploying to MagicInfo Server
|