Page History
| Sv translation | |||||||||||||||||||||||||||||||||||||||||||||||||||||||||||||||||||||||||||||||||||||||||||||||||||||||||||||||||||||||||||||||||||||||||||||||||||||||||||||||||||||||
|---|---|---|---|---|---|---|---|---|---|---|---|---|---|---|---|---|---|---|---|---|---|---|---|---|---|---|---|---|---|---|---|---|---|---|---|---|---|---|---|---|---|---|---|---|---|---|---|---|---|---|---|---|---|---|---|---|---|---|---|---|---|---|---|---|---|---|---|---|---|---|---|---|---|---|---|---|---|---|---|---|---|---|---|---|---|---|---|---|---|---|---|---|---|---|---|---|---|---|---|---|---|---|---|---|---|---|---|---|---|---|---|---|---|---|---|---|---|---|---|---|---|---|---|---|---|---|---|---|---|---|---|---|---|---|---|---|---|---|---|---|---|---|---|---|---|---|---|---|---|---|---|---|---|---|---|---|---|---|---|---|---|---|---|---|---|---|---|
| |||||||||||||||||||||||||||||||||||||||||||||||||||||||||||||||||||||||||||||||||||||||||||||||||||||||||||||||||||||||||||||||||||||||||||||||||||||||||||||||||||||||
DataLink 기능을 이용해 콘텐츠 안의 요소가 실시간으로 바뀌는 동적 콘텐츠를 제작할 수 있습니다. 이 콘텐츠에는 Premium Server에 등록된 일반 미디어 파일뿐만 아니라, DataLink 서버에 수집된 외부 데이터를 맵핑할 수도 있습니다.
Web Author를 이용해 DataLink 템플릿을 생성할 수 있습니다.
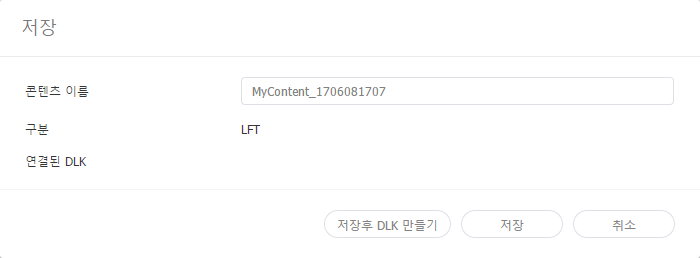
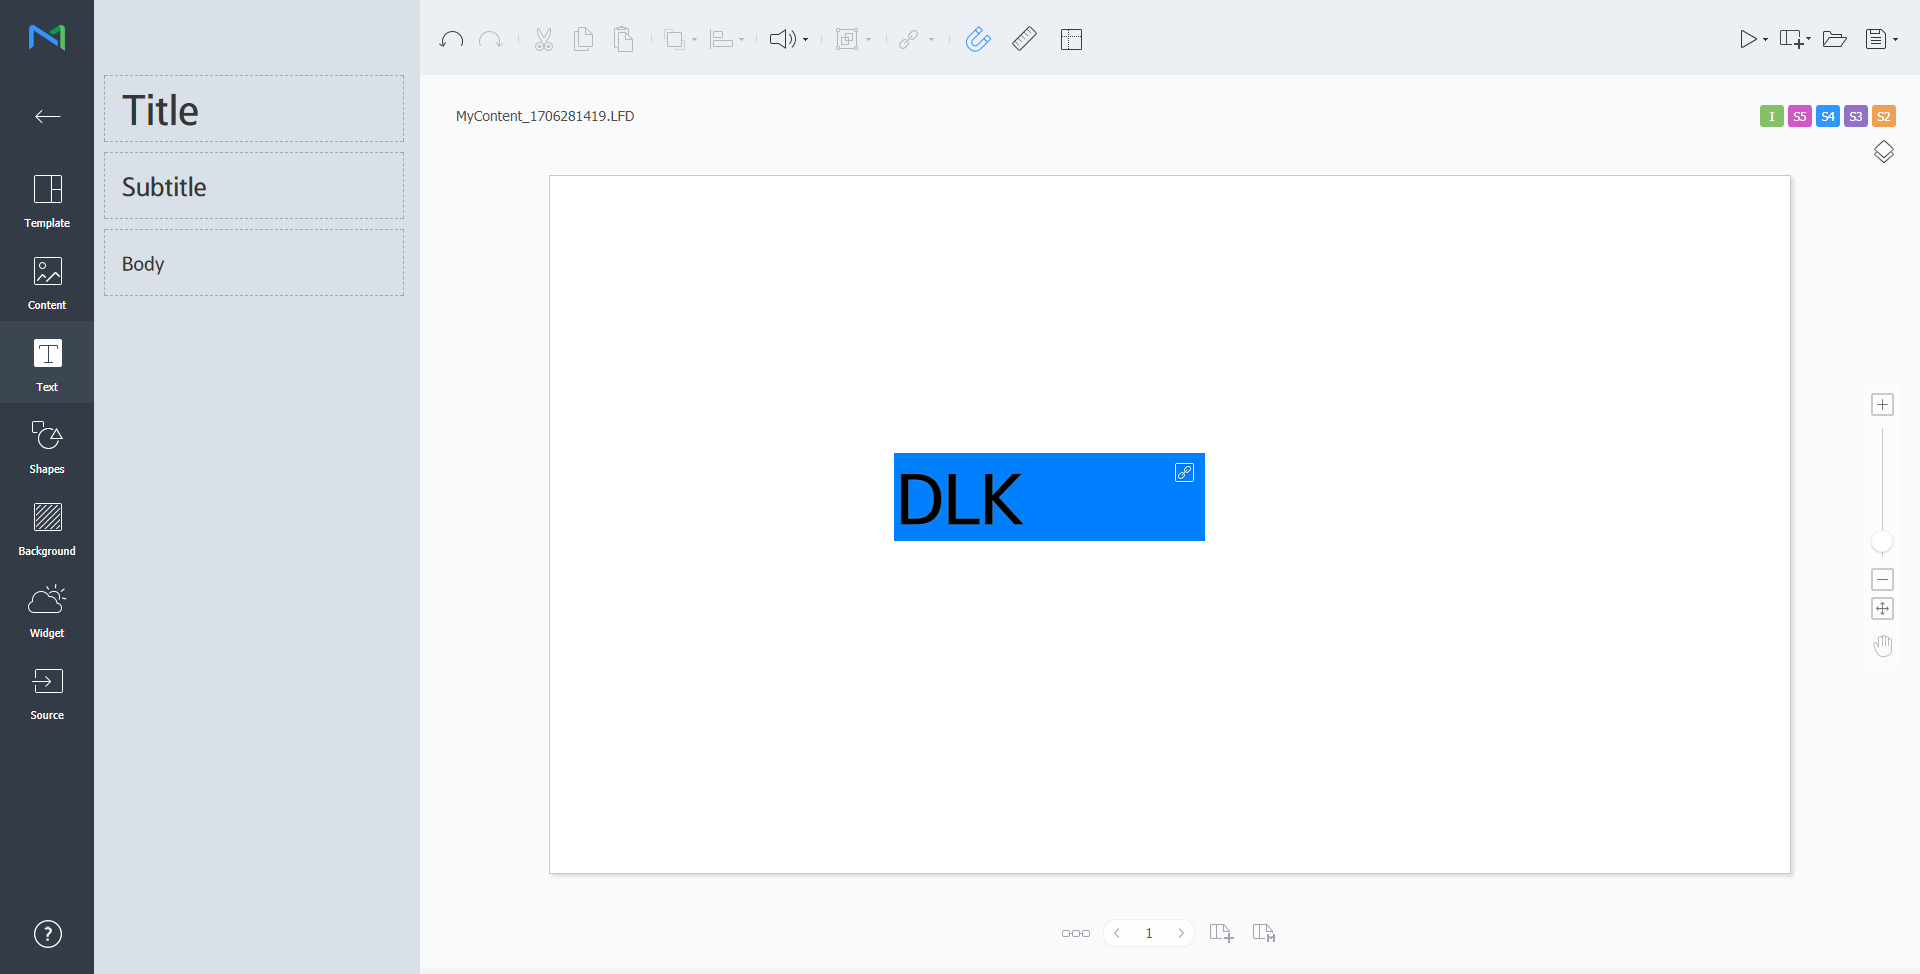
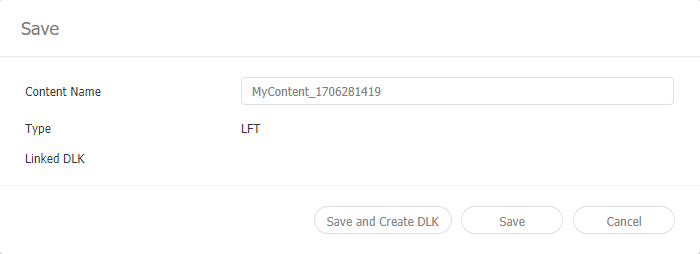
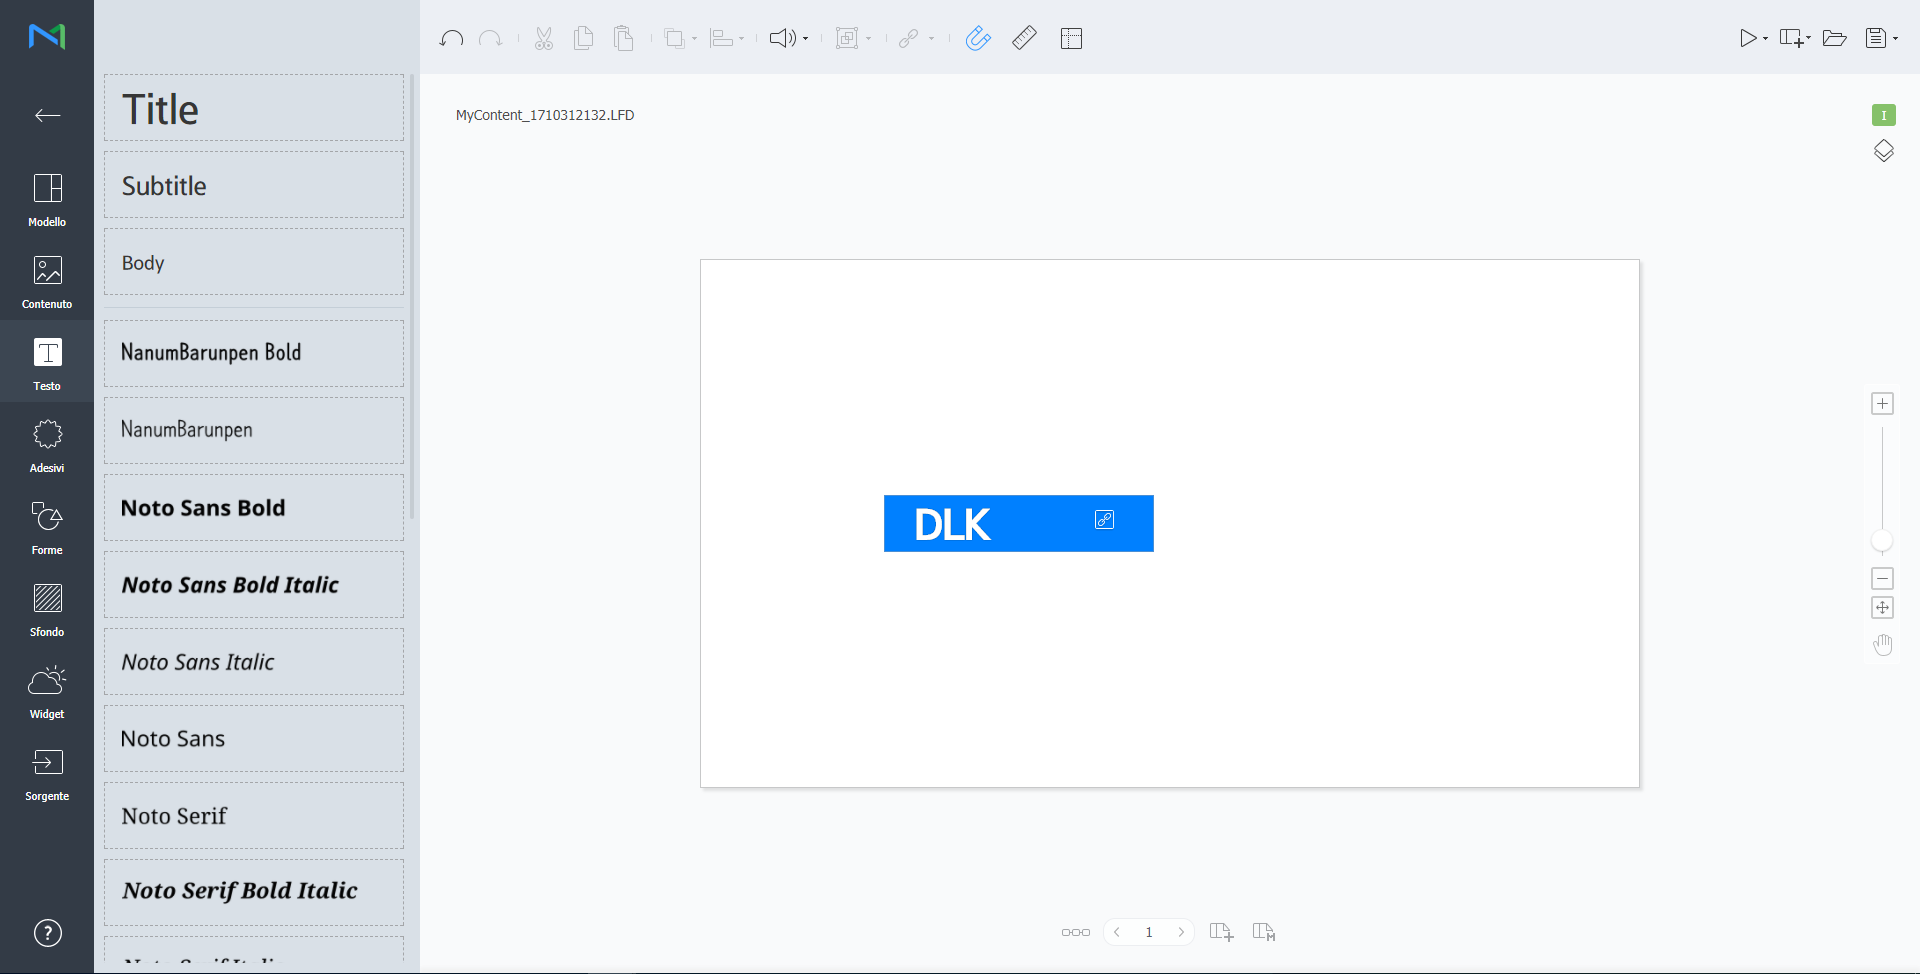
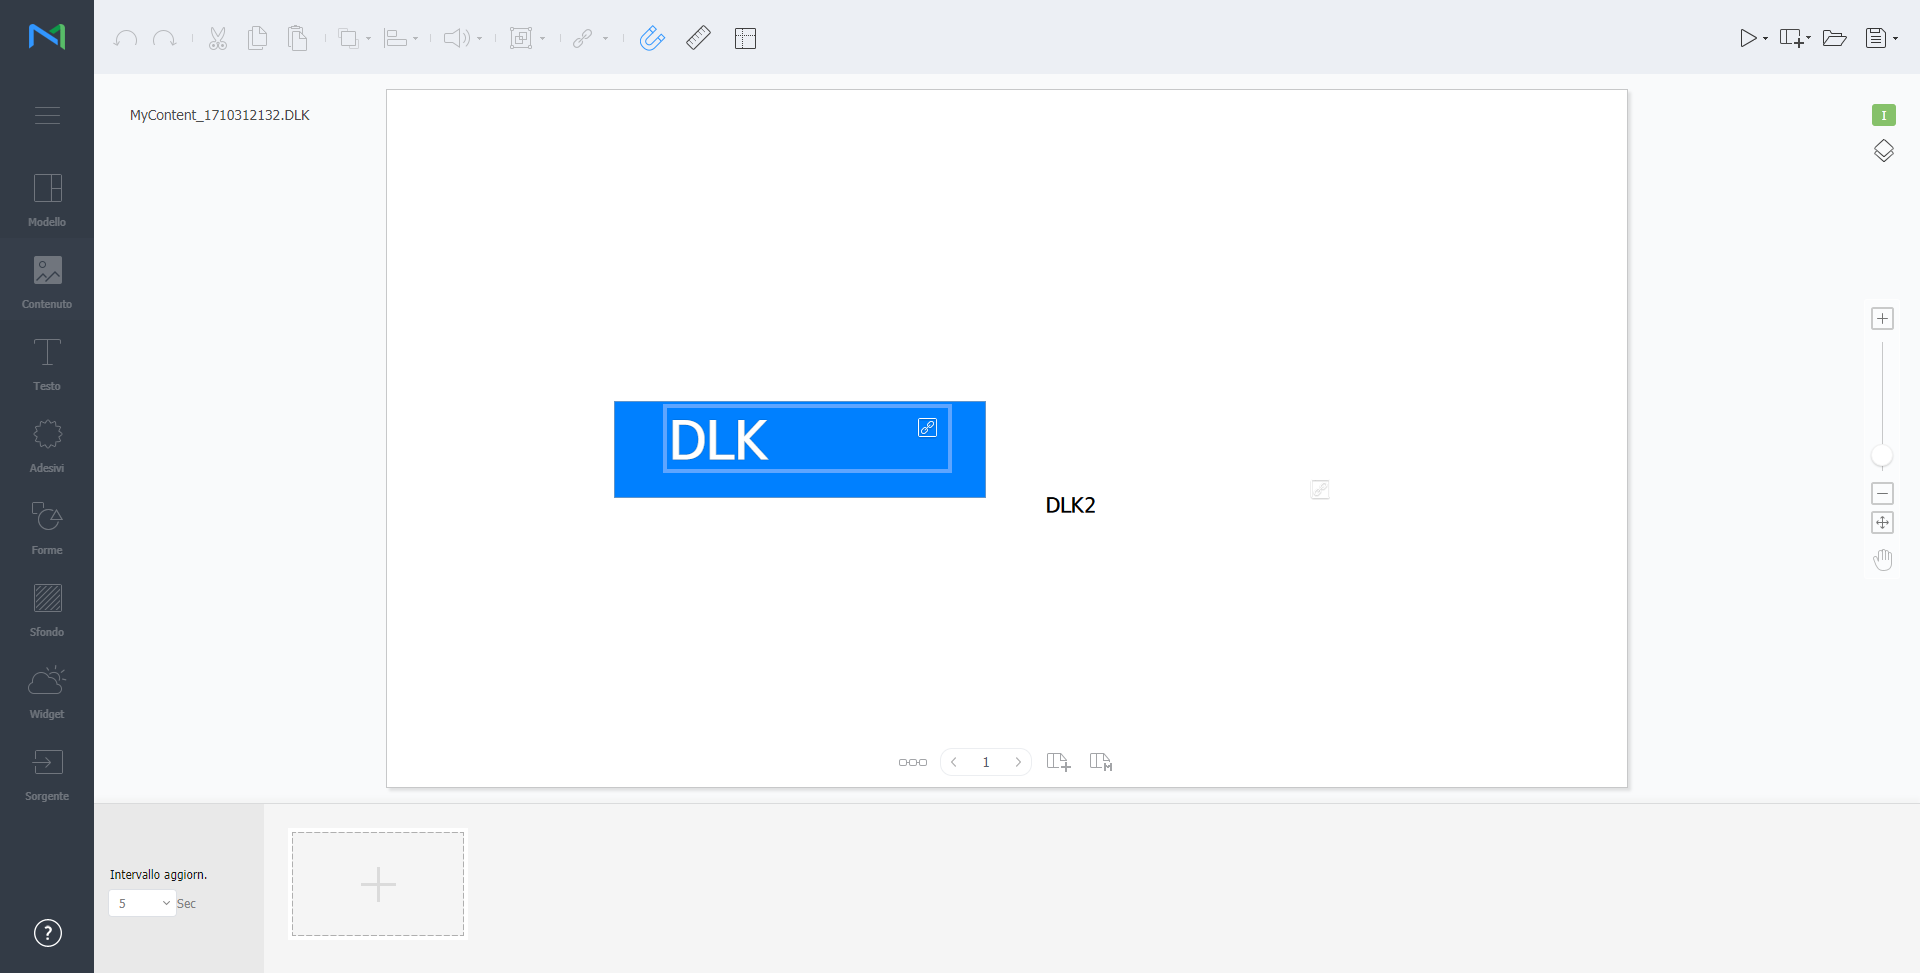
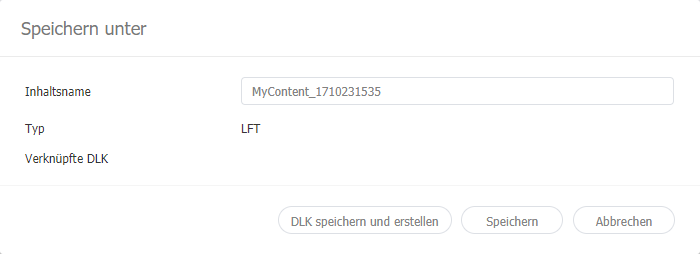
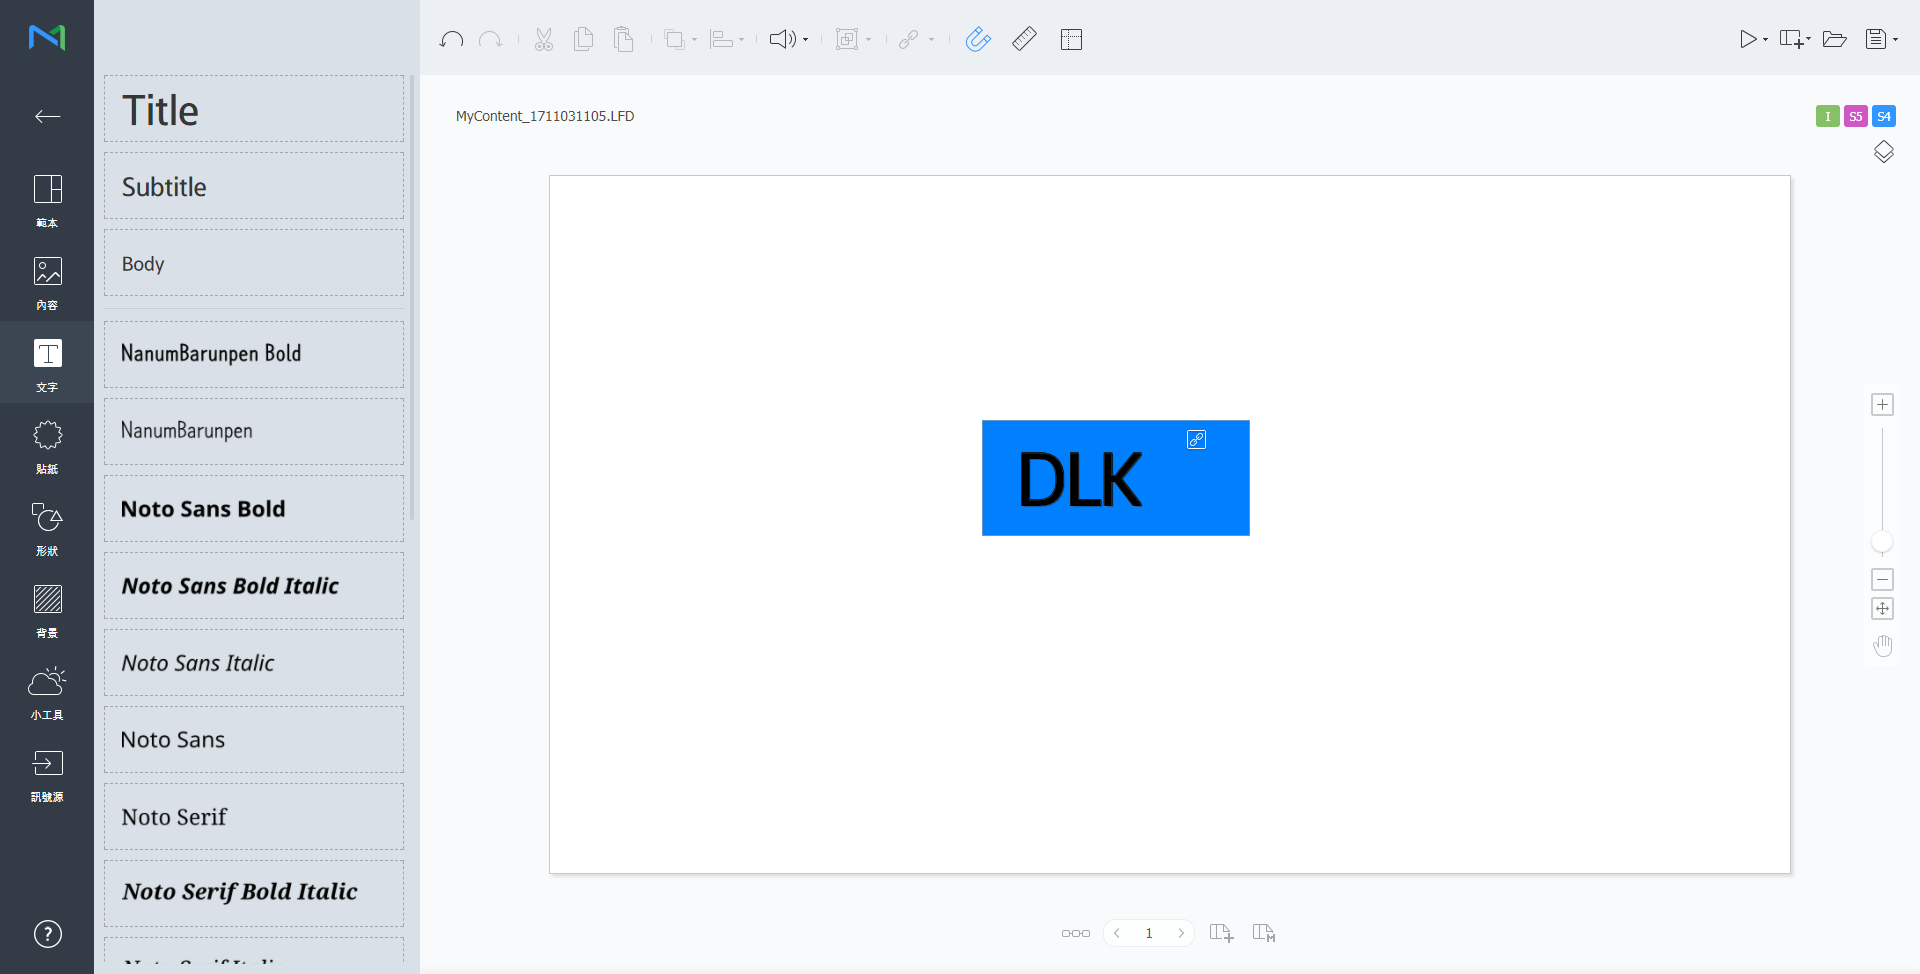
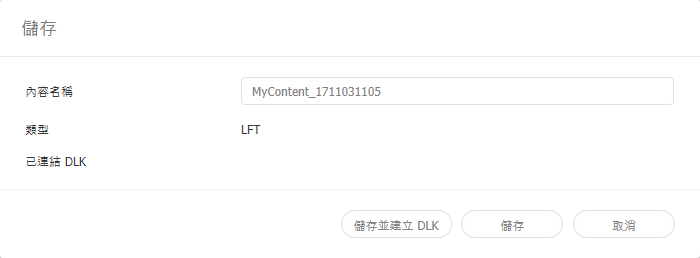
DataLink 템플릿 수정하기저장한 DataLink 템플릿을 불러온 후 수정할 수 있습니다.
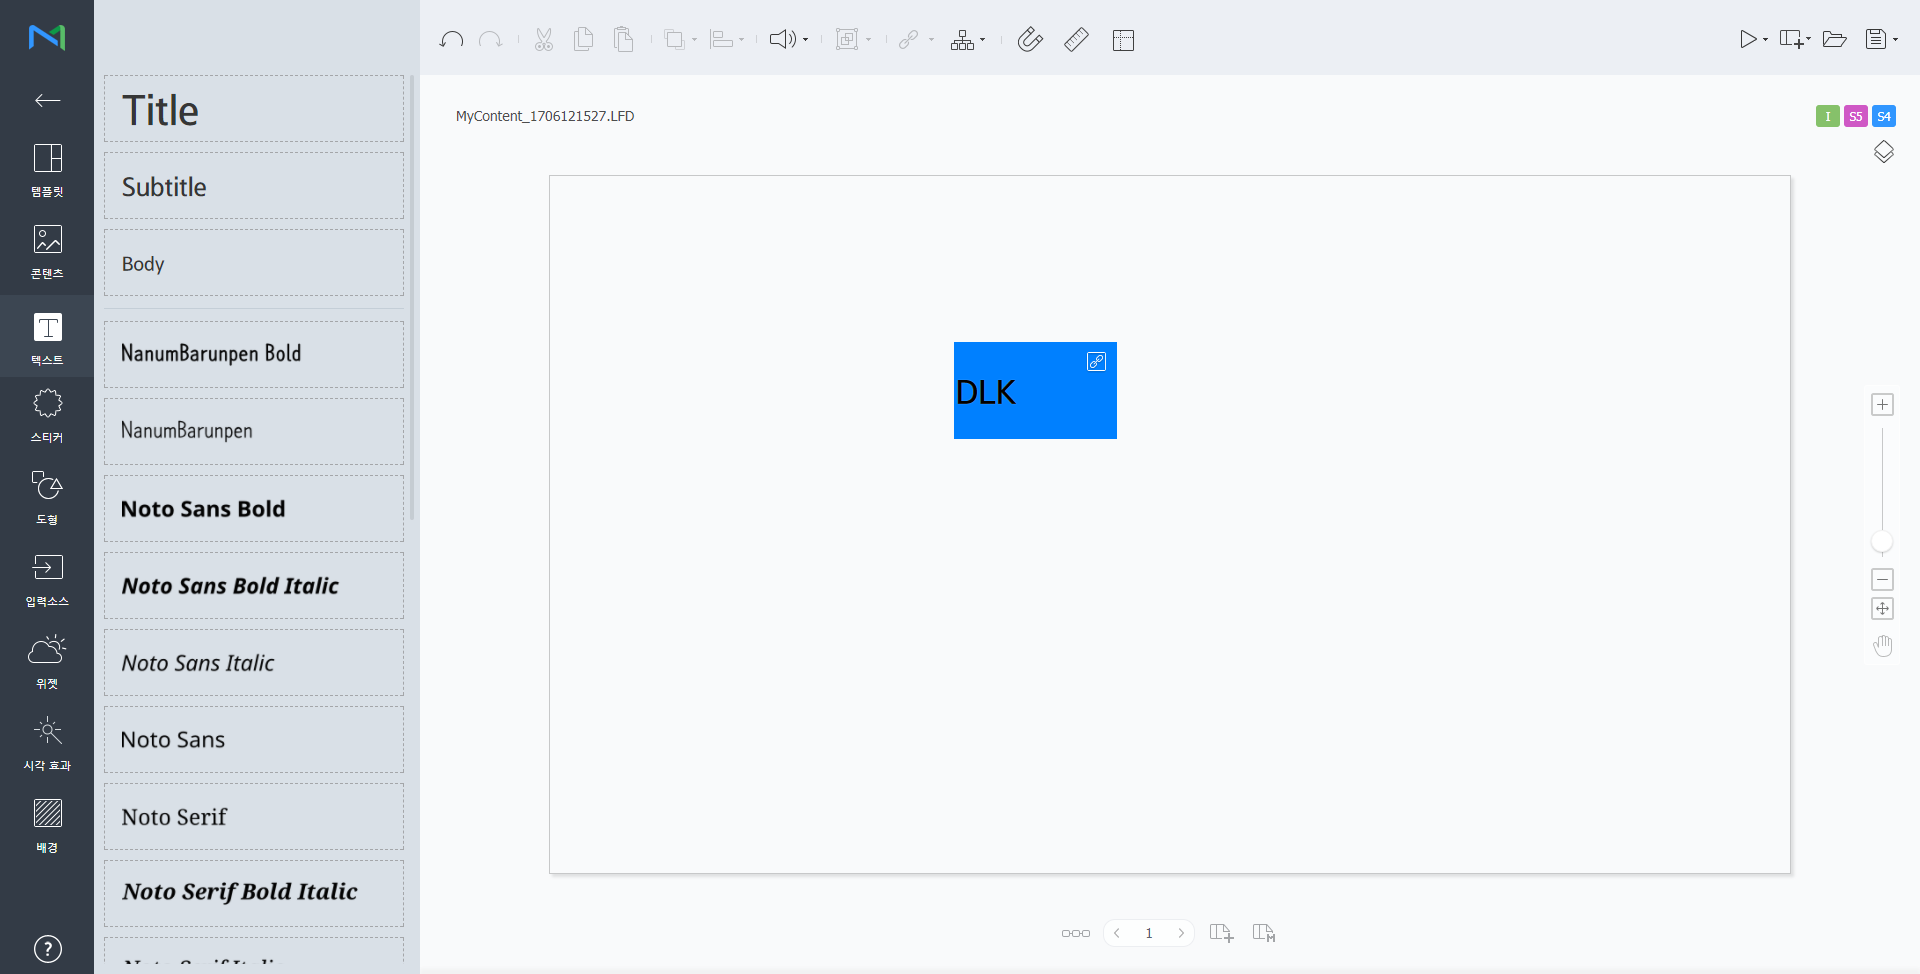
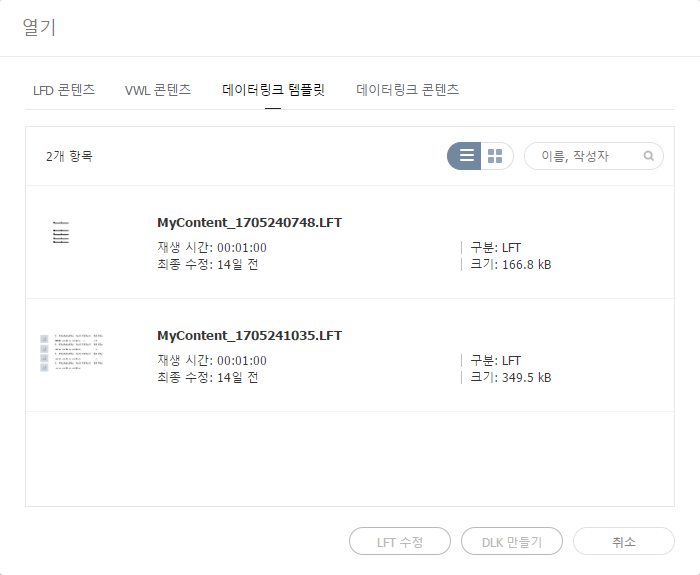
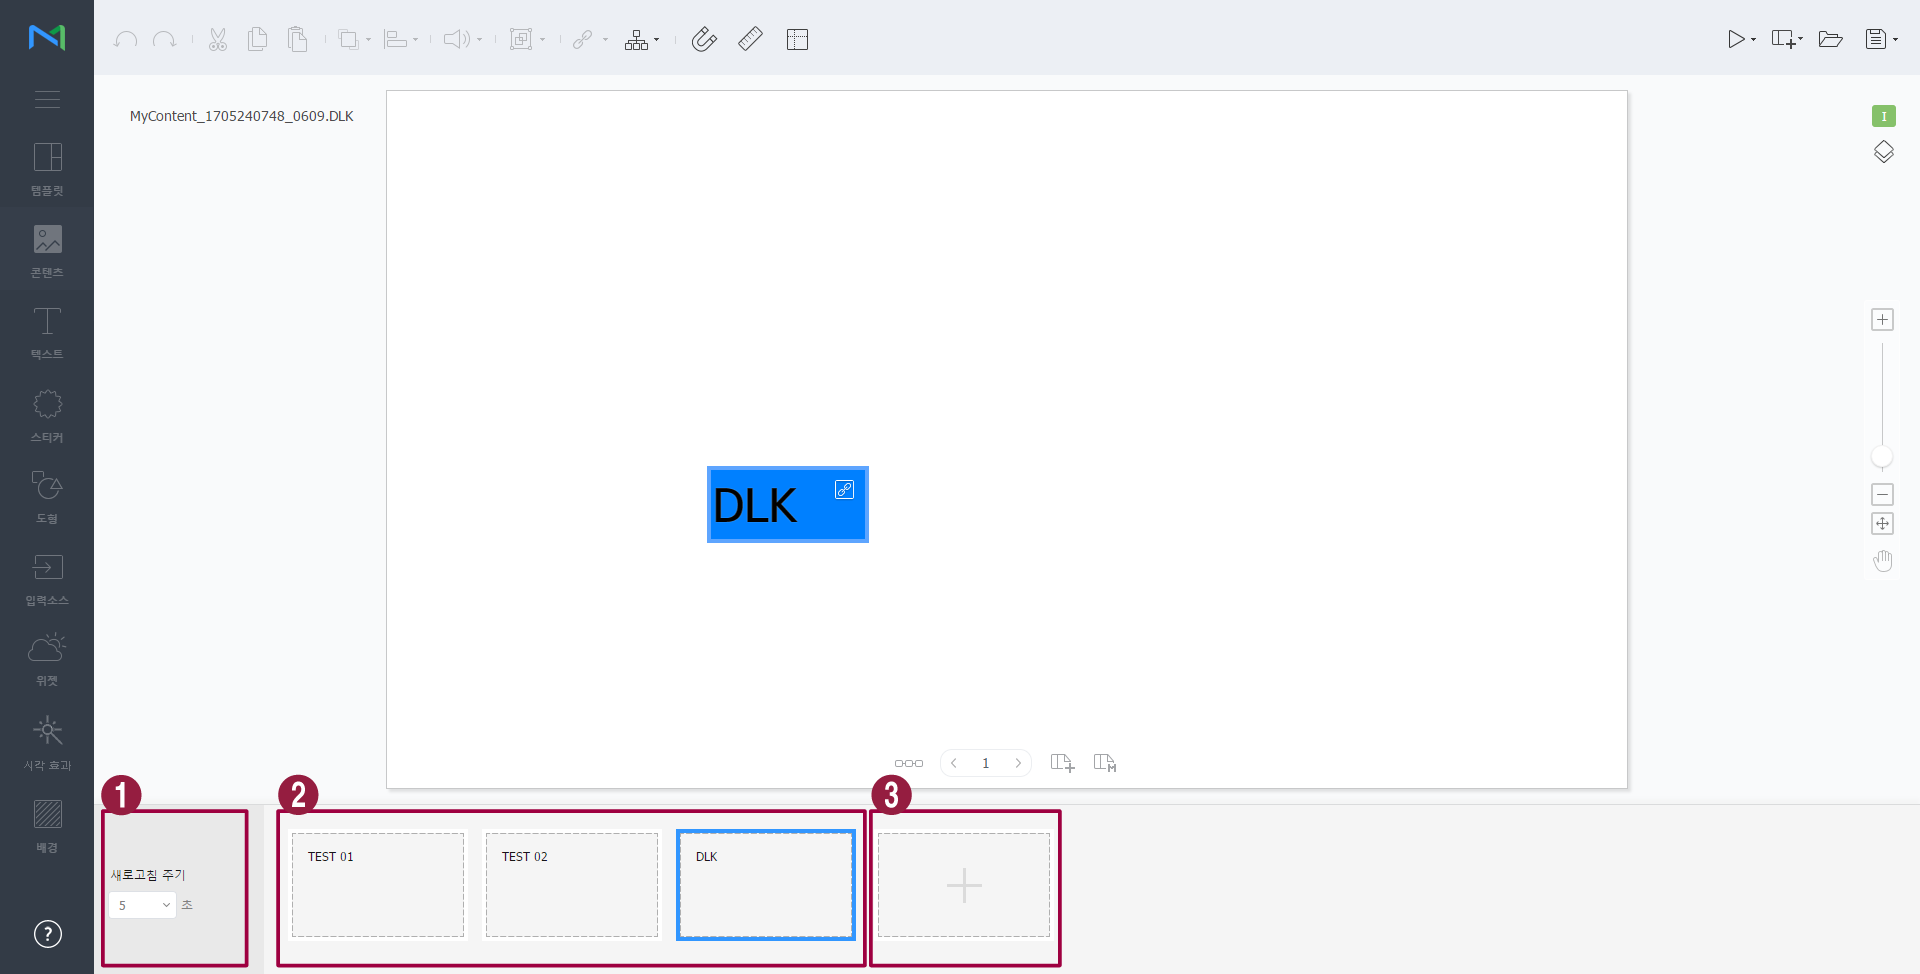
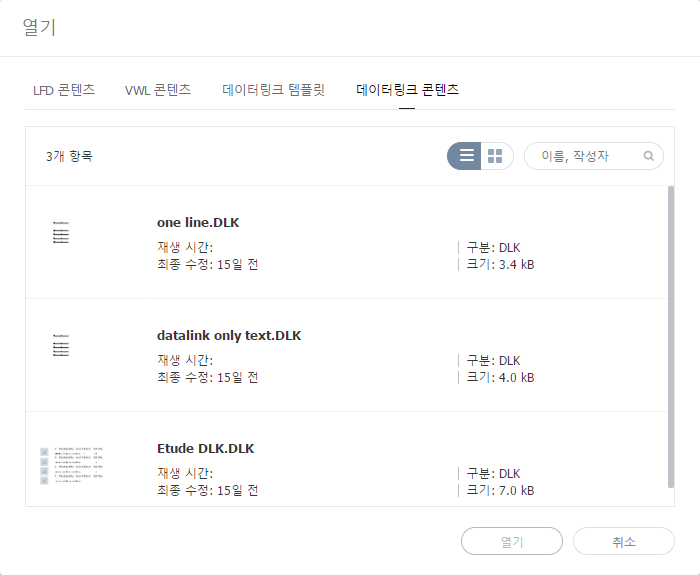
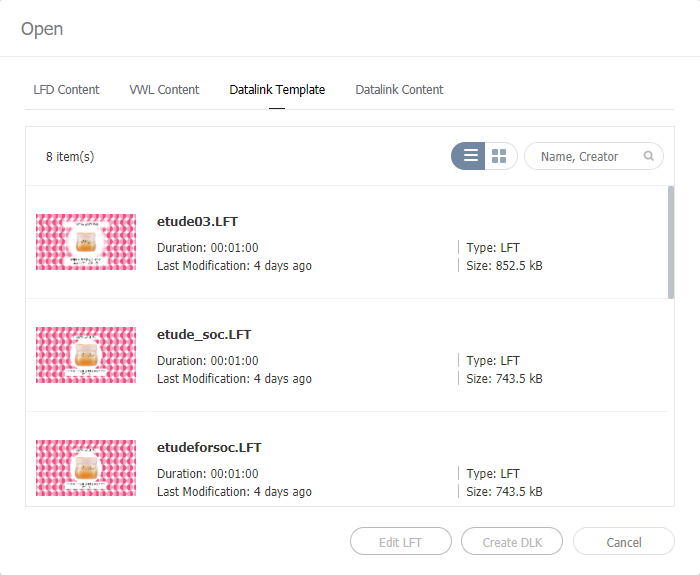
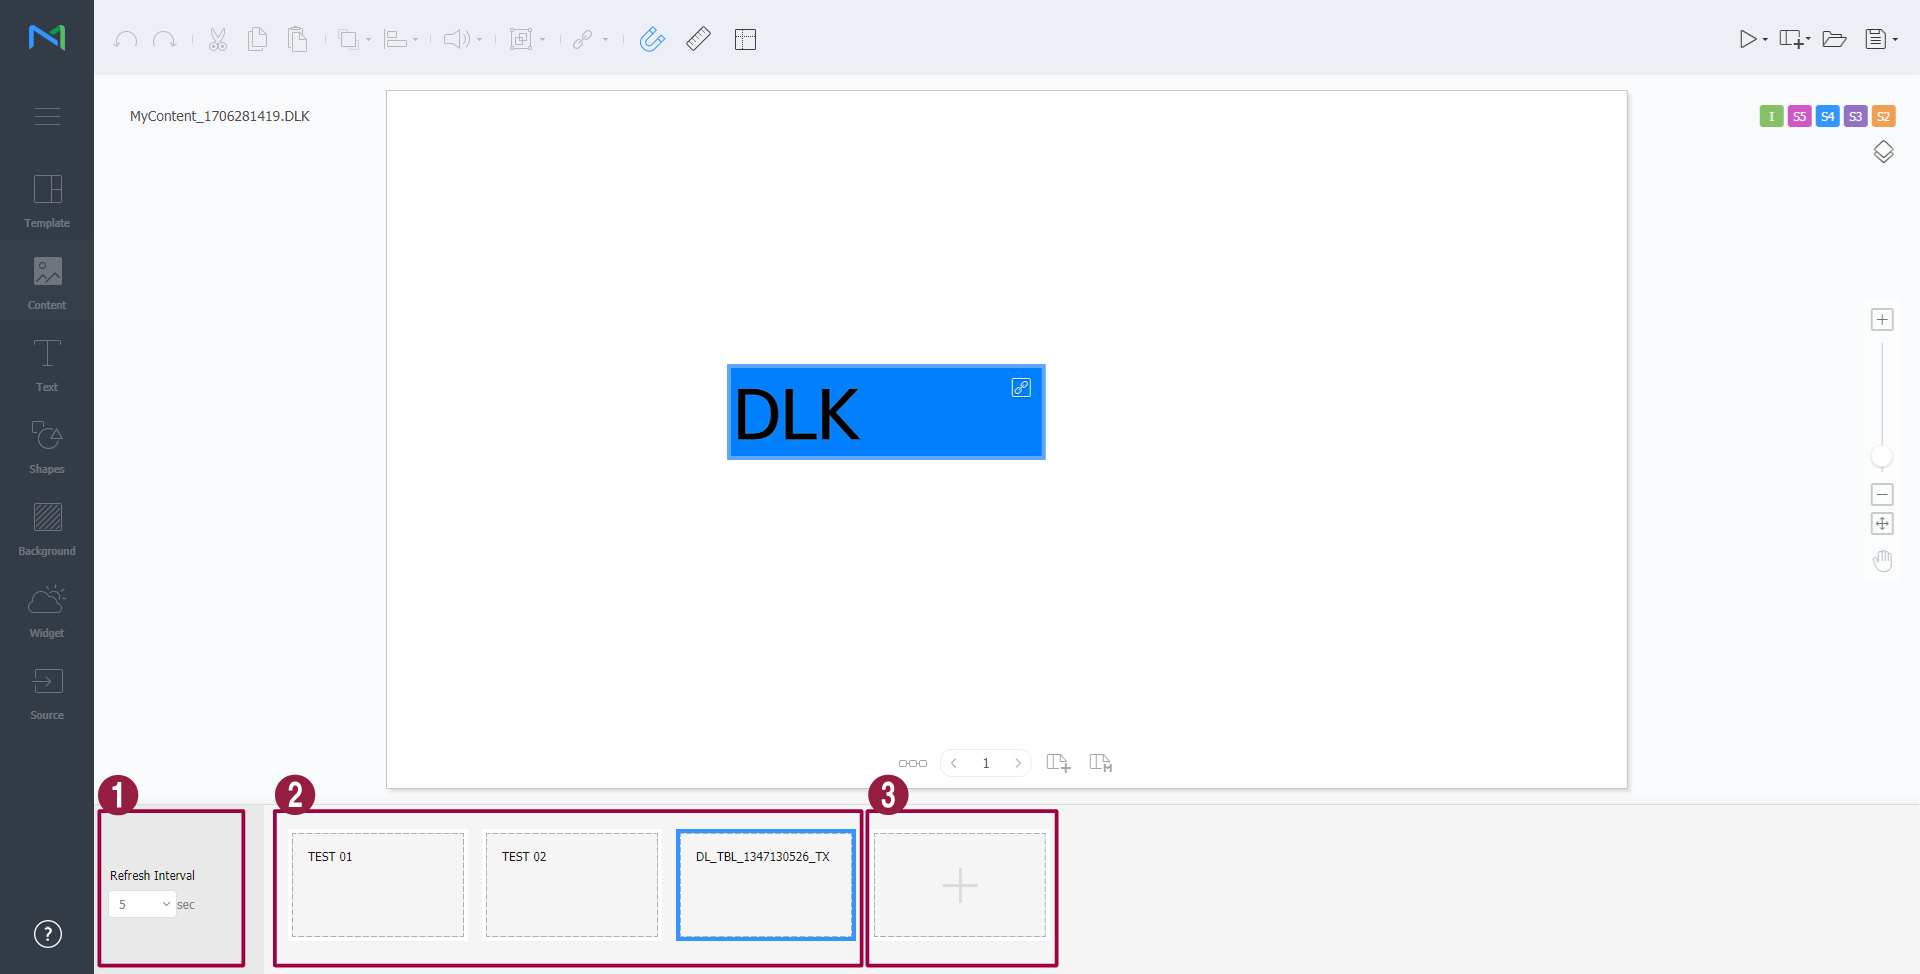
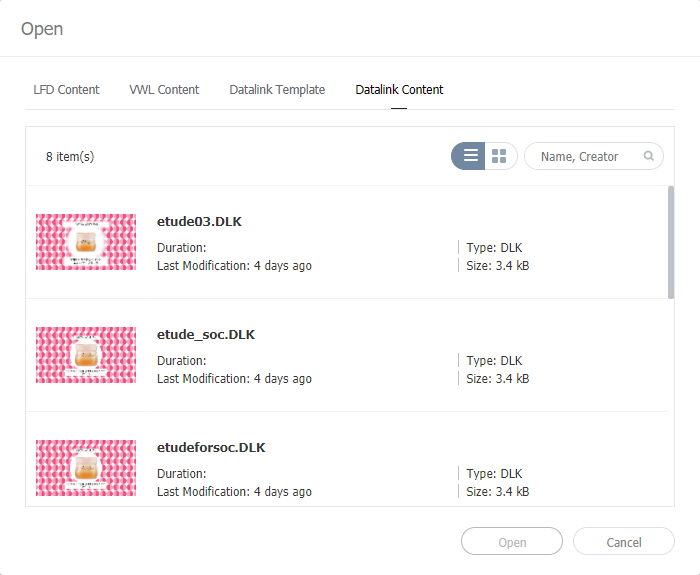
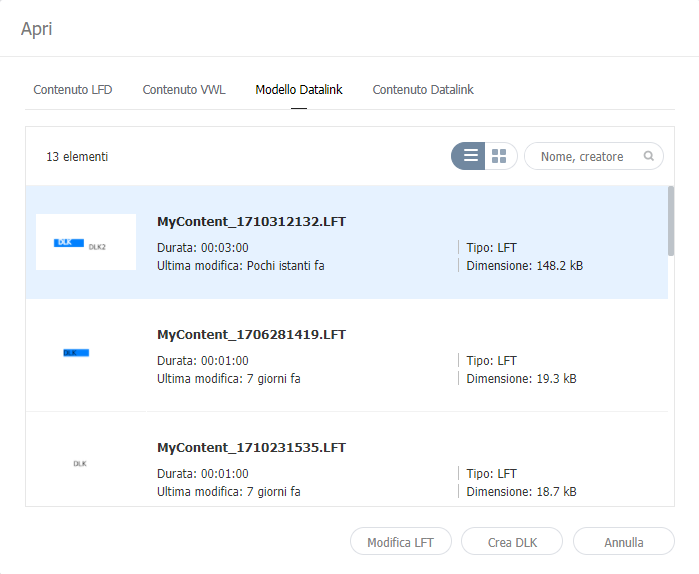
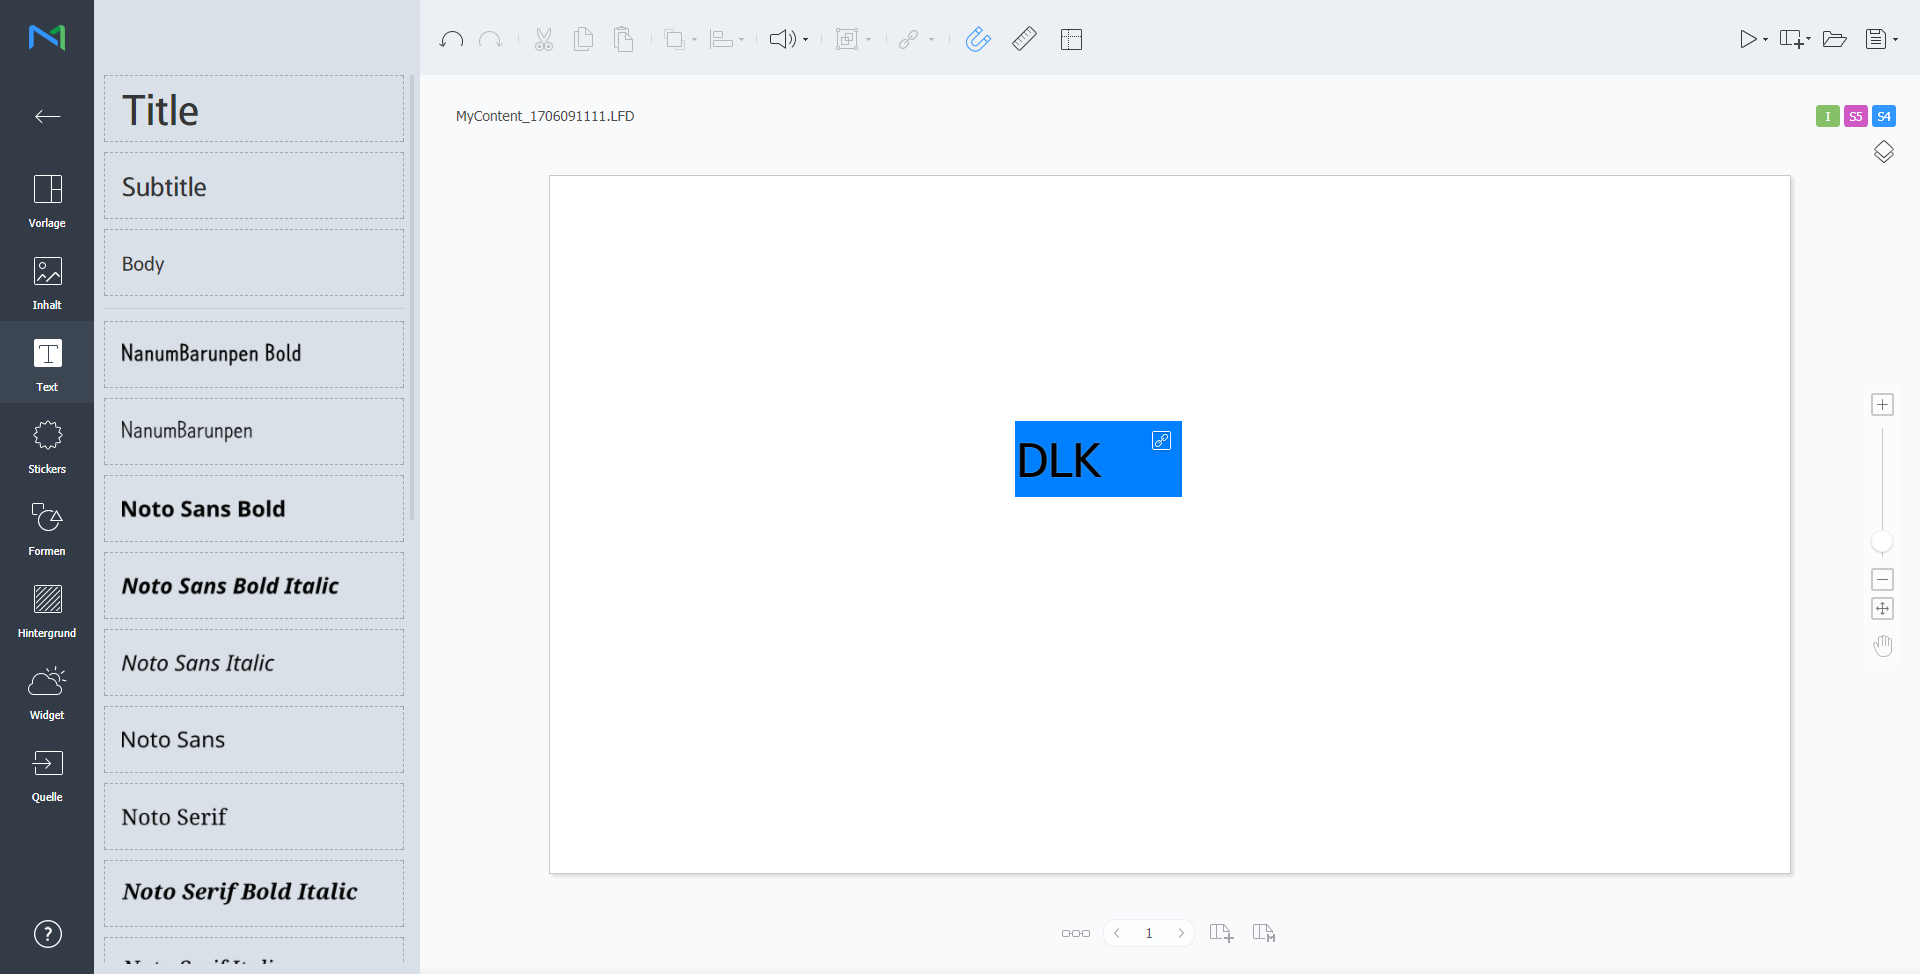
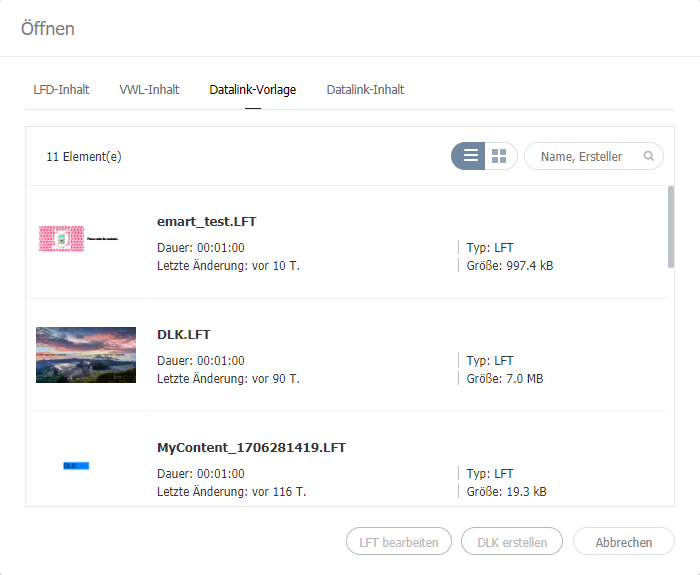
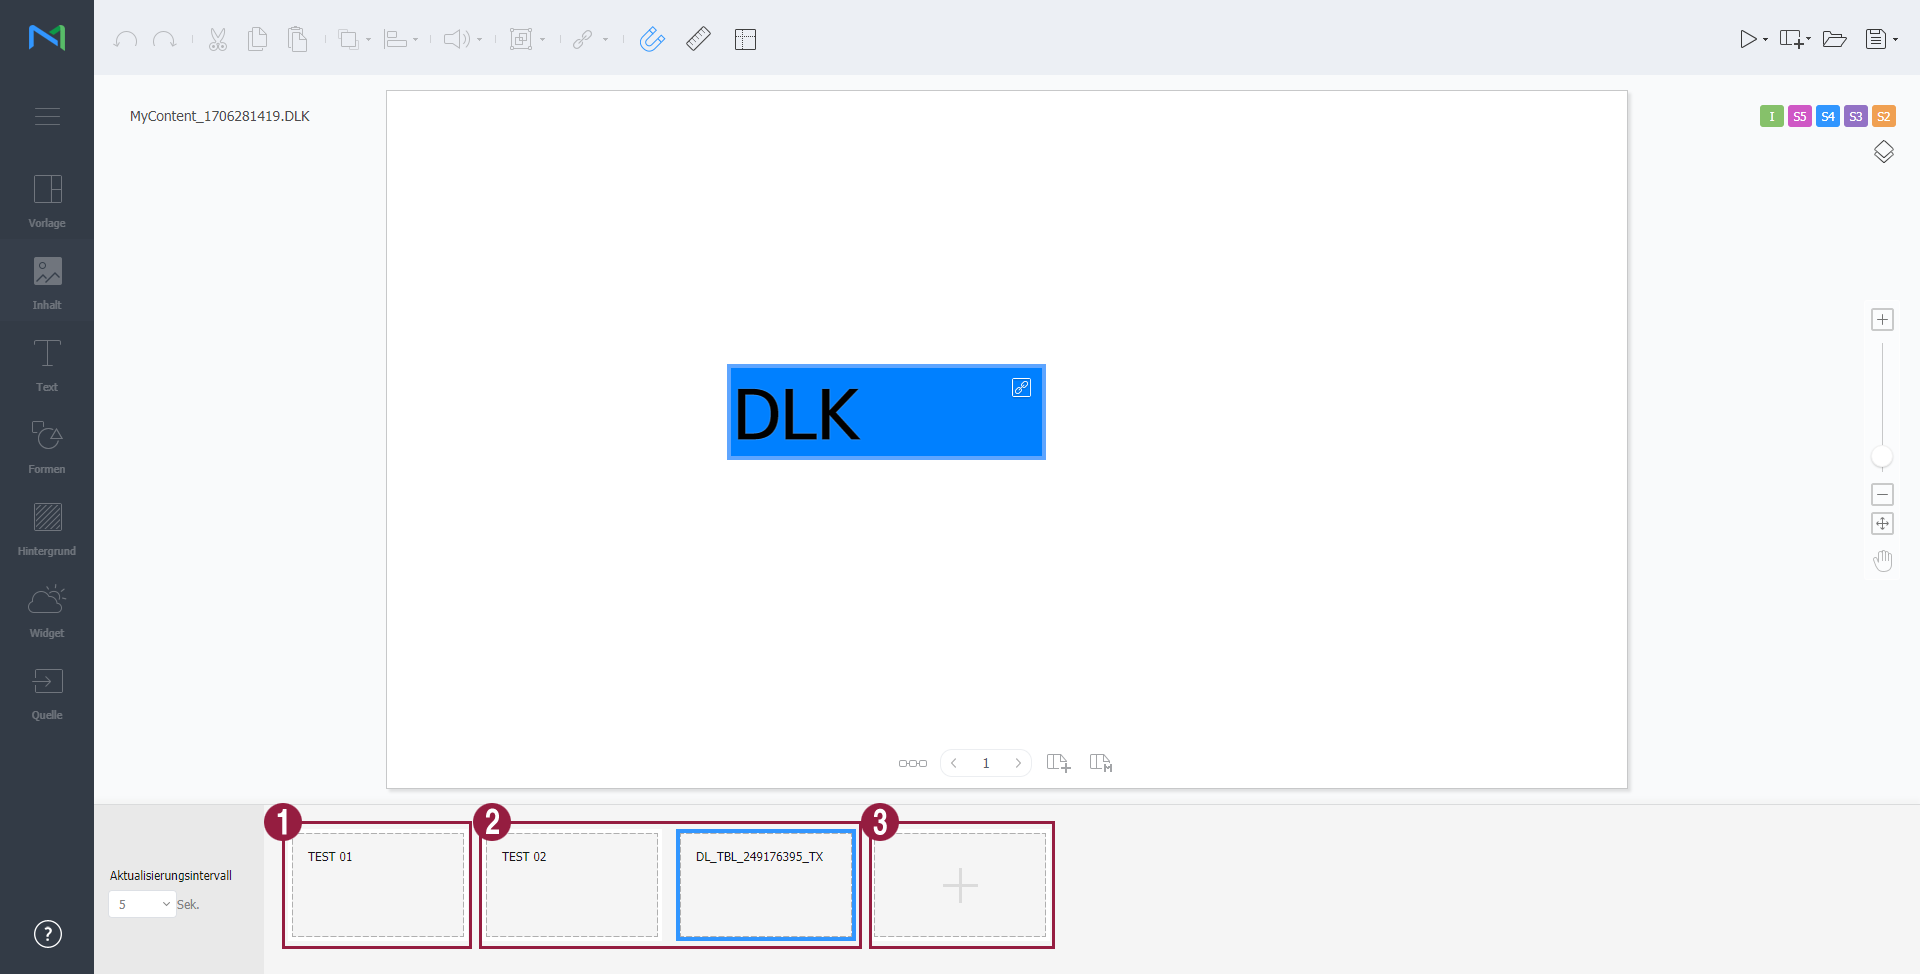
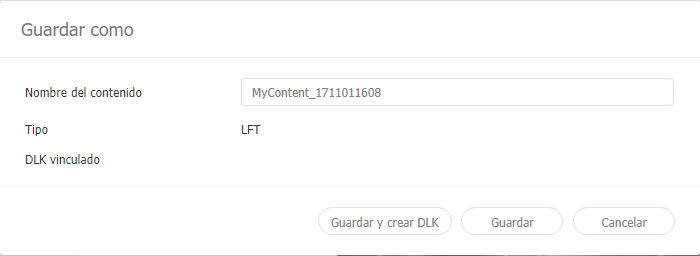
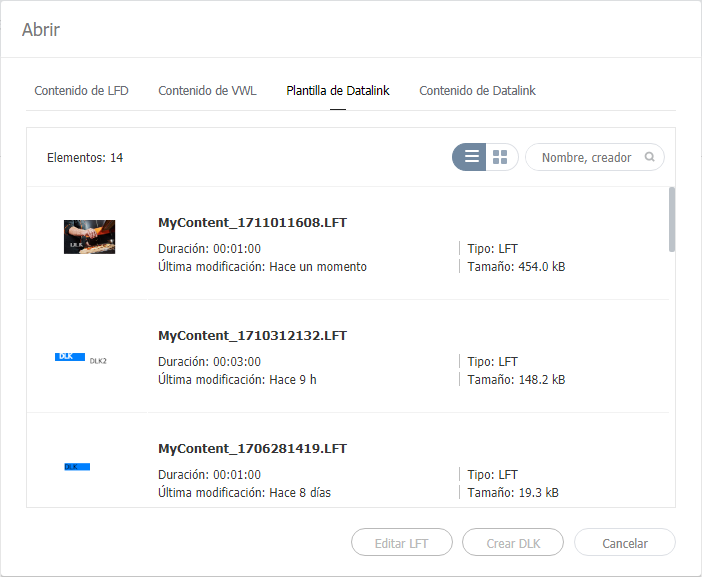
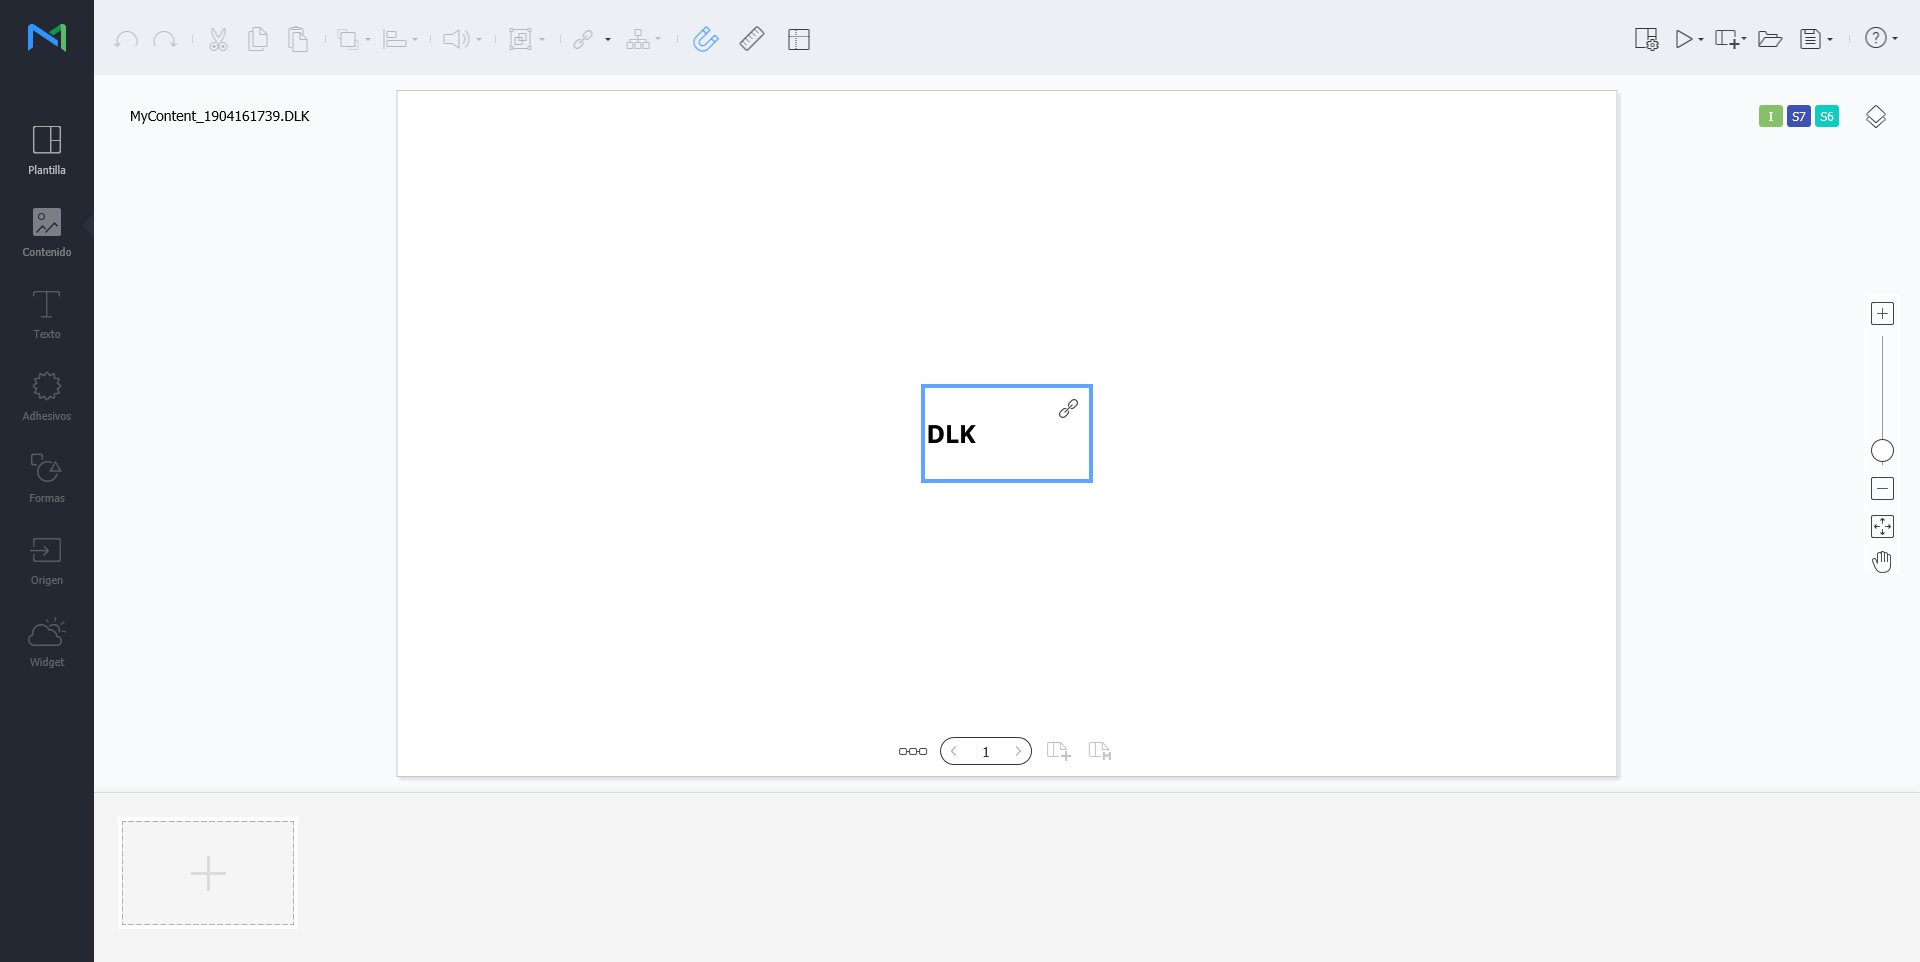
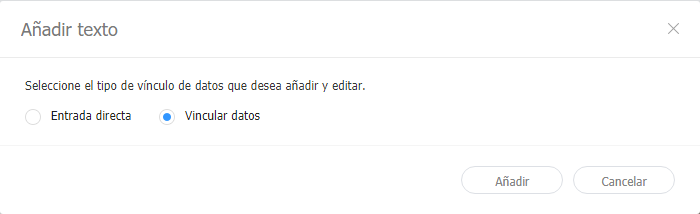
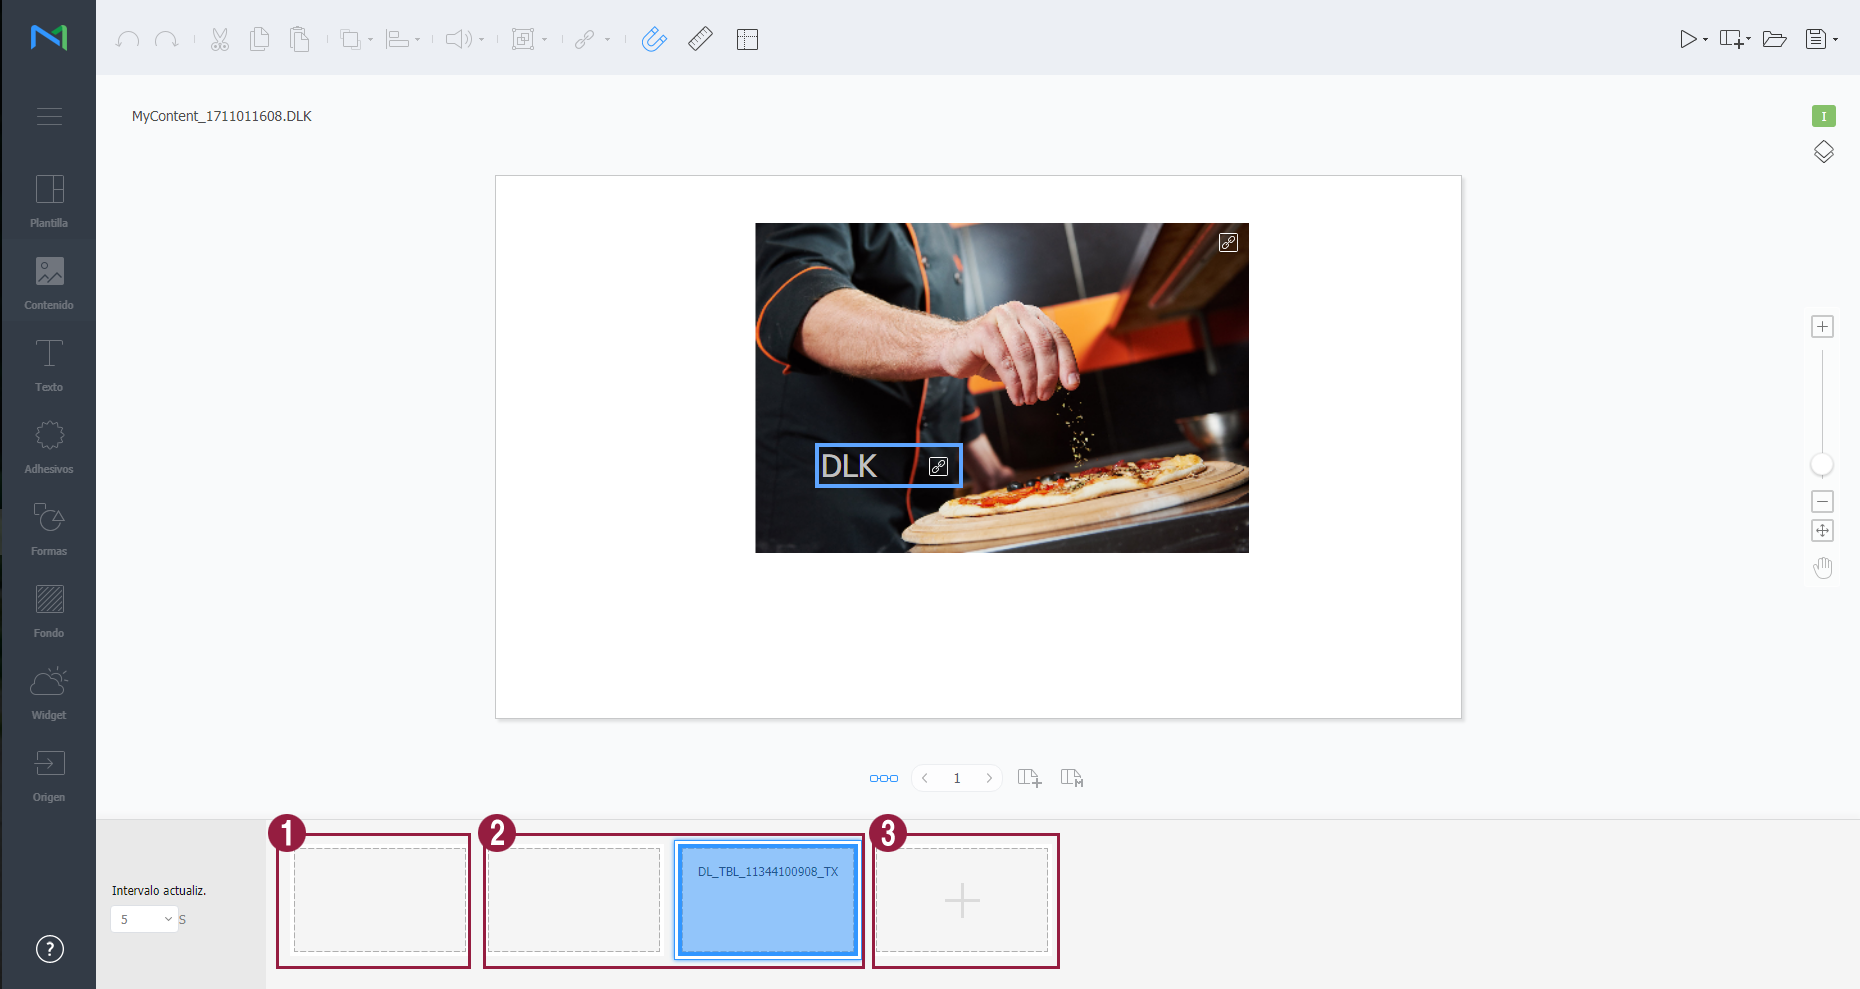
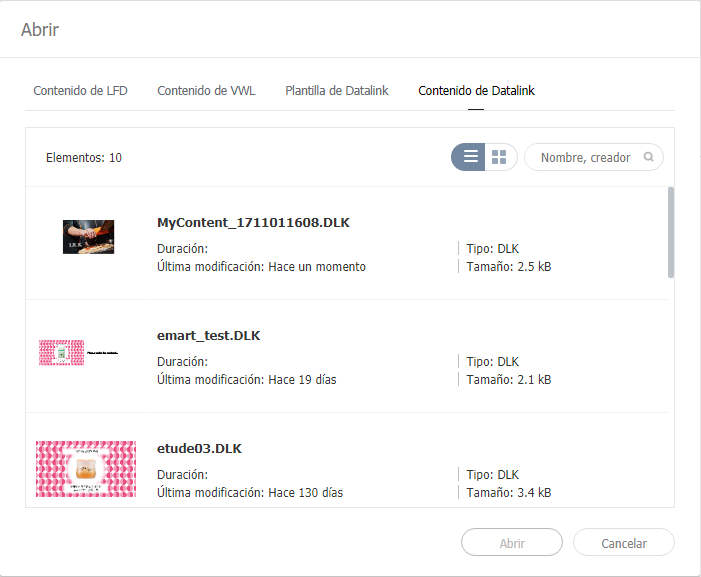
DLK 콘텐츠 생성하기DataLink 템플릿으로 Player에 배포할 DLK 콘텐츠를 생성할 수 있습니다. DLK 콘텐츠는 미디어 파일 또는 텍스트를 직접 등록하거나, 등록된 데이터링크 서버의 정보를 불러와서 생성할 수 있습니다. DataLink 템플릿 불러오기DLK 콘텐츠를 생성하기 위해 DataLink 템플릿을 불러올 수 있습니다.
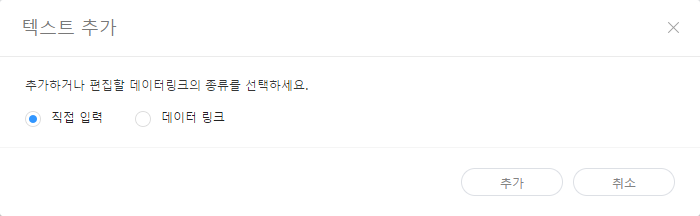
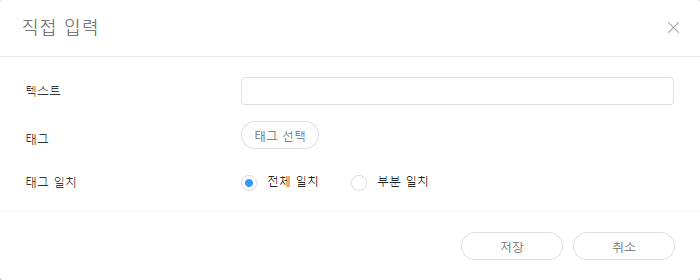
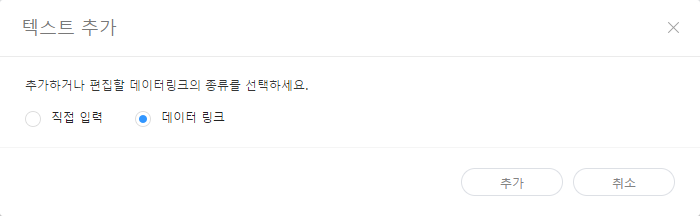
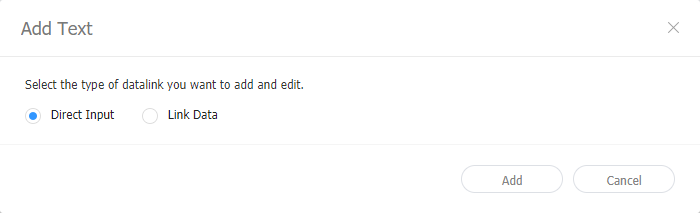
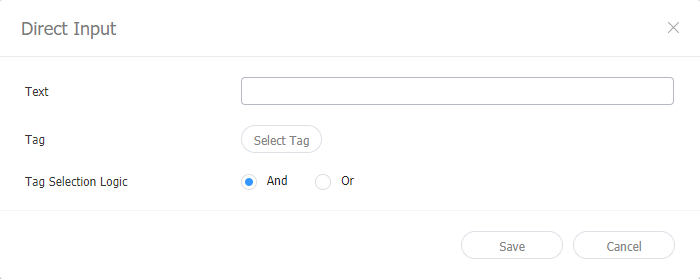
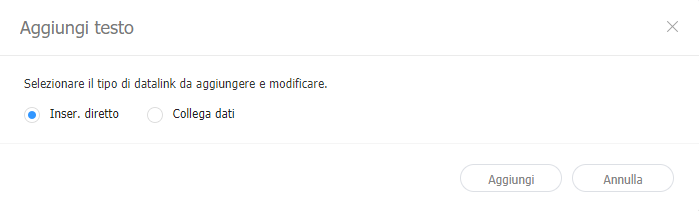
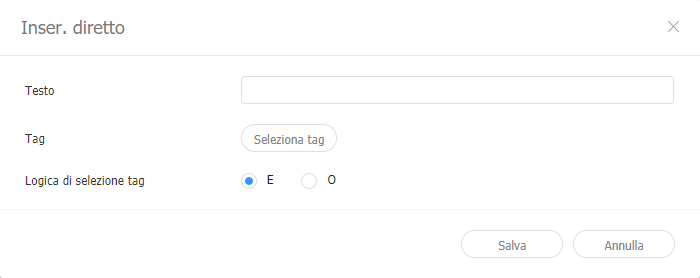
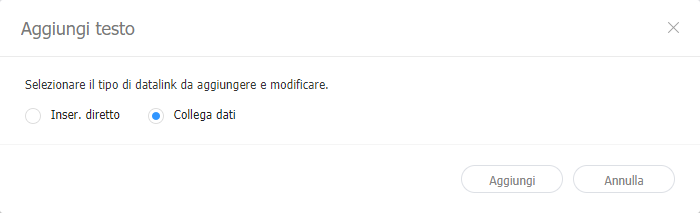
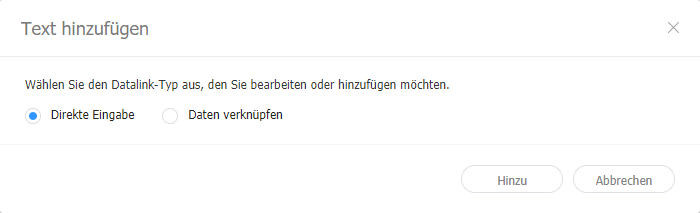
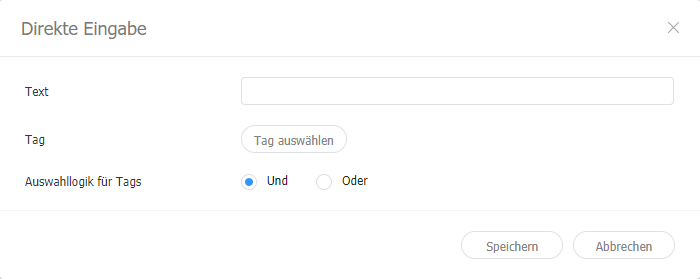
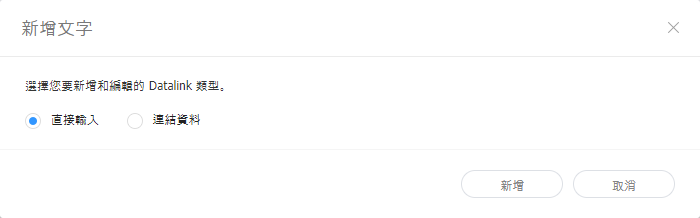
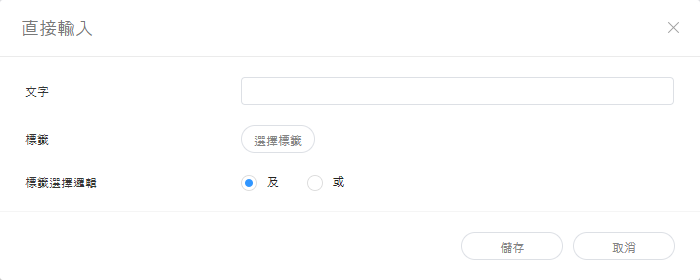
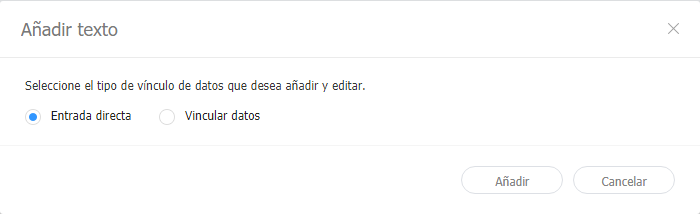
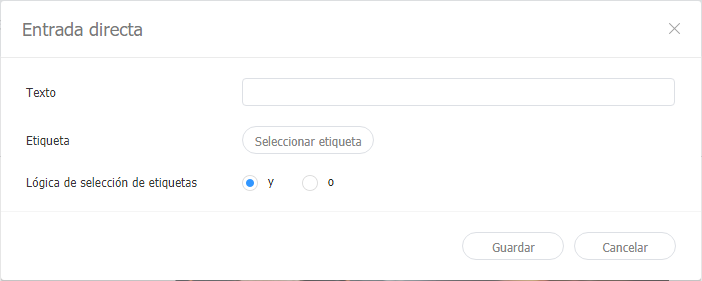
직접 입력하여 DLK 콘텐츠 만들기
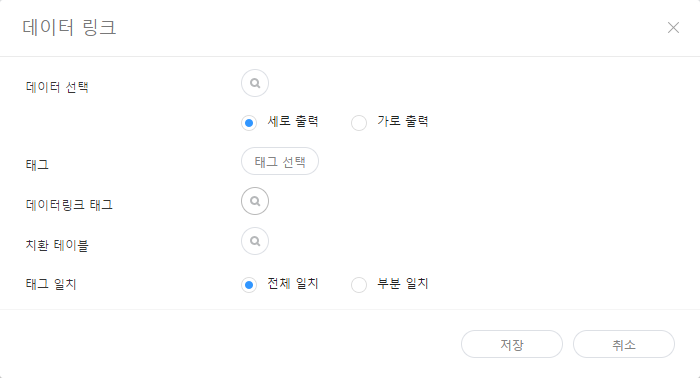
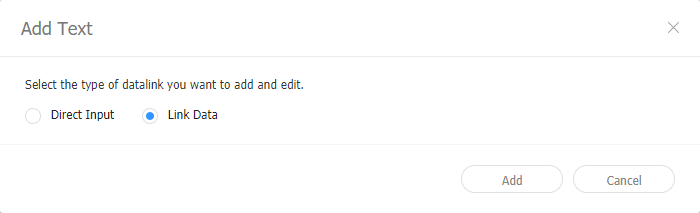
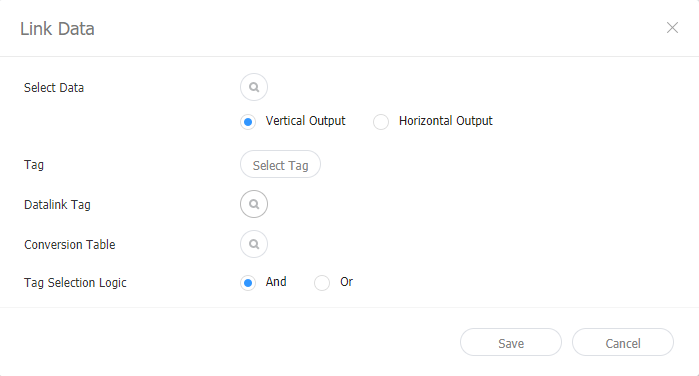
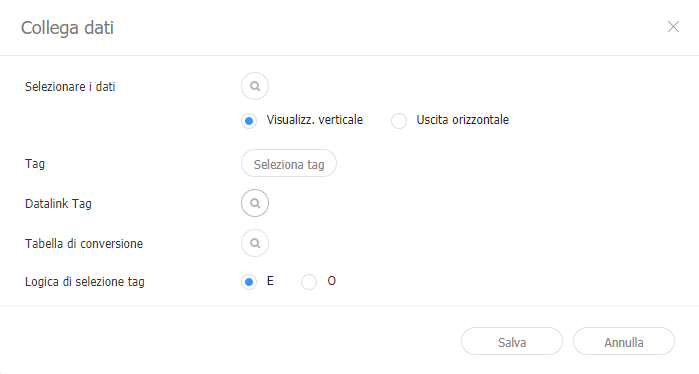
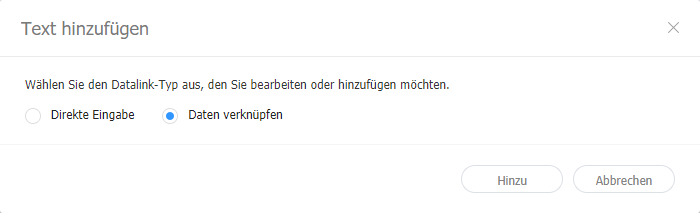
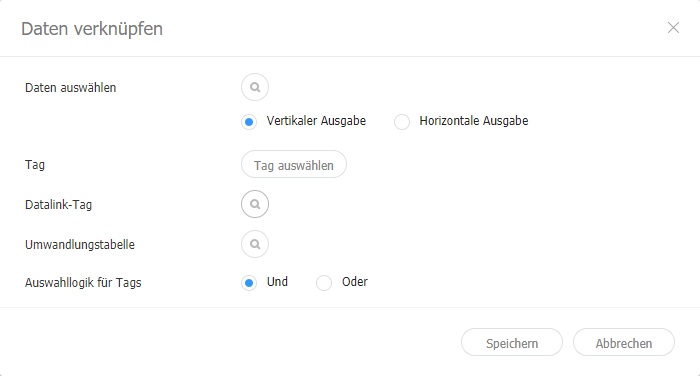
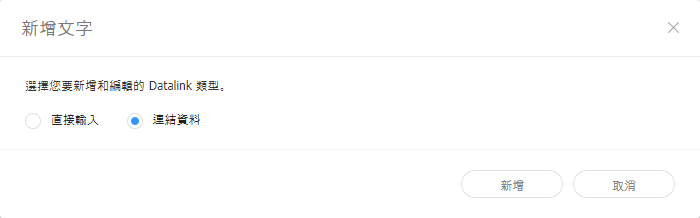
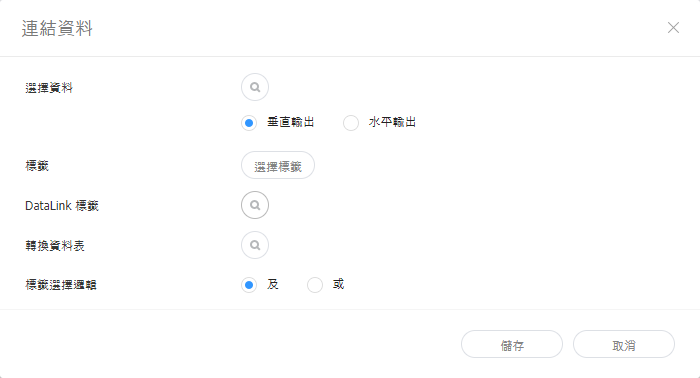
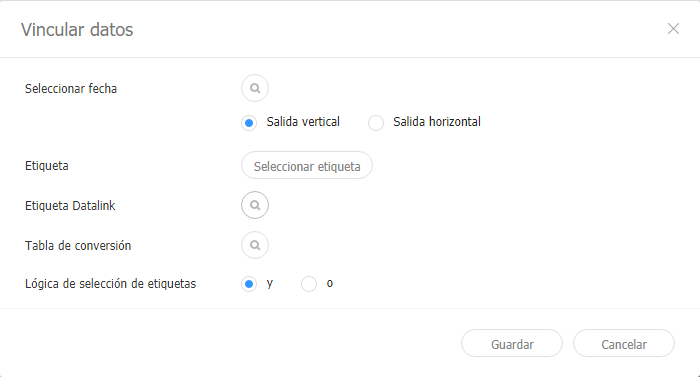
데이터링크 서버와 연동하여 DLK 콘텐츠 만들기데이터링크 서버의 데이터를 DLK 템플릿에 맵핑하여 DLK 콘텐츠를 구성할 수 있습니다.
데이터링크 관리하기
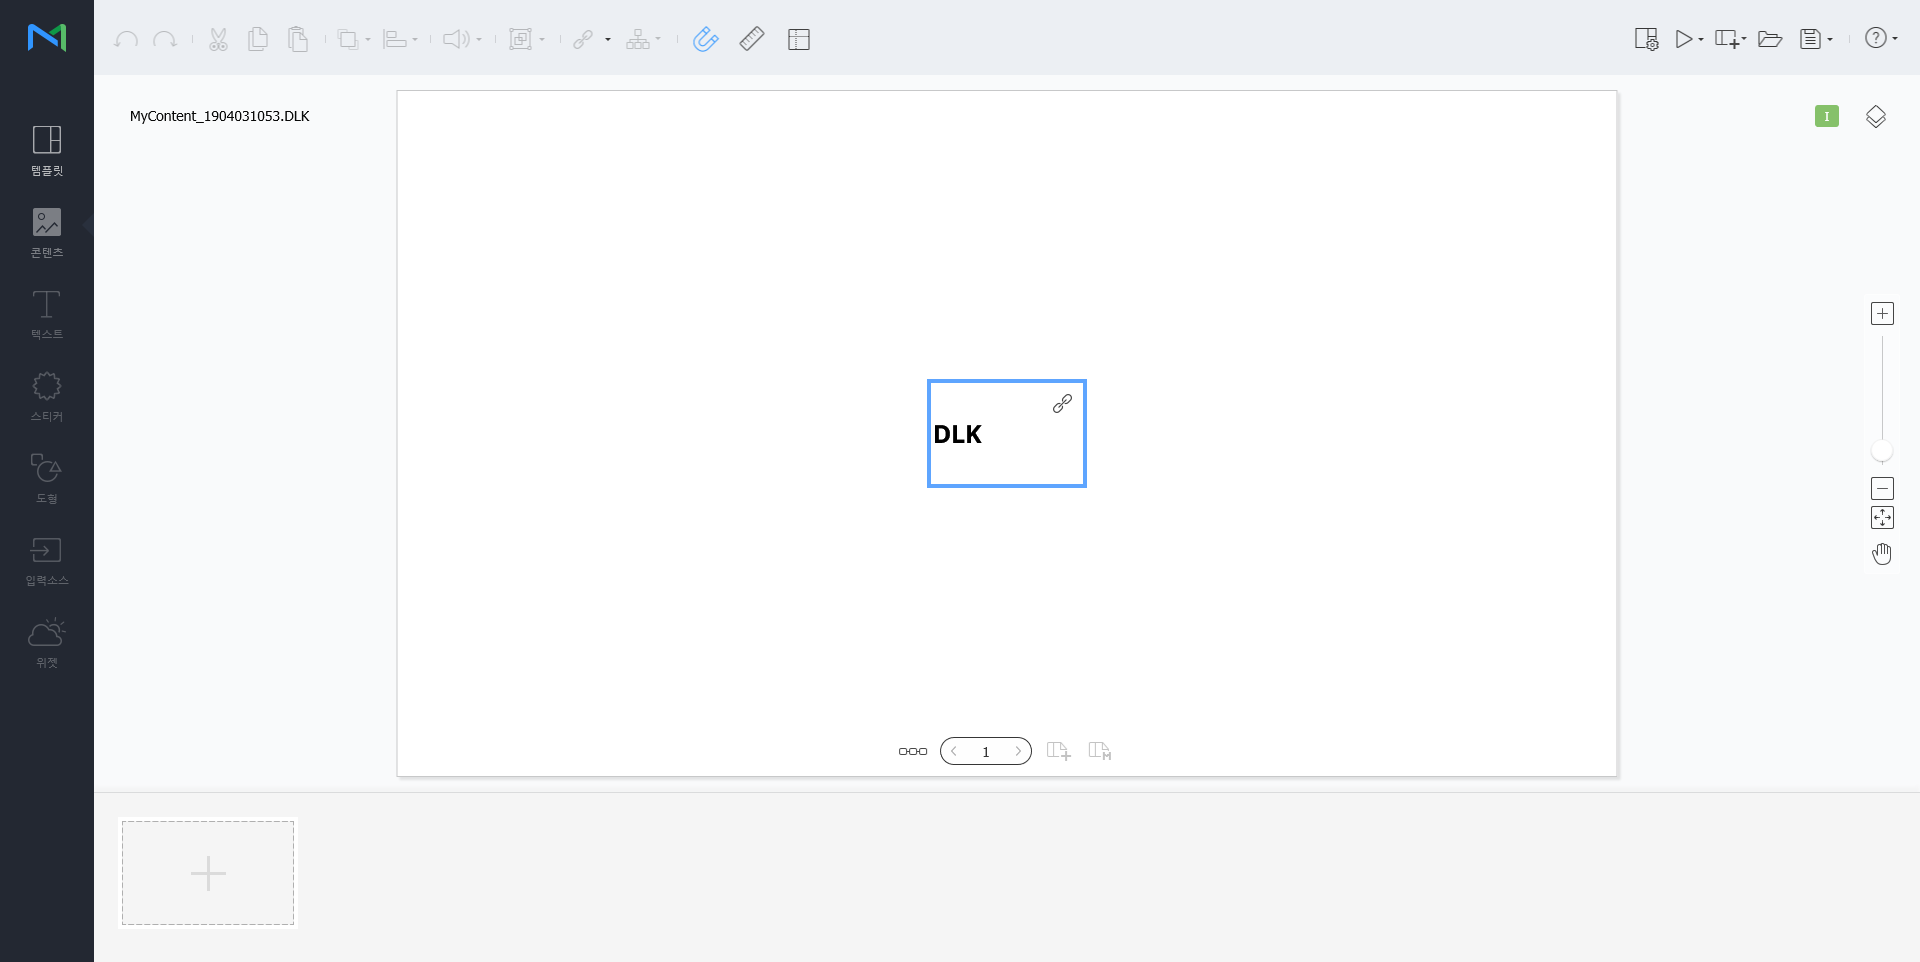
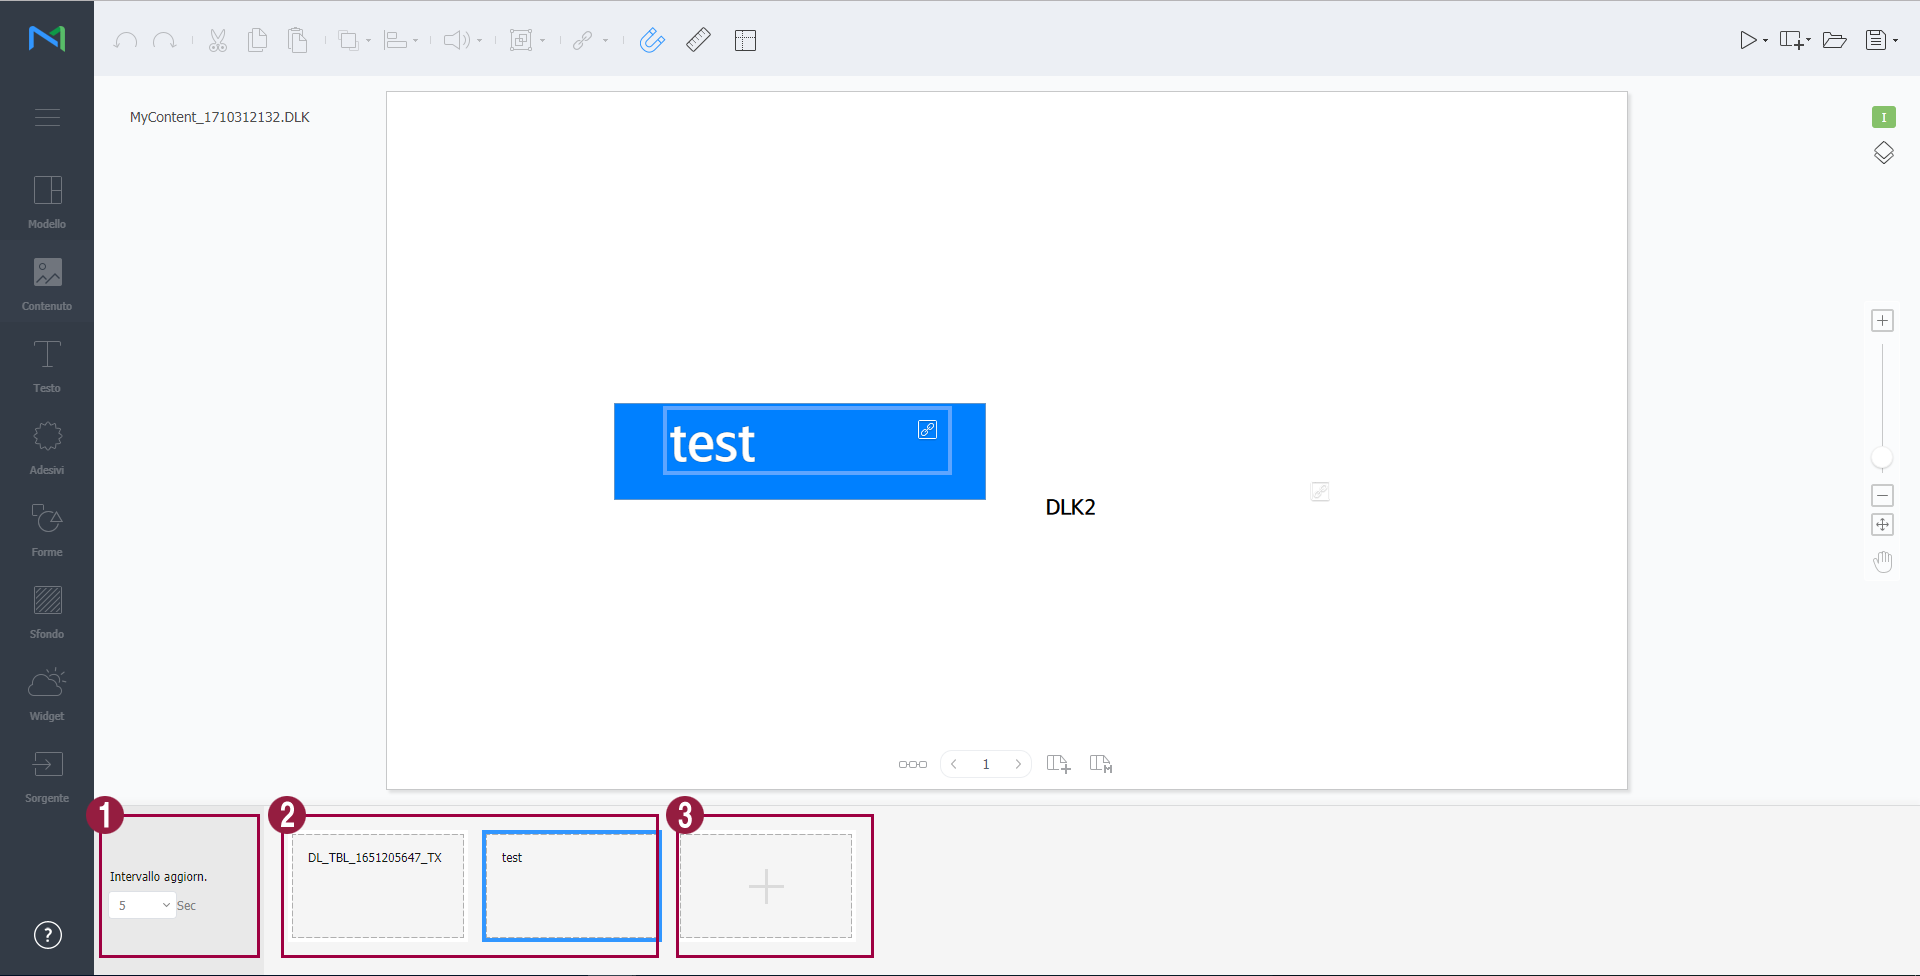
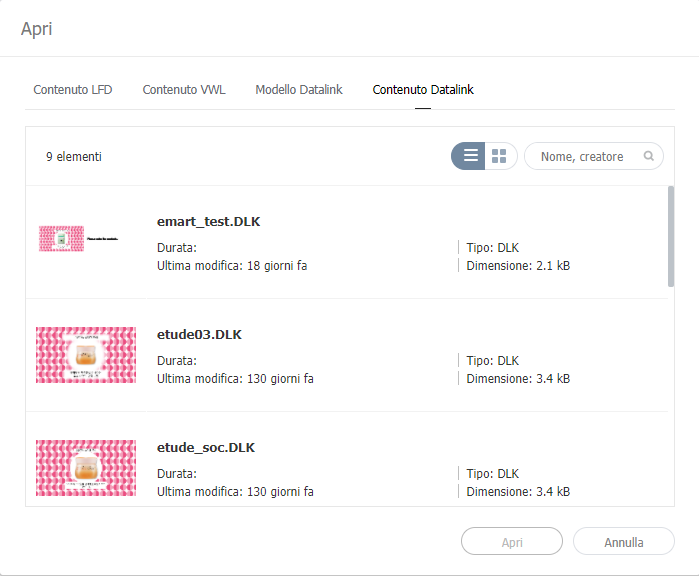
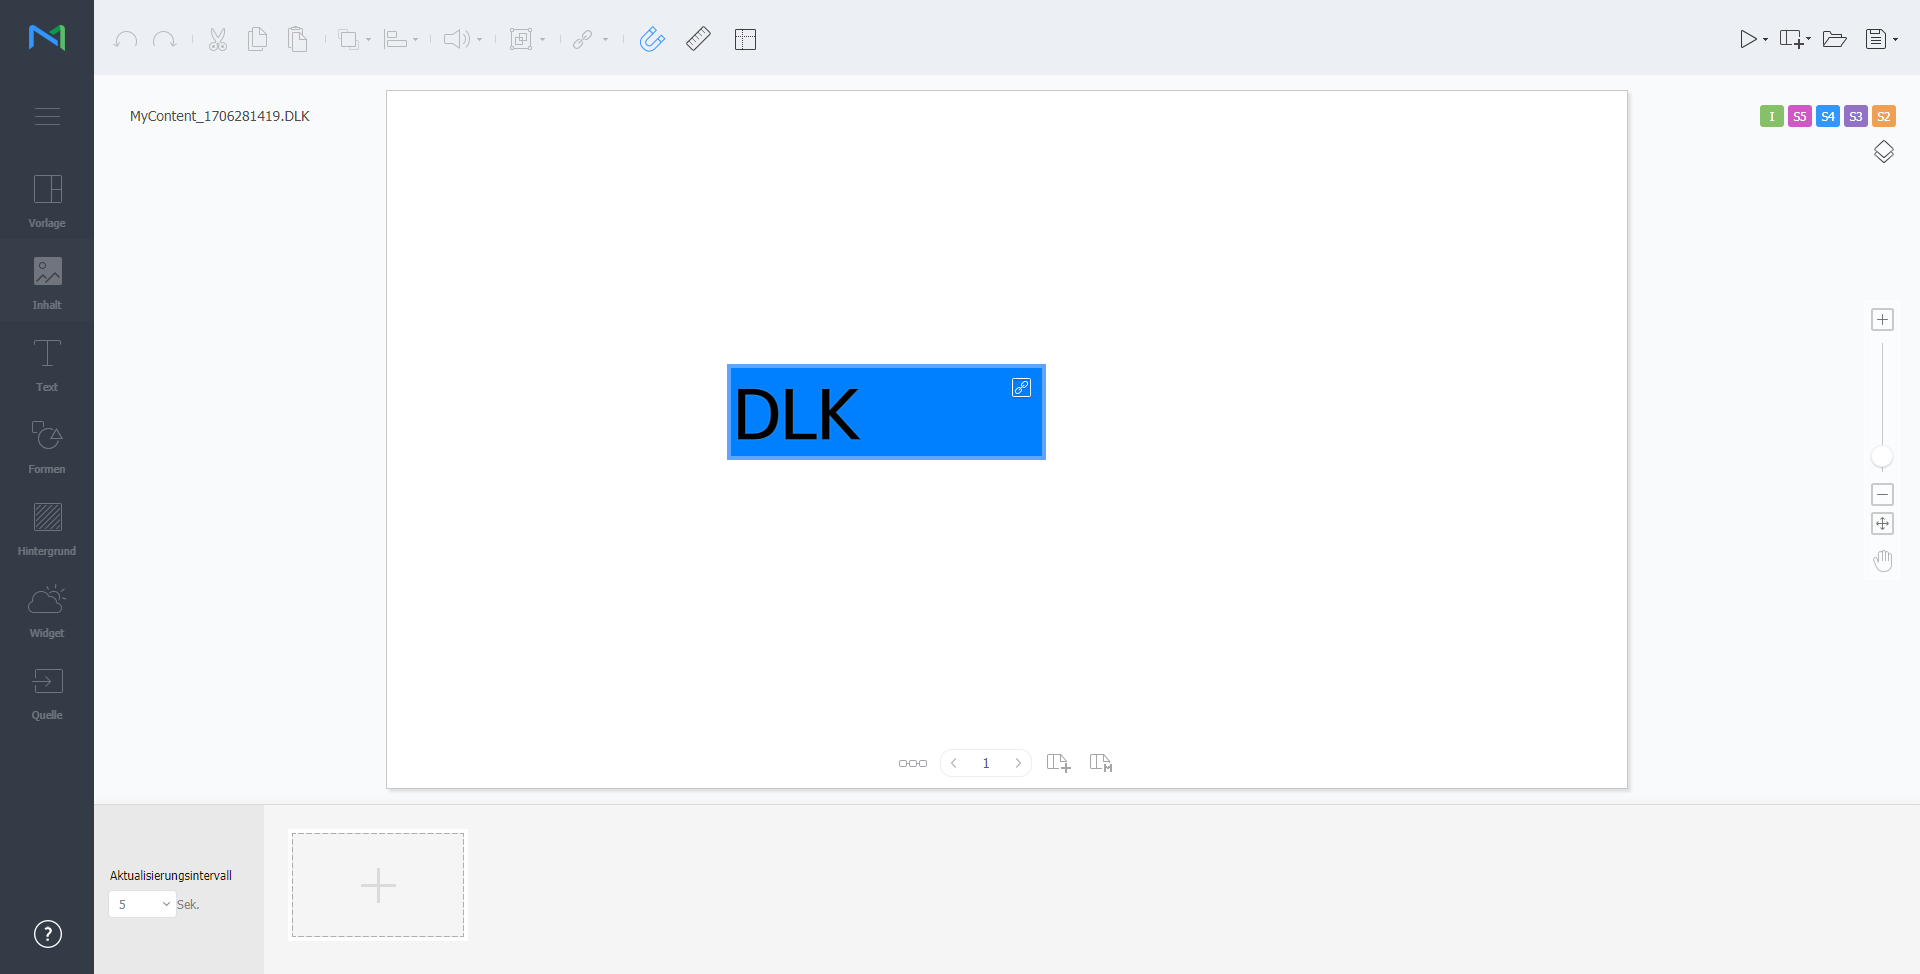
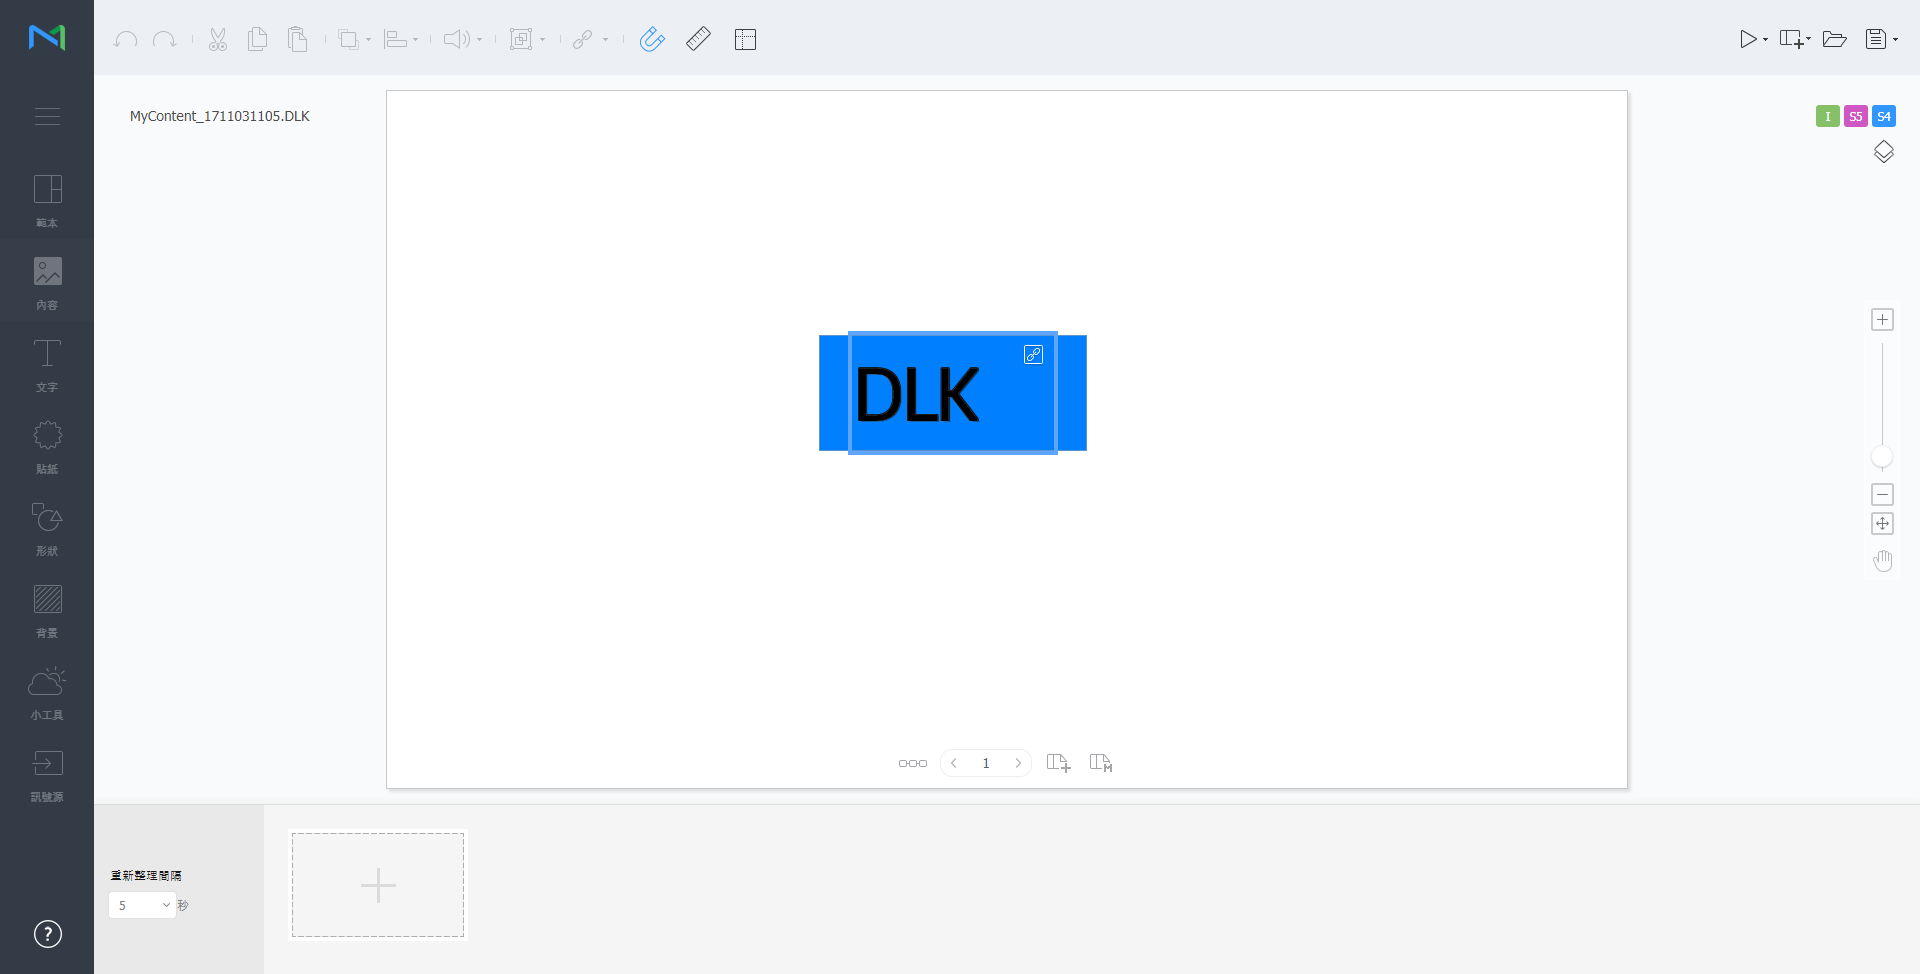
DLK 콘텐츠 수정하기저장한 DLK 콘텐츠를 불러온 후 수정할 수 있습니다.
이벤트 트리거 설정하기
각 페이지에 설정된 이벤트를 확인하고 전체 이벤트 흐름을 한눈에 파악할 수 있습니다.
|


| Sv translation | ||||||||||||||||||||||||||||||||||||||||||||||||||||||||||||||||||||||||||||||||||||||||||||||||||||||||||||||||||||||||||||||||||||||||||||||||||||||||||||||||||||||||||||
|---|---|---|---|---|---|---|---|---|---|---|---|---|---|---|---|---|---|---|---|---|---|---|---|---|---|---|---|---|---|---|---|---|---|---|---|---|---|---|---|---|---|---|---|---|---|---|---|---|---|---|---|---|---|---|---|---|---|---|---|---|---|---|---|---|---|---|---|---|---|---|---|---|---|---|---|---|---|---|---|---|---|---|---|---|---|---|---|---|---|---|---|---|---|---|---|---|---|---|---|---|---|---|---|---|---|---|---|---|---|---|---|---|---|---|---|---|---|---|---|---|---|---|---|---|---|---|---|---|---|---|---|---|---|---|---|---|---|---|---|---|---|---|---|---|---|---|---|---|---|---|---|---|---|---|---|---|---|---|---|---|---|---|---|---|---|---|---|---|---|---|---|---|
| ||||||||||||||||||||||||||||||||||||||||||||||||||||||||||||||||||||||||||||||||||||||||||||||||||||||||||||||||||||||||||||||||||||||||||||||||||||||||||||||||||||||||||||
Use the DataLink feature to create dynamic content containing elements that change in real time. Map general media files added to Premium Server or external data collected on the DataLink server to this dynamic content.
Use Web Author to create a DataLink template.
Editing DataLink templatesImport and edit a saved DataLink template.
Creating DLK content filesUse a DataLink template to create DLK content to distribute to Player. DLK content can be created either by adding a media file or text or by importing saved DataLink Server settings. Importing DataLink templatesImport a DataLink template in order to create DLK content.
Creating DLK content by manually entering data
Creating a DLK file in conjunction with DataLink ServerCreate a DLK content file by mapping data, saved in DataLink Server, to a DLK template.
Managing DataLink
Editing DLK contentImport and edit saved DLK content.
Configuring event triggers
This allows you to view set events per page and general flow for all events.
|


| Sv translation | |||||||||||||||||||||||||||||||||||||||||||||||||||||||||||||||||||||||||||||||||||||||||||||||||||||||||||||||||||||||||||||||
|---|---|---|---|---|---|---|---|---|---|---|---|---|---|---|---|---|---|---|---|---|---|---|---|---|---|---|---|---|---|---|---|---|---|---|---|---|---|---|---|---|---|---|---|---|---|---|---|---|---|---|---|---|---|---|---|---|---|---|---|---|---|---|---|---|---|---|---|---|---|---|---|---|---|---|---|---|---|---|---|---|---|---|---|---|---|---|---|---|---|---|---|---|---|---|---|---|---|---|---|---|---|---|---|---|---|---|---|---|---|---|---|---|---|---|---|---|---|---|---|---|---|---|---|---|---|---|---|
| |||||||||||||||||||||||||||||||||||||||||||||||||||||||||||||||||||||||||||||||||||||||||||||||||||||||||||||||||||||||||||||||
La funzionalità DataLink può essere utilizzata per creare contenuti dinamici contenenti elementi che cambiano in tempo reale. Mappare i file multimediali generali aggiunti a Premium Server o i dati raccolti esternamente nel server DataLink a questi contenuti dinamici.
Utilizzare Web Author per creare un modello DataLink.
Modifica di modelli DataLinkImportare e modificare un modello DataLink salvato.
Creazione di un file di contenuto DLKCreare un contenuto DLK da distribuire a Player utilizzando un modello DataLink. È possibile creare contenuto DLK aggiungendo un file multimediale o importando le impostazioni salvate di DataLink Server. Importazione di modelli DataLinkImportare un modello DataLink per create un contenuto DLK.
Creazione di contenuto DLK immettendo i dati manualmente
Creazione di un file DLK in congiunzione con DataLink ServerCrea un file di contenuto DLK mappando i dati, salvati su DataLink Server, a un modello DLK.
Gestione di DataLink
Modifica di contenuti DLKImportare e modificare contenuto salvato di DLK.
|

| Sv translation | ||||||||||||||||||||||||||||||||||||||||||||||||||||||||||||||||||||||||||||||||||||||||||||||||||||||||||||||||||||||||||||||||||||||||||||||||||||||||||||||||||||||||||||
|---|---|---|---|---|---|---|---|---|---|---|---|---|---|---|---|---|---|---|---|---|---|---|---|---|---|---|---|---|---|---|---|---|---|---|---|---|---|---|---|---|---|---|---|---|---|---|---|---|---|---|---|---|---|---|---|---|---|---|---|---|---|---|---|---|---|---|---|---|---|---|---|---|---|---|---|---|---|---|---|---|---|---|---|---|---|---|---|---|---|---|---|---|---|---|---|---|---|---|---|---|---|---|---|---|---|---|---|---|---|---|---|---|---|---|---|---|---|---|---|---|---|---|---|---|---|---|---|---|---|---|---|---|---|---|---|---|---|---|---|---|---|---|---|---|---|---|---|---|---|---|---|---|---|---|---|---|---|---|---|---|---|---|---|---|---|---|---|---|---|---|---|---|
| ||||||||||||||||||||||||||||||||||||||||||||||||||||||||||||||||||||||||||||||||||||||||||||||||||||||||||||||||||||||||||||||||||||||||||||||||||||||||||||||||||||||||||||
Erstellen Sie mit der Funktion DataLink dynamische Inhalte, die sich in Echtzeit verändernde Elemente enthalten. Ordnen Sie dem Premium Server hinzugefügte allgemeine Mediendateien oder auf dem DataLink-Server eingeholte externe Daten diesen dynamischen Inhalten zu.
Erstellen Sie mit dem Web Author eine DataLink-Vorlage.
Bearbeiten von DataLink-VorlagenImportieren und bearbeiten Sie eine gespeicherte DataLink-Vorlage.
Erstellen einer DLK-InhaltsdateiErstellen Sie mit einer DataLink-Vorlage einen DLK-Inhalt zum Verteilen an den Player. DLK-Inhalte können entweder durch Hinzufügen von Medien- oder Textdateien oder durch Importieren gespeicherter DataLink-Server-Einstellungen erstellt werden. Importieren von DataLink-VorlagenImportieren Sie eine DataLink-Vorlage, um DLK-Inhalte zu erstellen.
Erstellen von DLK-Inhalten durch manuelle Eingabe von Daten
Erstellen einer DLK-Datei in Verbindung mit Datalink-ServerErstellen Sie eine DLK-Inhaltsdatei durch Abbilden von Daten, die im DataLink Server gespeichert sind, auf eine DLK-Vorlage.
Verwalten von DataLink
Bearbeiten von DLK-InhaltenImportieren und bearbeiten Sie gespeicherte DLK-Inhalte.
Konfigurieren von Ereignisauslösern
Hiermit können Sie eingestellte Ereignisse pro Seite und den allgemeinen Ablauf für alle Ereignisse anzeigen.
|


| Sv translation | |||||||||||||||||||||||||||||||||||||||||||||||||||||||||||||||||||||||||||||||||||||||||||||||||||||||||||||||||||||||||||||||
|---|---|---|---|---|---|---|---|---|---|---|---|---|---|---|---|---|---|---|---|---|---|---|---|---|---|---|---|---|---|---|---|---|---|---|---|---|---|---|---|---|---|---|---|---|---|---|---|---|---|---|---|---|---|---|---|---|---|---|---|---|---|---|---|---|---|---|---|---|---|---|---|---|---|---|---|---|---|---|---|---|---|---|---|---|---|---|---|---|---|---|---|---|---|---|---|---|---|---|---|---|---|---|---|---|---|---|---|---|---|---|---|---|---|---|---|---|---|---|---|---|---|---|---|---|---|---|---|
| |||||||||||||||||||||||||||||||||||||||||||||||||||||||||||||||||||||||||||||||||||||||||||||||||||||||||||||||||||||||||||||||
使用 DataLink 功能來建立包含即時變更元件的動態內容。將新增至 Premium Server 的一般媒體檔案或 DataLink 伺服器上收集的外部資料對應至此動態內容。
使用 Web Author 來建立 DataLink 範本。
編輯 DataLink 範本匯入並編輯已儲存的 DataLink 範本。
建立 DLK 內容檔案使用 DataLink 範本,建立 DLK 內容以分配至 Player。可透過新增媒體檔案或文字,或匯入已儲存的 DataLink Server 設定來建立DLK 內容。 匯入 DataLink 範本匯入 DataLink 範本以建立 DLK 內容。
手動輸入資料以建立 DLK 內容
建立與 DataLink Server 連接的 DLK 檔案將儲存在 DataLink Server 中的資料對應至 DLK 範本,以建立 DLK 內容檔案。
管理 DataLink
編輯 DLK 內容匯入並編輯已儲存的 DLK 內容。
|


| Sv translation | |||||||||||||||||||||||||||||||||||||||||||||||||||||||||||||||||||||||||||||||||||||||||||||||||||||||||||||||||||||||||||||||
|---|---|---|---|---|---|---|---|---|---|---|---|---|---|---|---|---|---|---|---|---|---|---|---|---|---|---|---|---|---|---|---|---|---|---|---|---|---|---|---|---|---|---|---|---|---|---|---|---|---|---|---|---|---|---|---|---|---|---|---|---|---|---|---|---|---|---|---|---|---|---|---|---|---|---|---|---|---|---|---|---|---|---|---|---|---|---|---|---|---|---|---|---|---|---|---|---|---|---|---|---|---|---|---|---|---|---|---|---|---|---|---|---|---|---|---|---|---|---|---|---|---|---|---|---|---|---|---|
| |||||||||||||||||||||||||||||||||||||||||||||||||||||||||||||||||||||||||||||||||||||||||||||||||||||||||||||||||||||||||||||||
Utilice la función DataLink para crear contenido dinámico que incluya elementos que van cambiando en tiempo real. Asigne archivos multimedia generales añadidos a Premium Server o datos externos recogidos en el servidor DataLink a este contenido dinámico.
Utilice Web Author para crear una plantilla DataLink.
Edición de plantillas DataLinkImporte y edite una plantilla DataLink guardada.
Creación de un archivo de contenido DLKUtilice una plantilla DataLink para crear contenido DLK que se distribuirá a Player. Puede crear contenido DLK añadiendo un archivo multimedia o un texto o bien importando ajustes de DataLink Server guardados. Importación de plantillas DataLinkImporte una plantilla DataLink para crear contenido DLK.
Creación de contenido DLK introduciendo datos manualmente
Crear un archivo DLK en combinación con DataLink ServerPuede crear un archivo de contenido DLK asignando datos guardados en DataLink Server a una plantilla DLK.
Administración de DataLink
Edición de contenido DLKImporte y edite contenido DLK guardado.
|

| Sv translation | ||||||||||||||||||||||||||
|---|---|---|---|---|---|---|---|---|---|---|---|---|---|---|---|---|---|---|---|---|---|---|---|---|---|---|
| ||||||||||||||||||||||||||
Użyj funkcji DataLink, do tworzenia dynamicznych treści wykorzystujących elementy zmieniające się w czasie rzeczywistym. Zmapuj do treści dynamicznych ogólne pliki multimedialne dodane do MagicInfo Server lub dane zewnętrzne zebrane na serwerze DataLink. Uwaga:
Tworzenie szablonów DataLink.Do tworzenia szablonów DataLink służy Web Author.
Edytowanie szablonów DataLink.Import i edycja zapisanego szablonu DataLink.
Tworzenie plików DLK z treściamiSzablon DataLink służy do tworzenia treści DLK do rozesłania w MagicInfo Player. Treści DLK można tworzyć dodając plik mediów lub tekst, albo importując zapisane ustawienia DataLink Server. Importowanie szablonów DataLink.Importowanie szablonu DataLink w celu utworzenia treści DLK. Uwaga:
Tworzenie treści DLK przez ręczne wpisanie danych
Tworzenie pliku DLK razem z DataLink ServerTworzenie pliku z treściami DLK przez zmapowanie danych zapisanych w DataLink Server na szablon DLK. Tworzenie pliku DLK razem z DataLink Server Aby utworzyć plik z treściami DLK razem z DataLink Server sprawdź, czy nawiązane jest połączenie MagicInfo Server z DataLink Server. Szczegółowe informacje na ten temat podane są w części ► Zarządzanie zewnętrznymi serwerami Elementy będące slajdami Nie ma możliwości zmapowania danych DataLink Server na elementy będące slajdami.
Zarządzanie DataLink
Edycja treści DLKImport i edycja zapisanych treści DLK.
|


